Table of Contents
Advertisement
Quick Links
Advertisement
Table of Contents

Summary of Contents for ZANTIA SLIM-C Series
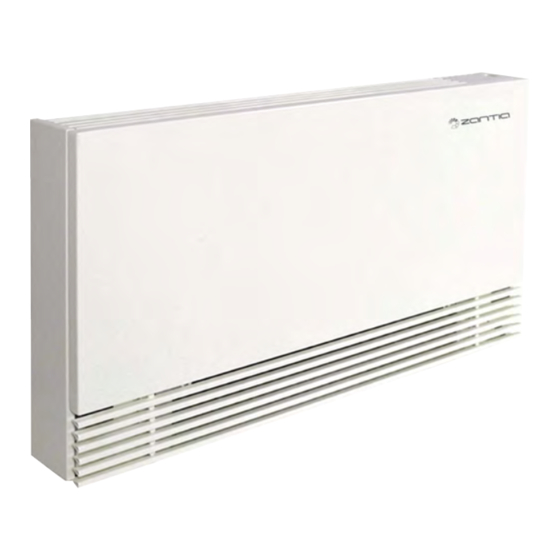
- Page 1 INSTRUCTION MANUAL INSTALLATION, USER AND MAINTENANCE SUPER SLIM FAN COIL UNIT SLIM - C SERIES HEATING and COOLING Thank you for purchasing our product. Read this manual carefully before installing or operating your newequipment. Make sure to save this manual for future reference.
-
Page 3: Table Of Contents
Catalogue 1. Introduction General Information Precautions Features Operation Temperature Range 2. Installation Transportation and handling Handling instructions Dimensions Parts description Unit Installation Precautions Accessories Installation 2.8.1 Before installation 2.8.2 Take off the air outlet grill 2.8.3 Wall mounted installation 2.8.4 Installation of feet (for the models with feet included only) 2.8.5 Water pipe connection 2.8.6 Filter 2.8.7 Insulation... -
Page 4: Introduction
1. Introduction 1.1 General Information Thank you for choosing our product. Please read this manual carefully before use and follow the instructions to operate the unit in order to prevent damages on the device or injuries to staff. Specifications are subject to change with product improvements without prior notice. Please refer to the specification sticker on the unit for upgraded specifications. - Page 5 1. Introduction INS TAL LATI ON A ND INS TAL LATI ON A ND US ER'S MA NUAL US ER'S MA NUAL Keep the unit away from the combustible Be sure to read this manual before use. or corrosive environment. Make sure no water or other liquid drips Do not insert any foreign objects into the into the electric box of the unit Otherwise...
- Page 6 1. Introduction It is mandatory to use a suitable circuit Make sure the pow er supply to the breaker for the unit and make sur e unit is off before any services are done the power supply to the unit corresponds on the unit.
-
Page 7: Features
1. Introduction 1. Features ■ Unique structure for super slim and super quiet. ■ With high efficiency fan motor. ■ Balanced fan system for super low noise. ■ Heat exchanger with hydrophilic coated aluminum coil and inner grooved copper tube, effectively increasing the heat transfer area of this unit. -
Page 8: Installation
2. Installation 2.1 Transportation and handling ! Do not open or tamper with the packaging before installation. The units should only be moved and lifted by specialised personnel trained in these operations. Check on arrival that the unit has not been damaged during transport and that it is complete with all its parts. -
Page 9: Dimensions
2. Installation 2.3 Dimensions he fan coil unit w ithout motorized water valve Model no. A(m m) Connector size Net weight(Kg) G1/2" SLIM-C20 SLIM-C30 G1/2" SLIM-C50 1094 G1/2" SLIM-C60 1294 G1/2"... - Page 10 2. Installation The fan coil with two-way valve G1/2" G1/2" Model no. A(m m) Connector size Net weight(Kg) G1/2" SLIM-C20 SLIM-C35 G1/2" SLIM-C50 1094 G1/2" SLIM-C60 1294 G1/2"...
- Page 11 2. Installation The fan coil with three-way valve Net weight ( ) Model ( ) Connector G1/2" SLIM-C20 G1/2" SLIM-C35 1094 G1/2" SLIM-C50 1294 SLIM-C60 G1/2"...
-
Page 12: Parts Description
2. Installation 2.4 Parts description Left-side panel Air outlet grill Front panel Operation panel Right-side panel Air inlet grill 2.5 Unit Installation Unit can be installed on the floor (only for the model with feet included) to obtain optimum efficiency and performance, In order to prevent any failures or hazardous situation, the installation location must meet the following requirements:... -
Page 13: Precautions
2. Installation 2.6 Precautions: Installation of the unit must be performed by professional and qualified installers. Power supply to the unit must be off before installation or maintenance work starts. Necessary tool for installation φ6~ φ8 drill bit Measuring reel Screw Driver Drilling tool Wrench... -
Page 14: Installation
2. Installation (2) Take out the accessory bag from the place as shown Accessories included in accessory bag for the models with feet included: in below pictures (for all models): Quantity Name Remark Positioning board Accessory bag Drain pipe Accessory bag User manual Ribbon... -
Page 15: Take Off The Air Outlet Grill
2. Installation 2.8.2 Take off the air outlet grill Take off one screw on each side of the air outlet grill, and take out the air outlet grill. Take out the air outlet grill 2.8.3 Wall mounted installation Take out the positioning board from accessory. Please put the positioning board up against the wall. - Page 16 2. Installation 1. After a suitable place for installation is selected, the unit must be fastened to the wall in place by two expansion bolts in each side. To fasten the unit to a wooden wall, use suitable bolts. 2. Mark on the wall where the mounting holes will be drilled. Drill the wall with a power drill.
-
Page 17: Installation Of Feet (For The Models With Feet Included Only)
2. Installation 2.8.4 Installation of feet (for the models with feet included only) Fix the feet onto the unit by fastening the screws on two sides of feet.After a suitable place is selected, put the unit against the wall, fasten expansion bolts on left and right side of back panel to fix the unit on the wall. -
Page 18: Water Pipe Connection
2. Installation 2.8.5 Water pipe connection Note: the water pipe mustn't stick out beyond the range of side panel, otherwise the side panel can't be installed back. After the unit is installed in place, connect water inlet and outlet pipes according to the stickers on the unit. - Page 19 2. Installation Installation steps: For the models with 4 connectors 3-way valve: 1.Take off the sealing cover of water inlet/otulet pipe . Take off the sealing cover Take off the sealing cover Connect the unit to water system, Stainless steel corrugated pipe are recommended for the inlet/outlet water pipe.
- Page 20 2. Installation Installation steps: For the models with 2-way valve: 1.Take off the sealing cover of water inlet/otulet pipe . Take off the sealing cover Take off the sealing cover Connect the unit to water system, Stainless steel corrugated pipe are recommended for the inlet/outlet water pipe.
-
Page 21: Filter
2. Installation Connect the smaller end of drainpipe to the outfall of auxiliary drain pan, then fasten the jointing by a tie. S m all Press 2.8.6 Filter It's suggested that a 80 mesh filter installed before the water inlet of the unit, for keeping the water quality and collecting impurity contained in the water. -
Page 22: Insulation
2. Installation 2.8.7 Insulation All the water piping must be insulated with insulation no less than 9mm thick. But all the valve switches need to stay outside for future use. The insulation must be fastened by tape, without any gap. 2.8.8 Setting up the condensate drainage system Connect to the unit condensate discharge or defrosting tray... -
Page 23: Pre Start-Up
2. Installation 2.9.2 Pre Start-up Before starting up the unit, a certain number of verifications must be perfor med on the installation to ensure that the unit will operate under the best possible conditions. The check list below is not exhaustive and should only be used as a minimum reference basis: ①.Make sure fan rotates freely. -
Page 24: Operation Instructions
3. Operation Instructions Operation panel Light, Time, Timer ON/OFF /SE T parameter setting Mode Fan speed, Sleep, Confirm increase time, parameter, Decrease time, parameter, temperature, and unlock temperature Meaning Symbol Symbol Meaning Heating mode Timer Electrical heater Cooling mode Sleeping mode Auto mode Key lock Dry mode... -
Page 25: Operation Instructions
3. Operation Instructions 3.2 Operation Instructions (1) ON/OFF ◎ When the unit is standby, press for 3 seconds to turn on the unit. When the unit is working, press again for 3 seconds to make the unit standby. The unit will recover its latest working settings automatically ON with Heating mode after power failure. - Page 26 3. Operation Instructions (6) Temperature Setting ◎ When the unit is turned on, press to temperature setting status, press again to set the temperature. Temperature Setting (7)Fan Speed Selection ◎ Select the fan speed by pressing button. The fan speed will be changed in sequence by , low , medium and high...
- Page 27 3. Operation Instructions ☞ Timer Unsetting Pressing button and set the timer to zero to cancel the timer. (9)Self-checking Press two times within 3 seconds after power the unit, unit will enter into self-checking mode. It will power water valve 1 (EV1) and valve 2(EV2) in sequence. Unit will quit self-checking function automatically in 10 seconds.
- Page 28 3. Operation Instructions (11) Parameters Range Default Setting Serial Number Meaning High fan speed of cooling 12-15 Medium fan speed of cooling 10-13 Low fan speed of cooling 8-12 10-15 High fan speed of heating Medium fan speed of heating 8-12 5-10 Low fan speed of heating...
-
Page 29: Maintenance
4. Maintenance 4.1 Precautions ● It is forbidden to change the inner structure and wiring of the unit. Otherwise injury of person or unit damage might happen. ● If the unit fails to work properly, please cut off the power supply immediately. The maintenance work must be performed by qualified personnel ●... -
Page 30: Check And Clean The Air Inside Water System Occasionally
4. Maintenance Pull out the filter Filter Plastic gap 4.3 Check and clean the air inside water system occasionally It is suggested to check and clean the air inside water system occasionally, to ensure the performance of the unit. Please do air purging work as per 2.9.1 4.4 Drainage Please drain out the water in the system, if the unit is not run... -
Page 31: Service To Fan Blade And Fan Motor
4. Maintenance 4.6 Service to fan blade and fan motor When fan system is not working properly, please open right side panel. 1.Take off the right side panel, open the electric box, pull out the connector of the motor. 2.Use a Allen key to unlock the fan blade with fan motor. 3.Take off the screw for fan motor fixture . -
Page 32: Circuit Board Changing
4. Maintenance 4.7 Circuit board changing 【 】 Take off the circuit board 1. Cut off the power supply of the fan coil unit, take off the right side panel of the unit. 2. Take off the screws at the top and bottom side of the electric box with a screw driver, open the cover of the electric box. - Page 33 4. Maintenance 【 】 Install a new circuit board 1. Put on a new circuit board and fix the circuit board with the four plastic screws. Plastic screws 2. Plug the motor connector, power supply connector, electrical three-way valve connector, wired controller connector, air inlet temperature sensor connector and water inlet temperature sensor connector on the circuit board.
-
Page 34: Appendix
5. Appendix 5.1 Exploded view... - Page 35 5. Appendix Name Name Connection bar Air deflector 1 Air outlet grill Air deflector 2 ABS plate Coil fixture-right Air deflector sponge Rubber plug Decorative panel Drain pan Insulation Right-inner plate Air deflector 4 Insulation Valve controller Coil Water valve Air guide plate 4 support plate Right-support plate 2 Insulation...
-
Page 36: Wiring Diagram
5. Appendix 5.2 Wiring diagram... -
Page 37: Technical Data
5. Appendix 5.3 Technical Data SLIM C-50 SLIM C-60 SLIM C-20 SLIM C-35 Note: (a) Cooling: Water inlet/outlet 7/12℃ ; Room temperature DB/WB 27/19℃ . (b) Heating: Water inlet50℃ , water flow rate as in cooling operation; Room temperature 20℃ . (c) Heating: Water inlet 70℃... - Page 38 NOTES...
- Page 40 w w w . Z A N T I A . c o m...
Need help?
Do you have a question about the SLIM-C Series and is the answer not in the manual?
Questions and answers