Advertisement
Installation, Operation & Maintenance Manual
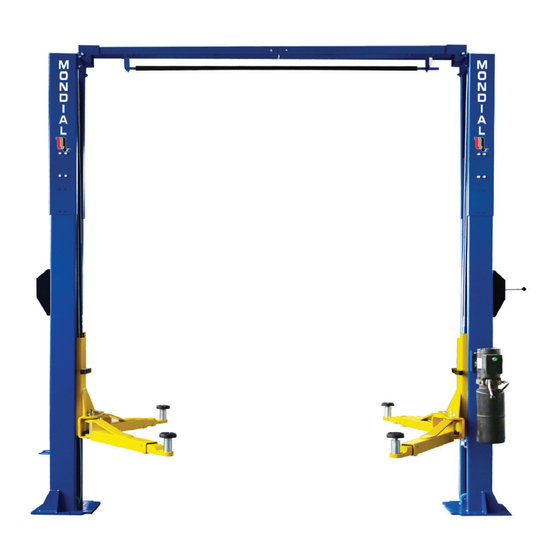
SUPER SYMMETRIC TWO POST LIFT
The specifications stated on this brochure are not binding.
We reserve the right to change the specification without notice
MONDIAL
AUTOMOTIVE EQUIPMENT
GP-9
IMPORTANT:
Read this manual completely before
installing or operating lift
Showroom - Distribution Centre
8275, 17e Avenue, Montréal, Qc., Canada H1Z 4J9
1-800-361-4095 • 514-328-2300 • Fax 514-328-4684
Advertisement

Summary of Contents for Mondial Designs Limited GP-9
- Page 1 SUPER SYMMETRIC TWO POST LIFT The specifications stated on this brochure are not binding. We reserve the right to change the specification without notice MONDIAL AUTOMOTIVE EQUIPMENT GP-9 IMPORTANT: Read this manual completely before installing or operating lift Showroom - Distribution Centre 8275, 17e Avenue, Montréal, Qc., Canada H1Z 4J9...
- Page 2 Read this entire manual before operation begins. Record below the following information which is located on the serial number data plate. Serial No. Model No. Date of Installation...
-
Page 3: Table Of Contents
Contents Specifications ... . . 4 Installation Requirement ..6 Drawing,part list and Installation Steps . 8 Test Run ....29 Operation Instructions. -
Page 4: Specifications
Specifications Clear-Floor Chain-Drived Model Features Model GP-9 • Compact design, minimizes the lift wear parts and breakdown ratio • Dual hydraulic cylinders, designed and made on ANSI standards. • Self-lubricating UHMW Polyethylene sliders and bronze bush • Single-point safety release with dual safety design •... - Page 5 Motor Capacity Time Height Height Width Columns Height Weight Clear 3880mm Floor 4.0T 1800-1980mm 152 4/5" 3437mm 2900mm 110mm 600Kg 2.0/3.0 GP-9 Chain 3607mm drived 9000lbs 70 4/5”–78” 142” 135 1/5" 114 1/5" 4 2/5” 1,322 lbs Fig. 2 Specifications...
-
Page 6: Installation Requirement
Installation Requirement Tools Required Rotary Hammer Drill (3/4inch bit) Carpenter’s Chalk Hammer Screw Drivers 4 Foot Level Tape Measure (25ft) Crescent Wrench (12”) Pliers Ratchet & Socket (28mm) Allen Head Wrench (3mm, 5mm, 8mm,10mm) Wrench set (mm) Vise Grips (8#, 10#, 13#, 14#, 17#, 19#, 24#) Fig. - Page 7 Concrete Specifications Concrete specifications must be followed accordingly. Failure to do so may result in lift and/or vehicle falling. 1. Concrete must have 4 inches minimum and must be totally cured before lift installation. 2. Concrete must be in good condition and must have a test strength 3,000psi minimum.
-
Page 8: Drawing,Part List And Installation Steps
Drawing,part list and Installation Steps A. Location of Installation Check and insure the installation location (concrete, layout, space size, etc.) is suitable for lift installation. B. Use A Carpenter’s Chalk Line To Establish Installation Layout Of Base Plate,Anchor bolt is 3/4”... - Page 9 2. Move aside the lift with fork lift or hoist, and open the outer packing carefully Extension Column Over Head (Outer Column) Assembly Model Nos Name plate Parts box Lifting arm Serial Nos Fig. 7 3. Loosen the screws on the upper package stand, take off the upper outer column, take out the parts in the inner column and remove the package stand Move aside the parts and check the parts according to the shipment parts list Fig.
- Page 10 D. Drawing,part list and installation steps Fig. 9 Order original parts when required from GRAND PRIX IMPORT at 1-800-361-4095 Drawing,part list and installation Steps...
- Page 11 E. Position Columns Lay down two columns on the installation site parallel. Position the power side column according to the actual installation site. Usually, it is suggested to install power side column on the front-right side from which vehicles are driven to the lift.
- Page 12 B /212200 Secondary column Assy. Fig. 11 Order original parts when required from GRAND PRIX IMPORT at 1-800-361-4095 C/212300 Carriage Assy. Fig. 12 Drawing,part list and installation Steps...
- Page 13 F. Position Columns / Level Columns 1. Position the columns on the installation layout on the base plate chalk line. NOTE: Before drilling and anchoring, assemble and install the over head beam first. Width between Columns: 114-1/5” Overall width:135-1/5” Fig. 13 2.
- Page 14 G. Install Overhead Beam / Drill Anchor Holes 1. Assemble the over head beam on the ground. With another person and two ladders, walk the overhead beam up and hang it in the hooks. Install hardware and tighten bolts. NOTE: Before drilling and anchoring, assemble and...
- Page 15 2. Prepare the Anchor Bolts Washer Lock Fig. 15 washer 3. Use a rotary hammer drill, drill all the anchor holes and install the anchor bolts. Then tighten the anchor bolts. If the top of the anchor exceeds 2” above the floor grade, you DO NOT have enough embedment. Tighten the anchor bolts between 60 and 86 foot pounds.
- Page 16 I. Install Safety Device(Safety device is pre-installed before leaving factory) Fig.18 - Power Side Safety Device Fig. 19 - Offside Safety Device Drawing,part list and installation Steps...
- Page 17 J. Lift The Carriages Up About 3 Feet By Hand And Lock Them At The Same Level Fig. 20 Drawing,part list and installation Steps...
- Page 18 K. Install Cables For high column set,in order to extend cable length,please attach the extensions on both cables before fixing on carriage Take free side of both cables across two pulleys on top beam, then attach on the opposite carriage This side of cables are pre- installed on...
- Page 19 I / 212900 Equalizing cable Assy. Fig. 22 Drawing,part list and installation Steps...
- Page 20 L. Install Hydraulic Power Unit And Oil Hose Assembly Use Tefl on tape on all Power side column tapered(NPT) fittings.Do not use Tefl on tape on the hydraulic hose(JIC) threads Fig. 23 Tighten all the hydraulic fittings, and fill the reservoir with approximately 3 gallons of hydraulic oil.
- Page 21 M. Oil Hose & Protective Covers 1. Install Oil Hose. Note: Don’t cross the oil hose and safety Safety Cable Oil Hose Wire Cable for overhead switch Fig. 24 - Power side Safety Device Fig. 25 - Off side Safety Device 2.
- Page 22 Protective cover Outer column Inner column After installing the wire protective cover Fig. 27 The safety cable cannot be inside of the cable clamp on top of overhead beam Wire cable for limit switch Oil hose Fig. 28 Drawing,part list and installation Steps...
- Page 23 N. Install Lifting Arms And Adjust The Arm Locks 1. Install the lifting arms (See Fig. 29). 2. Lower the carriages down to the lowest position. Use the 10mm Allen head wrench to loosen the Allen bolt (See Fig. 30). Use 10mm Allen Head Wrench to...
- Page 24 E / 212500 Three stages arms Assy. Fig. 33 Order original parts when required from GRAND PRIX IMPORT at 1-800-361-4095 F /212600 Two stages arms Assy. Fig. 34 Drawing,part list and installation Steps...
- Page 25 O. Install Electrical System Connect the power source according to the data plate on the Power Unit. Single phase motor Please Note: This motor is powered by Alternating Current and the terminals on the AC contactor are not wire color specific. There are no positive or negative terminals.
- Page 26 Manual Power unit G /212700 Pump Assy.220V/60HZ/1PH Order original parts when required from Fig. 36 GRAND PRIX IMPORT at 1-800-361-4095 Drawing,part list and installation steps...
- Page 27 Manual power unit, 220V/60HZ, Single phase Fig. 37 Drawing, part list and installation steps...
- Page 28 Cylinder H /212800 Hydraulic cylinder Assy. Fig. 38 Order original parts when required from GRAND PRIX IMPORT at 1-800-361-4095 Drawing,part list and installation steps...
-
Page 29: Test Run
Test Run 1. Adjust the equalizing cables Use wrench to hold the cable fitting,meanwhile use a ratchet to tighten the cable nut. Make sure the cables have the same Cable nut tension so the two carriages lift at the same time. A good way to make sure carriage lift in the same height:turn on the machine,lift carriages,you can hear both locks making “click,click”... - Page 30 Throttle Valve Fixing Nut Clockwise to Fig. 39 Counterclockwise decrease the to increase the down speed down speed 5. Test with load After finishing the above adjustment test run the lift with a load. Run the lift in the low position several times. Run the lift to the top completely. NOTE: If the lift vibrates with a load, lubricate all pulley shafts and wear blocks.
-
Page 31: Operation Instructions
Operation Instructions Please read the safety tips carefully before operating the lift To lift vehicle 1. Keep the lift area free of clutter; 2. Position lift arms to the lowest position; 3. Open lift arms; 4. Position vehicle between columns; 5. -
Page 32: Maintenance Schedule
Maintenance Schedule Monthly: 1. Re-torque the anchor bolts to 65-86 Ft Lbs; 2. Check all connectors, bolts and pins to insure proper mounting; 3. Lubricate cable with lubricant; 4. Make a visual inspection of all hydraulic hoses/lines for possible wear or leakage;... -
Page 33: Trouble Shooting
Trouble Shooting TROUBLE CAUSE REMEDY 1. Button does not work 1. Replace button 2. Wiring connections are not in 2.Repair all wiring good condition connections Motor does not run 3. Motor burned out 3. Repair or replace motor 4. Height Limit Switch is damaged 4.Replace the Limit Switch 5. - Page 34 Installation, Operation & Maintenance Manual NOTES _______________________________________________________________________________ _______________________________________________________________________________ _______________________________________________________________________________ _______________________________________________________________________________ _______________________________________________________________________________ _______________________________________________________________________________ _______________________________________________________________________________ _______________________________________________________________________________ _______________________________________________________________________________ _______________________________________________________________________________ _______________________________________________________________________________ _______________________________________________________________________________ _______________________________________________________________________________ _______________________________________________________________________________ _______________________________________________________________________________ _______________________________________________________________________________ _______________________________________________________________________________ _______________________________________________________________________________ _______________________________________________________________________________ _______________________________________________________________________________ _______________________________________________________________________________ _______________________________________________________________________________ _______________________________________________________________________________ _______________________________________________________________________________ _______________________________________________________________________________ _______________________________________________________________________________ _______________________________________________________________________________ _______________________________________________________________________________ _______________________________________________________________________________ _______________________________________________________________________________ _______________________________________________________________________________ _______________________________________________________________________________ _______________________________________________________________________________ _______________________________________________________________________________ _______________________________________________________________________________ _______________________________________________________________________________ _______________________________________________________________________________...
- Page 35 Installation, Operation & Maintenance Manual NOTES _______________________________________________________________________________ _______________________________________________________________________________ _______________________________________________________________________________ _______________________________________________________________________________ _______________________________________________________________________________ _______________________________________________________________________________ _______________________________________________________________________________ _______________________________________________________________________________ _______________________________________________________________________________ _______________________________________________________________________________ _______________________________________________________________________________ _______________________________________________________________________________ _______________________________________________________________________________ _______________________________________________________________________________ _______________________________________________________________________________ _______________________________________________________________________________ _______________________________________________________________________________ _______________________________________________________________________________ _______________________________________________________________________________ _______________________________________________________________________________ _______________________________________________________________________________ _______________________________________________________________________________ _______________________________________________________________________________ _______________________________________________________________________________ _______________________________________________________________________________ _______________________________________________________________________________ _______________________________________________________________________________ _______________________________________________________________________________ _______________________________________________________________________________ _______________________________________________________________________________ _______________________________________________________________________________ _______________________________________________________________________________ _______________________________________________________________________________ _______________________________________________________________________________ _______________________________________________________________________________ _______________________________________________________________________________ _______________________________________________________________________________...
- Page 36 SUPER SYMMETRIC TWO POST LIFT The specifications stated on this brochure are not binding. We reserve the right to change the specification without notice MONDIAL AUTOMOTIVE EQUIPMENT GP-9 IMPORTANT: Read this manual completely before installing or operating lift Showroom - Distribution Centre 8275, 17e Avenue, Montréal, Qc., Canada H1Z 4J9...
Need help?
Do you have a question about the GP-9 and is the answer not in the manual?
Questions and answers