Advertisement
INTRODUCTION
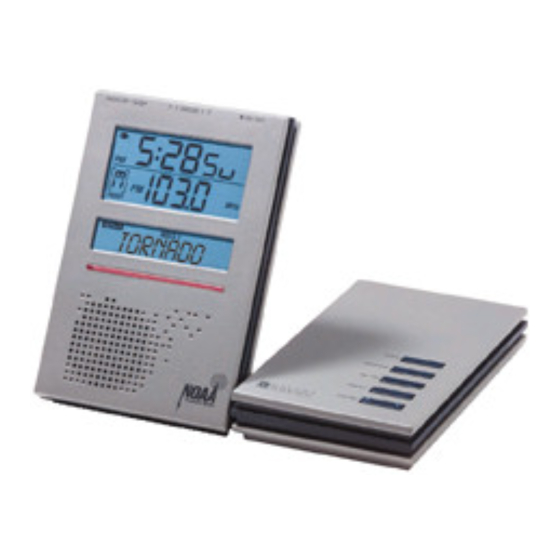
Thank you for purchasing the WR196T NOAA (National Ocenanic Atmospheric Administation) - SAME (Specific Area Message Encoded) Weather Radio. This multifunctional radio warns users of severe weather and environmental dangers.
The WR196T comes with the following NOAA functions and features:
- Digital PLL tuning for seven NOAA channels
- SAME decoding and automatic alert activation
- 9 County code settings for all SAME compatible counties
Other functions and features include:
- Calendar clock with two daily alarms and eight-minute snooze
- AM/FM radio with 10 user-select channels and auto-off function
- Indoor thermometer with maximum and minimum readings
- Backlight
CONTROL BUTTONS AND CONNECTORS

- [ALARM ON/OFF] BUTTON
Turns the alarm On/Off and activates/disables a county setting - [SNOOZE/BACKLIGHT] BUTTON
Activates the snooze function and the backlight - [RADIO OFF/SLEEP] BUTTON
Turns off the radio automatically when the sleep function is activated - [COUNTY] BUTTON
Displays and changes the county settings for SAME decoding - [CHANNEL] BUTTON
Changes the NOAA channels - [TUNING UP/DOWN] BUTTONS
Change the radio channels - [MODE] BUTTON
Switches between clock, calendar and the two alarm modes - [MEM] (MEMORY) BUTTON
Changes display of maximum, minimum and current temperatures - [NOAA] BUTTON
Activates the NOAA function or sets function in standby or mute modes - [MESSAGE] BUTTON
Displays the previously stored Alert messages - [AM/FM] BUTTON
Switches between AM and FM radio bandwidths - [PRESET] BUTTON
Changes between user-selected radio channels - [VOLUME UP/DOWN] BUTTONS
Adjusts radio volume; also changes values in a MODE setting - POWER ADAPTER CONNECTOR
Connects the AC power adapter (included) - ANTENNA CONNECTOR
Connects an optional external antenna (not included) - SPK (SPEAKER) CONNECTOR
Connects an optional external speaker (not included)
POWER
The WR196T comes with an AC power adapter. To install it, plug it into the power adapter connector (Figure N) and a wall socket. FM reception is enhanced when the power adapter is connnected.

Using the AC power adapter is the prefered power source. However, the WR196T also operates on battery back-up power for emergency situations when electrical power fails. It is recommended that batteries be installed in the WR196T at all times for such emergency situations. The WR196T uses three AA-sized (UM3) batteries (not included).

The WR196T has a low battery warning indicator icon. The low battery warning icon is displayed in the top line of the LCD screen when the batteries need changing. Change the batteries when the low-battery indicator lights up.
BEFORE YOU BEGIN
- Place the WR196T on a flat, sturdy surface. You can adjust the display angle of the LCD by unlocking the latch on the back of the unit and lifting the LCD up.

- The [CHANNEL], [COUNTY], [TUNING], [MEM] and [MODE] buttons are protected by a cover. Gently lift the cover to gain access to these buttons.

- In some locations, for better NOAA reception, an optional additional antenna (not include) may be needed. The optional attenna connection is shown in Figure O.


THE BACKLIGHT
Press [SNOOZE/BACKLIGHT] to turn on the backlight. The light will go out automatically after 10-seconds.
THE CALENDAR CLOCK AND THERMOMETER
There are four display modes: CLOCK, CALENDAR, ALARM 1 and ALARM 2. To switch between modes, press [MODE] once to sequentially advance through the modes. The current temperature is displayed when the AM/FM radio is off. NOTE: The unit will save all changes and return to normal time display automatically after 10-seconds.
HOW TO SET THE CALENDAR CLOCK
- Press and hold [MODE] for two seconds.
- Use [VOLUME UP/DOWN] to enter the desired hour and AM/PM designation.
- Press [MODE].
- Use [VOLUME UP/DOWN] to enter the minutes.
- Press [MODE].
- Use [VOLUME UP/DOWN] to enter the display language for day-of-theweek. Language choices are E (English), D (German), F (French), I (Italian) and S (Spanish).
- Press [MODE]. Follow the same pattern to enter the year, month and day.
- Press [MODE] to exit.
The unit will save all changes and return to normal display automatically after 10 seconds.
HOW TO SET THE ALARMS
- Select ALARM 1 or ALARM 2 using [MODE].
- Press and hold [MODE] for two seconds.
- Use [VOLUME UP/DOWN] to enter the hours.
- Press [MODE].
- Use [VOLUME UP/DOWN] to enter the minutes.
- Press [MODE].
- Use [VOLUME UP/DOWN] to select ALARM or RADIO. If ALARM is selected, a one-minute alarm will sound at the set alarm time. If RADIO is selected, the radio will come on at the set alarm time instead of the alarm.
The radio will remain on for an hour or until turned off. - Press [MODE] to exit. The WR196T will save all changes and return to normal display automatically after 10 seconds.
HOW TO USE THE ALARMS
To turn on or off an alarm:
- Select ALARM 1 or ALARM 2 using [MODE].
- Press [ALARM ON/OFF]. The alarm time is displayed when the selected alarm is activated; otherwise, the display is blank.
Both alarms can be active or disabled at the same time. When an alarm goes off, press [ALARM ON/OFF] to mute the alarm. Or press [SNOOZE/BACKLIGHT] to activate the snooze function.
SNOOZE
By pressing [SNOOZE/BACKLIGHT] when the alarm sounds, the alarm will be temporarily interrupted and sound again after 8-minutes. To disable the snooze funtion, press [ALARM ON/OFF].
THE TEMPERATURE
When AM/FM radio is off, the current room temperature is displayed. To display the maximum and minimum temperature in memory, press [MEM]. To clear and reset the memory for maximum and minimum temperatures, press and hold [MEM] for two seconds.
To display the current maximum and minimum temperatures when AM/FM radio is on, press [MEM].
THE RADIO
HOW TO USE THE RADIO
To turn on the radio, press [AM/FM]. The last selected radio channel will be shown. To turn off the radio without using the sleep function, press and hold [RADIO OFF/ SLEEP] for two seconds or press [NOAA] twice. To manually change the radio channel:
- Press [AM/FM] to select AM or FM.
- Use [TUNING UP/DOWN] to locate the desired channel. To change the volume, use [VOLUME UP/DOWN]. Press [PRESET] to select a programmed channel.
HOW TO PROGRAM A CHANNEL
You may program up to 10 radio channels. To program a channel:
- Turn the radio on.
- Select the desired channel number using [PRESET].
- Press and hold [PRESET] for two seconds.
- Press [AM/FM] to select AM or FM.
- Use [TUNING UP/DOWN] to locate the desired frequency.
- Press [PRESET] to save.
HOW TO USE THE SLEEP (AUTO-OFF) FUNCTION
- Turn on the radio.
- Press [RADIO OFF/SLEEP] to activate the sleep function. Blanks will be displayed when the function is not activated.
- Press [RADIO OFF/SLEEP] again to select the minutes before the radio switches off automatically. You can select 15, 30, 60, 90 or 120 minutes.
NOTE ON ALARM RADIO
When the alarm radio is set [ON], it will keep playing for one hour before it turns off automatically.
To deactivate the alarm radio: reset the time for the sleep function, or simply turn off the radio by pressing [RADIO OFF/SLEEP] for two second or [NOAA] twice.
NOTE: Switching from AM or FM mode to NOAA mode.
When the unit is being manually tuned in AM or FM mode, the 'M' icon is flashing, press either one of the following keys: [CHANNEL], [COUNTY], [MEN], [NOAA] or [MESSAGE], there will not have any effect.
In this case, you can either wait for about 8 seconds until the 'M' icon stops flashing, then you can press the [NOAA] button to change to NOAA mode.
Alternatively, you can press 'MODE' key to quit from the manual tuning mode. Once the 'M' icon stops flashing, you can press the [NOAA] button to change to NOAA mode.
THE NOAA MESSAGING UNIT
USING THE EARLY ALERT WARNING SYSTEM
The early warning system uses radio signals to alert the user to weather and environmental dangers A built-in radio receiver responds to seven (7) userselected signal channels.
The WR196T has four activity status levels: NOAA-On, NOAA-Stand-by, NOAAMute and NOAA-Off.
- NOAA-On: The radio is on and audio messages will be continuously heard.
- NOAA-Stand-by: The radio is in standby mode and will activate automatically when an alert message is received.
- NOAA-Mute: The radio is in standby mode without audio capability. When an alert message is received, the LED (Figure D) will flash. Voice messages will not be heard until the radio is switched to NOAA-On mode.
- NOAA-Off: The radio is off and will not respond to alert messages.
To select an activity level, press [NOAA]. With each press, the status level advances sequentially.
To hear an alert message when the radio is in NOAA-Mute mode, press [NOAA] until the status becomes NOAA-On, and then adjust the volume level if necessary.
ALERTS AND MESSAGES
When a NOAA message is detected, an alert will sound (except in Mute or OFF modes) and the backlight will flash. The alert type (warning, watch or statement) and description (flood, tornado, fire, etc.) will be displayed. The WR196T can store up to 3 NOAA messages. To display stored messages, press [MESSAGE]. The messages will be displayed with the most current one as "MSG1." The red message LCD will be lit when at least one message is in effect. The message(s) will automatically erase when the alert has been discontinued.
SAME MESSAGE CODES USED BY THE NWR
When the NWR airs alert warnings, a digital code known as "Specific Area Message Encoded" (SAME) is included as part of the warning. This code includes information specific to an affected or endangered local geographical area. With SAME codes, the user can select the geographical area(s) of interest and program the WR196T to receive only those specific alerts. When the WR196T is programmed with SAME codes, the user will be alerted to warnings only for those pre-selected geographical areas. Alerts are intially shown on the WR196T as a text display on the LCD screen (Figure A4); then an audio broadcast will follow. At completion of the audio broadcast, the WR196T will emit a short burst of static to indicate end of message.
In NOAA-Stand-by mode, the WR196T will automatically turn the audio on so that the warning broadcast can be heard. The WR196T will then return to NOAAStand-by mode after the audio broadcast has been completed.
FINDING LOCAL NWR CODES AND CHANNELS
SAME codes are available from the NWR. To contact the NWR by phone, call toll-free: 888-697-7263 and follow the voice menu to NWR channels and SAME codes. The NWR can also be contacted via the internet at: www.nws.noaa.gov/ nwr/indexnw.htm. Click on the state for which information is desired.
Example of the first ten county radio channels and SAME codes for Montana:
| ST. | COUNTY | SAME # | NWR TRANSMITTER | FREQMHZ | CALL | WATTS REMARKS |
| MT | Beaverhead | 030001 | Butte MT | 162.550 | WXL79 | 100 |
| MT | Big Horn | 030003 | Billings MT | 162.550 | WXL27 | 400 |
| MT | Blaine | 030005 | Havre MT | 162.400 | WXL53 | 300 |
| MT | Broadwater | 030007 | Helena MT | 162.400 | WXK66 | 300 |
| MT | Carbon | 030009 | Billings MT | 162.550 | WXL27 | 400 |
| MT | Carter | 030011 | —No NWR Coverage— | |||
| MT | Cascade | 030013 | Great Falls MT | 162.550 | WXJ43 | 300 |
| MT | Chouteau | 030015 | Havre MT | 162.400 | WXL53 | 300 |
| MT | Chouteau | 030015 | Great Falls MT | 162.550 | WXJ43 | 300 |
| MT | Custer | 030017 | Miles City MT | 162.400 | WXL54 | 300 |
In addition, many counties have been further subdivided into as many as 9 smaller sub-sections. The numbers of one (1) to nine (9) in the far left column of a SAME code identifies specific sub-sections of a county. If the county has not been subdivided, the first digit of the county code will be zero (0). (See "Description of SAME Codes.")
ABOUT NOAA CHANNELS
The NWR radio channels work in the same way as channels of a regular radio. All of the NWR transmission stations operate on one of seven frequencies:
| Channel | Corresponding Radio Frequency |
| A | 162.400MHz |
| B | 162.425MHz |
| C | 162.450MHz |
| D | 162.475MHz |
| E | 162.500MHz |
| F | 162.525MHz |
| G | 162.550MHz |
The WR196T labels each frequency channel "A" to "G." Once a radio frequency for a region has been selected, the WR196T will receive audio and code information on this frequency. The radio channel is located in the upper left hand corner of the LCD screen.
CHANGING RADIO CHANNELS
- In any of the time display modes, press [CHANNEL] and hold for two (2) seconds. The channel selection icon will begin to flash.
- While the channel selection icon is flashing, press [VOLUME UP/DOWN] to scroll through the channel selections.
- When the channel has been selected, press [MODE] to save selection and return to time display mode.
PROGRAMMING SAME COUNTY CODES
SAME county codes are required to selectively receive weather and environmental alerts for a specific county, and need to be entered into the WR196T. Up to nine selected SAME codes can be entered.
The first step in programming SAME codes requires the user to select the option of receiving [ALL] warnings or selected warnings. Selecting [ALL] will result in the WR196T broadcasting all alerts and warnings issued on a particular radio frequency which can encompass a large geographical area of many counties. (See "About Radio Channels") To receive warnings for a specific county, that county code must be programmed into the WR196T
NOTE: It is recommended that the user program the WR196T with specific county codes of interest or need in order to receive alerts and warnings pertinent to only those counties. Selecting [ALL] of the county code will result in the WR196T receiving all of the messages for an entire transmission region. These regions are quite large and encompass about 5,000 square miles.
Display fields permit up to nine county codes to be entered. The user can select less than nine codes by leaving the unused fields empty.
To program a county code:
- Press [COUNTY] once. "County 0... All" will be displayed.
- Press [COUNTY] again to bring up "County 1." Hold [COUNTY] until the first digit field begins to flash.
- When the digit field flashed press [VOLUME UP/DOWN] to select the first code digit.
- Press [COUNTY] to save selection and to advance to the second digit field.
- Repeat steps 3 and 4 to select and save digit selections in the other code fields.
- Repeat step 2 to advance and program other county codes.
To individually enable or disable a county code:
- Locate the county number by using [COUNTY]. To select all counties, choose COUNTY 0.
- Press [ALARM ON/OFF]. When a county is disabled, blanks will be displayed. To enable it again, simply press [ALARM ON/OFF].
Note that the unit will only response to enabled county codes.
DESCRIPTION OF SAME CODES
SAME codes are comprised of 6 columns of numbers.
State-county coding:
The 3 digits on the far right identify the specific county coding. Each county within a state will have an independent three-digit code.
NOTE: To receive all of the alerts for a given state, insert 000 into the county section.
State codes:
The next two digits, to the left of the county code, are for state coding. Each of the 50 US states has its own two-digit code.
County sub-section code
The last digit on the extreme left is the county subsection. A county may be are broken into nine subsections; each number between one to nine represents a specifc county subsection.
NOTE: If the county subsection code is stated as 0, then that county is not subsectioned. To receive all of the alerts for a given county, insert 0 into the county subsection field.
| Code | Area | Code | Area |
| 1 | Northwest | 6 | East |
| 2 | North | 7 | Southwest |
| 3 | Northeast | 8 | South |
| 4 | West | 9 | Southeast |
| 5 | Central | ||

SAME MESSGES
The WR196T receives and displays SAME warning messages in three classifications depending upon severity of emergency: Warning, Watch and Statement. In addition to these classes of alert messages, there is now a new type of message: Test.
The purpose of this new class is to assist you in verifying that your NOAA weather radio is set-up and working properly. Each week the National Weather Service will broadcast a Test message in SAME format. To receive the Test message, your WR196T needs to be in NOAA-On, NOAA-Stand-by or NOAA-Mute mode with a county code and NWR channel selected and programmed into the WR196T. If the WR196T is properly set, a flashing "Test" icon will be displayed on the LCD screen when a Test message is received. The "Test" icon will continue to flash for over an hour after the Test message is received.
NOAA Weather Radio stations broadcast the Test message every Wednesday between 10:00AM-Noon, local time. (Test messages may also be sent on other days and times when there is a threat of severe weather in the listening area or for other reasons.)
Corresponding with the "Test" icon, the following broadcast will be made immediately after sounding the Test alarm:
"This is the National Weather Station office in...(city).... The preceding signal was a test of the Weather Radio Station...(call sign)... public warning system. During potentially dangerous weather situations, specially built receivers can be automatically activated by this signal to warn of the impending hazard. Tests of this signal and receivers' performance are normally conducted by the National Weather Service at...(time)... each Wednesday. If there is a threat of severe weather, the test will be postponed to the next available good-weather day. Reception of this broadcast, and especially the warning alarm, will vary at any given location. This variability, normally more noticeable at greater distances from the transmitter, can occur even though you are using a good quality receiver in good working condition.
To provide the most consistant and dependable warning service possible, the warning alarm will be activated for hazardous watches and warnings for the following counties...(list of counties)...."
When more than one state is involved, the state names will always precede the names of the counties in that state.
If the Test is cancelled due to threat of severe weather, the Test broadcast schedule will resume with the next good-weather day.
If you have questions regarding alarm tests or to verify if a test was conducted, contact the programming office of your local NOAA Weather Radio station.
ADDITIONAL INFORMATION
RESET THE UNIT
If the unit needs to be reset, unplug the AC power adaptor then remove the batteries. When the display is blank, reinstall the batteries and all the settings will reflect their default values.
PRECAUTIONS
- Read the user's manual thoroughly.
- Do not subject the unit to excessive force, shock, dust and temperature.
- Do not tamper with the unit internal components.
- Do not mix fresh and old batteries, or batteries of different specifications.
CUSTOMER SERVICE
Oregon Scientific has made every effort to design and manufacture the WR196T to provide you with many years of service. Should you have questions or require additional information, please contact our Customer Service Department at 800-853-8883 or via email at: helpme@oscientific.com.
We also invite you to explore the international world of Oregon Scientific and our diverse line of practical and useful products designed to enhance your lifestyle and protect your family. Please visit our website at: www.oregonscientific.com.
WARRANTY
This product is warranted to be free of manufacturing defects for 90 days from day of purchase. Defective product returns should be directed to the place of retail purchase. This warranty does not cover a product subjected to abuse, misuse or accidental damage.
MAINTENANCE
When handled properly, the WR196T will provide you with many years of service.
- Do not clean with abrasive or corrosive materials. Abrasive cleaning agents may scratch the plastic parts and corrode the electronic circuit.
- Do not subject to excessive force, shock, dust, temperature, moisture or humidity. Such treatment may result in malfunction, a shorter electronic life span, damaged batteries or distorted parts.
- Do not tamper with unit's internal components. Doing so will void product's warranty and may cause damage. The WR196T does not contain any userservicable parts.
- Use only fresh batteries as specific in this manual. Do not mix old and new batteries as the old batteries may leak corrosive or hazardous fluids.
NOTICE
- The content of this manyual is subject to change without notice.
- Due to printing limitations, the displays shown in this manual may differ from the displays on the actual product.
- The manufacturer and its suppliers hold no responsiblity to you or any other person for any damage, expenses, lost profits, or any other claim arising from using this product.
- The contents of this manual may not be reproduced without permission of the manufacturer.
SPECIFICATIONS
| Radio Functions | |
| NOAA Channels: | Digital PLL tuning for seven (7) NOAA channels |
| SAME code setting: | Nine (9) independent setting or ALL counties options |
| FM Band: | 88 - 109.2MHz at 100KHz steps |
| AM Band: | 540 - 1600KHz at 10KHz steps |
| Preset Memory: | Ten (10) preset memories can be assigned to stations in either AM or FM bandswidths |
| Volume: | Sixteen (16) adjustment levels |
| Sleep timer: | 15, 30, 60, 90, 120 minutes |
| Time Functions | |
| Clock: | 12 hour format |
| Calendar: | Day-of-the-week display in English, German, French, Italian or Spanish Month / Day / Year format |
| Daily alarms: | Two (2) one - minute duration alarms with alarm beep tone or 60 minutes radio |
| Snooze: | Eight (8) minute alarm delay |
| Accuracy: | +/- 0.5 seconds / day |
| General Specifications | |
| Battery Type: | Three (3) AA-size (UM-3) 1.5V alkaline batteries |
| LCD Dimensions: | Upper:: 2-2/3" (L) x 1-1/4" (W) Upper:: 65mm (L) x 32mm (W) Lower: 2-2/3" (L) x 1/2" (W) Lower 65mm (L) x 14mm (W) |
| Unit Dimensions: | 6-7/8" (L) x 5-3/8" (W) x 7/8" (H) 173.6mm (L) x 135mm (W) x 23mm (H) |
| Unit Weight: | 11.2 oz (without batteries) 320g (without batteries) |
| Operating Temperature: | 23°F to 122°F -5 o C to 50 o C |
Documents / Resources
References
Download manual
Here you can download full pdf version of manual, it may contain additional safety instructions, warranty information, FCC rules, etc.
Download Oregon Scientific WR196T - AM/FM Weather Radio Manual
Advertisement


Need help?
Do you have a question about the WR196T and is the answer not in the manual?
Questions and answers