
Summary of Contents for Sunerg Solar Energy UNISPLIT A++
- Page 1 UNISPLIT _A ++ OUTDOOR UNIT - HEAT PUMPS MONOBLOC TYPE Energy Class MHP5RL24 MHP10RL24 MHP12RL24P3 MHP7RL24 MHP12RL24 MHP14RL24P3 MHP9RL24 MHP14RL24 MHP16RL24P3 MHP16RL24 INSTALLATION MANUAL...
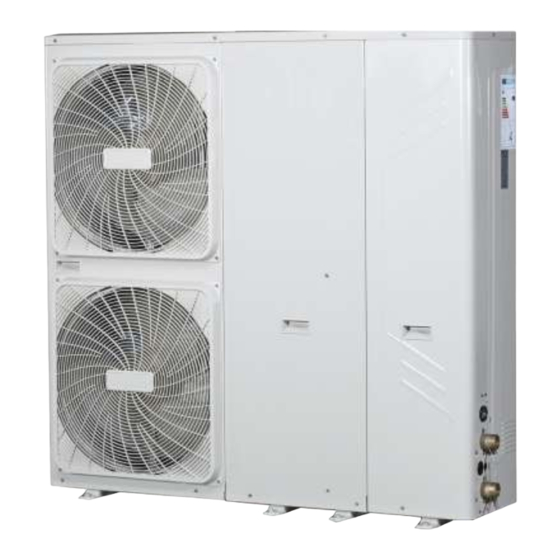
- Page 2 Figure 1) Figure 2) 5/7/9 kW 10/12/14/16 kW Wiring diagram:12-16kW(3-phase) for examples Terminal Block 5/7 kW Hydraulic System 10/12/14/16 kW Please remove the hollow plate after installation.
-
Page 3: Table Of Contents
1 INTRODUCTION 1.1 General information CONTENTS PAGE ■ These units are used for both heating and cooling applications. They can be combined with fan coil units, floor heating INTRODUCTION..............1 applications, low temperature high efficiency radiators, domestic ACCESSORIES..............3 hot water tanks (field supply) and solar kits (field supply). 3 SAFETY CONSIDERATIONS..........3 ■... - Page 4 In cooling mode,The minimum leaving water flow temperature(T1stopc) Unit 5~9kW 10~16kW that the unit can reach in different outdoor temperature(T4) is listed below: minimun Volume of tank/L suggestion ≤10 minimum 1.75 T1stopc Heating heat exchange exchanger area/m suggestion (Stainless minimum T1stopc Volume/L steel coil)
-
Page 5: Accessories
3 SAFETY CONSIDERATIONS 2 ACCESSORIES 2.1 Accessories supplied with the unit The precautions listed here are divided into the following types. They are quite important, so be sure to follow them carefully. QUANTITY Meanings of DANGER, WARNING, CAUTION and NOTE symbols. SHAPE NAME 5~9kW... -
Page 6: Before Installation
f) Where voltage fluctuates a lot, such as in factories. ■ Be sure to install a ground fault circuit interrupter according to local g) In vehicles or vessels. laws and regulations. h) Where acidic or alkaline vapors are present. Failure to install a ground fault circuit interrupter may cause electric shocks and fire. -
Page 7: Important Information Regarding The Refrigerant Used
atmosphere. The position of barycenter for different unit can be seen in the - Places where servicing space can be well ensured. picture below. - Places where the units' piping and wiring lengths come within the allowable ranges. - Places where water leaking from the unit cannot cause damage to the location (e.g. -
Page 8: Precautions On Installation
7 If you install the unit on a building frame, please install a waterproof plate (field supply) (about 100 mm, on the underside of the unit) in order to avoid drain water dripping. (See the picture in the right). Φ10 Expansion bolt Concrete... - Page 9 7.1 Installation servicing space (A) In case of stacked installation (B) In case of multiple-row installation (for roof top use, etc.) 1. In case obstacles exist in front of the outlet side. 1. In case of installing one unit per row. <1/2 H Unit A(mm)
-
Page 10: Typical Application Examples
8 TYPICAL APPLICATION EXAMPLES The application examples given below are for illustration purposes only. 8.1 Application 1 Space heating only application with a room thermostat connected to the unit....FHL1 FHL2 FHLn room thermostat (field supply) outdoor unit drain valve (field supply) 1.1 manometer fill valve (field supply) - Page 11 8.2 Application 2 Space heating only application without room thermostat connected to the unit. Domestic hot water is provided through the domestic hot water tank that is connected to the unit. 12.3 12.1 12.2 FHL1 FHL2 FHLn outdoor unit user interface 12.1 booster heater 1.1 manometer drain valve (field supply)
-
Page 12: Outdoor Unit
CAUTION Make sure to fit the 3-way valve correctly. For more details, refer to 9.6.6 Connection for other components/For 3-way valve SV1. NOTE The unit can be configured so that at low outdoor temperatures, water is exclusively heated by the booster heater. This assures that the full capacity of the heat pump is available for space heating. -
Page 13: User Interface
■Pump operation and space heating and cooling The unit will switch to either heating or cooling mode according to the setting of room thermostate. When space heating/cooling is requested by the room thermostat (5), the pump will start operating and the unit (1) will switch to heating mode/cooling mode. - Page 14 NOTE The volume of balance tank(8) should be greater than 40L(for 5~9kW unit, greater than 20L) The drain valve (6) should be installed at the lowest positon of the system. For 5/7/9kW unit, the backup heater (1.5) is not integrated in the outdoor unit. An independent backup heater can be selected and installed in the door.
- Page 15 Application a Boiler provide heat for space heating only 12.3 12.1 12.2 23.1 FHL1 FHL2 FHLn Application b Boiler provide heat for space heating and domestic water heating, the ON/OFF of boiler is controlled by itself for domestic water heating. 12.3 12.1 12.2...
-
Page 16: Expansion Vessel (Field Supply)
Application c Boiler provide heat for space heating and domestic water heating. the ON/OFF of boiler controled by unit. 12.3 12.1 12.2 FHL1 FHL2 FHLn 1 outdoor unit SV1: 3-way valve(field supply) 8.1 air purge valve 1.1 manometer T1B: temperature sensor(field 8.2 drain valve 1.2 pressure relief valve supply) - Page 17 ■ During heating operation of the boiler, the boiler will operate to achieve the target water flow temperature set on the user interface. ■ Never set the target water flow temperature set point on the user interface above (60°C). NOTE Make sure to correctly configure FOR SERVICEMAN in the user interface. Refer to 10.7 Field settings/Other heating source. CAUTION ■...
-
Page 18: P_O: Outside Circulation Pump (Field Supply)
1 outdoor unit balance tank (field supply) 1.1 manometer 8.1 air purge valve 1.2 pressure relif valve 8.2 drain valve 1.3 expansion vessel expansion vessel (field supply) 1.4 plate heat exchanger P_o: outside circulation pump (field supply) 1.5 air purge valve collector (field supply) 1.6 flow switch bypass valve (field supply) -
Page 19: Collector(Field Supply)
FCU1 FCU2 FCUn 23.1 FHL1 FHL2 FHLn outdoor unit user interface bypass valve(field supply) 1.1 manometer drain valve(field supply) SV2:2-way valve (field supply) 1.2 pressure relif valve fill valve(field supply) mixing station (field supply) 1.3 expansion vessel balance tank(field supply) 23.1 P_c: mixing pump 1.4 plate heat exchanger 8.1 air purge valve... -
Page 20: Booster Heater
8.8 Application 8 Space heating application and domestic hot water heating with a solar energy kit connect to the system, space heating is provided by heat pump, domestic hot water heating is provided by heat pump and solar energy kit. 12.3 12.3 12.1... -
Page 21: Overview Of The Unit
9 OVERVIEW OF THE UNIT 9.1 Opening the unit Door 1 gives access to the compressor compartment and electrical parts. Door 2 gives access to the hydraulic compartment and electrical 9.2 Main components parts. 9.2.1 Hydraulic compartment 15.3 TW_out 15.1 15.2 12.1 TW_in... - Page 22 9.2.2 Functional diagram of hydraulic compartment 9.Flow switch The flow switch checks the flow in the water circuit and protects heat exchanger against freezing and the pump against damage. 10.Pump 15.3 The pump circulates the water in the water circuit. 11.Heat exchanger The manometer provides a water pressure readout of the water circuit.
- Page 23 Control box for 5/7/9 kW UNIT Control box for 10~16KW UNIT PCB A PCB B main control board of hydraulic module PCB C Main control board (at back of the PCB B,only for 3 phase unit) PCB A PCB B of hydraulic module The image shown here is indicative only.
- Page 24 9.2.4 PCB for refrigerant system PCB A, Inverter module for 1-phase 10~16kW unit Reserved(CN2) Power Supply Of U Phase For Compressor(U) 10 Input Port N For PFC Module(VIN-N) Input Port N For IPM Module(N) Output Port N Of PFC Module(N_1) 11 Input Port P For IPM Module(P) Power Supply Of W Phase For Output Port P Of PFC Module(P_1)
- Page 25 PCB C, filter board for 3 phase 12~16kw unit, door 1 PCB C 3-phase 12~16kW 1 Power supply L3(L3) 2 Power supply L2(L2) 3 Power supply L1(L1) 4 Power supply N(N) 5 Ground wire(GND_1) 6 Power supply for load(CN18) 7 Power supply for main control board(CN19) 8 Power filtering L1(L1’) 9 Power filtering L2(L2’) 10 Power filtering L3(L3’)
- Page 26 PCB B, Main control board for 3-phase 12~16kW unit 4 5.15.2 6.1 21 20 10 Port for electrical expansion value(CN22) 18 Reserved(CN68) 1 Power supply for the main PCB(CN250) 11 Port for power supply(CN41) 19 Port for down fan(CN19) 2 Port for pressure sensor(CN36) 12 Power supply for hydro-box 20 Port for up fan(CN17) 3 Port for sunction temperature sensor(CN4)
- Page 27 PCB A, Inverter board for 1 phase 5/7/9 kW unit. 1-phase 5/7/9kW To main board (CN101,CN105) Compressor connection port U V W (U,V,W) Input port N for IPM module(N) Input port P for IPM module(P) Input port for PFC inductance P1(P1) Input port for bridge Rectifiers(P5) Input port for Bridge Rectifiers(P6) Output port P of PFC(P2)
- Page 28 PCB B, Main control board for 1 phase 5/7/9 kW unit. PCB A 1-phase 5/7/9kW Rectifier bridge input port L 10 Th temperature sensor port 2 Hydraulic compartment input port2 11 Pressure sensor port Rectifier bridge input port N 12 Port for communication between this PCB and main control board of hydraulic module Power supply N 13 P/N/+18V port...
- Page 29 Before continuing installation of the unit, check the following: 9.3 Water pipework ■ The maximum water pressure = 3 bar. ■ The maximum water temperature is 70°C according to safety All piping lengths and distances have been taken into consideration. device setting.
- Page 30 Example 1 2. Using the table below, determine if the expansion vessel The unit(16kW) is installed 10m below the highest point in the water pre- pressure requires adjustment. circuit. The total water volume in the water circuit is 50 L. 3.
- Page 31 NOTE The unit is only to be used in a closed water system. Application in an open water circuit can lead to excessive corrosion of the water piping: ■ Never use Zn-coated parts in the water circuit. Excessive corrosion of these parts may occur as copper piping is used in the unit's internal water circuit.
- Page 32 9.6 Field wiring NOTE WARNING ■ Be aware of the hygroscopic property of glycol. It absorbs moisture from the environment. ■ A main switch or other means of disconnection, having a c ■ Leaving the cap off the glycol container causes the ontact separation in all poles, must be incorporated in the fixed concentration of water to increase.
- Page 33 A Outdoor unit G P_c: Mixing pump (field supply) L Domestic hot water tank B Solar energy kit (field supply) H P_o: Outside circulation pump M Booster heater C User interface (field supply) N Contactor D Room thermostat (field supply) I P_d: DHW pump (field supply) O Power supply E Boiler (field supply)
- Page 34 Required number of e t I o i t Maximum running current conductors r a l r e l t s i e for T1B t s i Booster heater control cable 2+GND 1-phase 31A 1-phase Power supply cable for unit 3+GND 3-phase 15A 3-phase 2+GND 1-phase...
- Page 35 Field wiring guidelines 9.6.4 Specifications of standard wiring components ■ Most field wiring on the unit is to be made on the terminal block inside the switch box. To gain access to the terminal block, Door 1: compressor compartment and electrical parts: XT1 remove the switch box service panel (door 2).
- Page 36 For remote alarm: Door 2: electrical parts of the hydraulic compartment, backup heater:XT5(3-phase)/XT4(1-phase) REMOTE ALARM Voltage Passive signal port Maximum running current 0.2A Wiring size 0.75mm FUSE Type 1 Control port signal type REMOTE ALARM Procedure 1. Connect the cable to the appropriate terminals as shown on the diagram.
- Page 37 For tank loop pump P_d and mix pump P_c: There are three methods for connecting the thermostat cable (as described in the picture above) and it depends on the application. Method A P_d N P_c N RT can control heating and cooling individually, like the controller for 4-pipe FCU.
- Page 38 For defrosting signal output: Procedure 1. Connect the cable to the appropriate terminals as shown on the picture 2. Fix the cable with cable ties to the cable tie mountings to ensure Voltage 220~240VAC strain relief Maximum running current 0.2A Wiring size For boiler and outside circulation pump P_o: 0.75mm...
-
Page 39: Start-Up And Configuration
10 START-UP AND CONFIGURATION The unit should be configured by the installer to match the installation environment (outdoor climate, installed options, etc.) and user expertise. It is important that all information in this chapter is read sequentially by the installer and that the system is configured as applicable. 10.1 Climate related curves The climate related curves can be selected in the user interface, the curves for heating mode and ECO heating mode are the same but the default curve is curve 4 in heating mode, while in ECO mode, the default curve is curve 6 (refer to the operation manual, 6.2.2... - Page 40 Low temperature curves for heating mode 10.2 DIP switch settings overview T1s(℃) DIP switch 13 is located on the hydraulic module main control board (see "9.2.3 main control board of hydraulic module") and allows configuration of additional heating source thermistor installation, the second inner backup heater installation, etc.
- Page 41 10.5 Powering up the unit 10.3 Initial start-up at low outdoor ambient temperatures When power to the unit is turned on, "1%~99%" is displayed on the During initial start-up and when water temperature is low, it is user interface during initialization. During this process the user important that the water is heated gradually.
- Page 42 Pump LED diagnosis and solutions Keys Function The pump has an LED operating status display. This makes it easy for MENU • Go to the menu structure (on the home page) the technician to search for the cause of a fault in the heating system. 1.
- Page 43 2 If tank heater (booster heater) is avaliable, Go to FOR SERVICEMAN 1 DHW MODE SETTING >DHW MODE SETTING>1.2 TANK HEATER and select “Yes”, when 1.1. DHW MODE “OK” pressed, the following page will appear: 1.2. TANK HEATER 1.2 TANK HEATER 1.3.
- Page 44 t_DI_HIGHTEMP If DHW PRIORITY is enabled, the operation of the unit is described in the picture below: T5S_DI Min (T5S,Tstop) Restart Min (T5S,Tstop)-dT5_on Space heating/ Heating Heating t_DI_MAX cooling Time water operation water Be aware that the domestic hot water temperature at the hot water tap will be equal to the value selected in FOR SERVICEMAN “T5S_DI”...
- Page 45 When the cursor is on COOL MODE, Use ◄► to select YES or When the cursor is on HEAT MODE, Use◄► to scroll to YES or NON. Then press OK to enable or disable the cool mode. When the NON and press OK to enable or disable the heat mode. When the cursor is on T1S RANGE.
- Page 46 4 AUTO MODE SETTING T4AUTOCMIN 25 °C 21: 55 08 - 08 - 2015 SAT. T4AUTOHMAX 17 °C MAIN TANK If ►is pressed, the main page will display the room temperature: SCROLL Use ◄ ► and ▼ ▲ to scroll and adjust the parameter. 21: 55 08 - 08 - 2015 SAT.
- Page 47 NOTE:The setting in the user interface should correspond to the wiring of thermostat. If YES is selected in ROOM THERMOSTAT T1S-dT1_IBH_ON and the MODE SETTING is NON, the wiring of thermostat should follow method B. If the MODE SETTING is YES, then the wiring IBH1 OFF IBH1 ON should follow method A, If “DUAL ROOM THERMOSTAT”...
- Page 48 SERVICE CALL T1s-T1B T4<T4_AHS_ON About SERVICE CALL The installers can set the phone number of the local dealer in dT1_AHS_ON SERVICE CALL. If the unit doesn’t work properly, call this number for help. dT1_AHS_OFF How to set the SERVICE CALL To set the SERVICE CALL, go to MENU>...
- Page 49 When CIRCULATION PUMP RUNNING is selected, the page will TEST RUN displayed as follows: About TEST RUN 11 TEST RUN TEST RUN is used to check correct operation of the valves, air Test run is on. purge, circulation pump operation, cooling, heating and domestic Circulation pump is on.
- Page 50 During test run, all buttons except OK are invalid. If you want to turn The number displayed on the page is the time that the air purge has off the test run, please press OK. For example ,when the unit is in air run.
- Page 51 During floor drying, all the buttons except OK are invalid. When During preheating for floor, all the buttons except OK are invalid. the heat pump malfunctions, the floor drying mode will turn off when If you want to turn off the preheating for floor, please press OK. the backup heater and additional heating source is unavailable.
-
Page 52: Test Run And Final Check
11 TEST RUN AND FINAL CHECK The described checks must be executed at least once a year by qualified personnel. 1. Water pressure The installer is obliged to verify correct operation of unit after Check if the water pressure is above 1 bar. If necessary add installation. - Page 53 Symptom 3: Pump is making noise (cavitation) WARNING POSSIBLE CAUSES CORRECTIVE ACTION When carrying out an inspection on the switch box of the There is air in the system. Purge air. unit, always make sure that the main switch of the unit is Water pressure at pump •...
- Page 54 13.3 PARAMETERS CHECK IN THE UNIT Symptom 7: Heat mode can’t change to DHW mode immediately To check the parameters of hydraulic box, open door 2 and you’ll see the PCB like following, the digital display will show the POSSIBLE CAUSES CORRECTIVE ACTION temperature of outlet water in normal condition (‘0’...
- Page 55 To check the parameters on the refrigerant side, open door 1 and 13.4 Error codes you’ll see the PCB like the following (different for 1-phase and 3-phase unit): the digital display will show the present compressor When a safety device is activated, an error code will be displayed frequency (‘0’...
- Page 56 Malfunction or Failure cause and Corrective Malfunction or Failure cause and Corrective Error code Error code protection action protection action 1.The T5 sensor connector is 1. The Th sensor connector loosen. Reconnect it. is loosen. Re connect it. 2.The T5 sensor connector is 2.The Th sensor connector is The domestic hot wet or there is water in.
- Page 57 Malfunction or Failure cause and Corrective Malfunction or Failure cause and Corrective Error code Error code protection action protection action 1. Pressure sensor 2.if light is on, check the connector is loosen, wire connection between Pressure sensor reconnect it. Communication the main PCB and driven failure 2.
- Page 58 Malfunction or Failure cause and Corrective Malfunction or Failure cause and Corrective Error code Error code protection action protection action 1. Check that all shut off 4. Electrical expansion valve valves of the water locked or winding connector is loosen. circuit are completely open.
- Page 59 Malfunction or Failure cause and Corrective Malfunction or Failure cause and Corrective Error code Error code protection action protection action 9.Module wires or screws 1. Check the power supply. are loosen. Reconnect wires 2. If the power supply is OK,and and screws.
-
Page 60: Technical Specifications
14 TECHNICAL SPECIFICATIONS 14.1 General 14.3 Important information for the used refrigerant 1-phase 3-phase 1-phase This product has the fluorinated gas, it is forbidden to release to air. 10\12\14\16 12\14\16 5\7\9 Refrigerant type: R410A; Volume of GWP: 2088; Nominal Refer to the Technical Data GWP=Global Warming Potential capacity Dimensions...
Need help?
Do you have a question about the UNISPLIT A++ and is the answer not in the manual?
Questions and answers