
Summary of Contents for SUNSET RES5102
- Page 1 Instruction Manual Pulse Oximeter RES5102 Manufactured for Sunset Healthcare Solutions 180 N Michigan Ave Ste 2000 IFU-00054 REV 1.01 Chicago, IL 60601 2022-01-31...
-
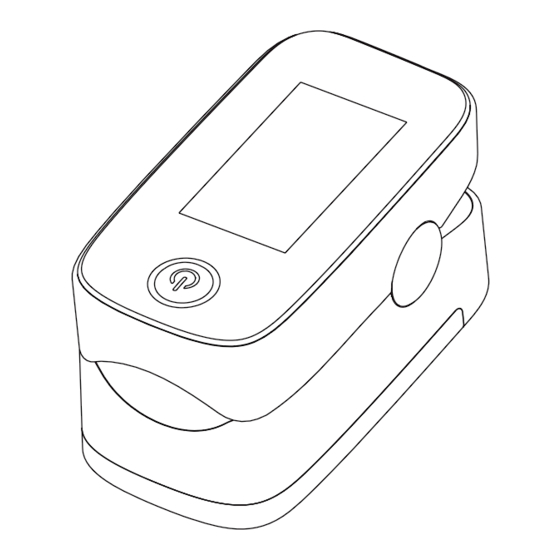
Page 2: Front View
1. Product Introduction and Operation Guide 1.1 Front View Figure 1 Front View of RES5102 1.2 Battery Installation A. Put the two AAA batteries into battery compartment in correct polarities (Figure2). B. Push the battery cover horizontally in the direction of the arrow WARNINGS: •... -
Page 3: Lanyard Installation
Figure 2 Battery Installation 1.3 Lanyard installation A. Pass the thinner end of the lanyard through the hanging hole. B. Loop the thicker end of the lanyard through the thinner end and tighten the lanyard (Figure 3). Figure 3 Lanyard Installation... -
Page 4: Before Operating
1.4 Before Operating A. Before use check and confirm that the user’s finger size is appropriate B. Before use check and confirm that the environment contains only non-combustible material, and avoid high or low temperature and humidity. Pay attention to the following: a) Avoid glare and exposure to direct sunlight. -
Page 5: Operation
Figure 4 Finger Placement Diagram 1.5 Operation A. Press the bottom of the equipment to open the probe, then insert one finger into the probe. B. Turn on the oximeter by pressing and holding the power button for about 2 seconds. C. - Page 6 On parameter interface 1 • Move”*” to the corresponding option, and hold the button to set alarm or beep to on or off. • When alarm is set to on and the measured SpO2 or PR Values go beyond the upper limit or lower limit, the oximeter gives off an alert sound.
- Page 7 Interface 1 Interface 2 Figure 5 The setting interfaces of the oximeter...
-
Page 8: Power Requirements
2. Specification 2.1 Classification Type of protection against electric shock: II (Internally powered equipment) Degree of protection against electric shock: Type BF-Applied part Operating mode : Spot checking Application: Sport use only Degree of protection against hazards of explosion: IP22 2.2 Power Requirements Specification of alkaline batteries: Two AAA (LR03) Operating current: 25-50mA... - Page 9 2.5 Environmental Specifications Temperature Temperature Operating: +50~+104°F / +10~ +40°C Storage/Transportation: -4~+140°F / -20~+60°C Humidity Operating: 15~95%, noncondensing Storage/Transportation: 10~95%, noncondensing Atmosphere Pressure Operating: 70~106kpa Storage/Transportation: 50~107.4kpa 2.6 Display Display Color: 1.3”,Blue Display content: SpO2%, Pulse Rate, PI%, Bar Graph Battery Indicator, Pulse Wave Notes: 1.
-
Page 10: Maintenance, Cleaning, Disinfection
3. Maintenance, Cleaning, Disinfection 3.1 Maintenance The equipment’s design life expectancy is about 2 years. Keep equipment and accessories free of dust and dirt, and observe the following rules: A. Please clean the equipment before use according to chapter 6.2. Remove the batteries inside the battery cassette if the equipment will not be operated for a long time. - Page 11 3.2 Cleaning Equipment should be cleaned on a regular basis. If there is heavy pollution, dust or sand in its storage environment, it should be cleaned more frequently. Before cleaning the equipment, consult your hospital’s regulations. Recommended cleaning agents are: A.
- Page 12 erosive cleaners (such as acetone or acetone-based cleaners). • If you spill liquid onto the equipment, contact your service personnel. 3.3 Disinfection Clean the pulse oximeter before disinfecting it. The recommend disinfec- tant is ethanol 70%. Disinfection steps are the same as cleaning. CAUTION •...
-
Page 13: Troubleshooting
5. Troubleshooting Trouble Possible Reason Solution The battery is Please replace depleted or almost batteries. depleted. The equipment can’t The battery installa- Install the battery over be turned on. tion is incorrect. again. The device is Please contact product damaged. distributor. - Page 14 Guidance and manufacturer´s declaration – electromagnetic emission The model RES5102 is intended for use in the electromagnetic en- vironment specified below. The customer or the user of the model RES5102 should assure that it is used in such an environment.
- Page 15 CISPR 11 interference in nearby electronic equipment. RF emissions Class B CISPR 11 The Model RES5102 is suitable for Harmonic Not appli- use in all establishments, including emissions cable domestic establishments and those...
- Page 16 Guidance and manufacturer´s declaration – electromagnetic immunity The Model RES5102 is intended for use in the electromagnetic environ- ment specified below. The customer or the user of the Model RES5102 should assure that it is used in such an environment.
- Page 17 Voltage 0% UT (100 % dips, short dip in UT ) interruptions for 0.5 cycle at and voltage 0°, 45°, 90°, variations on 135°,180°, power supply 225°, 270°, and input lines 315° IEC 61000-4-11 0% UT (100% dip in UT ) for 1 cycle at 0°...
- Page 18 Guidance and manufacturer’s declaration – electromagnetic immunity The RES5102 is intended for use in the electromagnetic environment specified below. The customer or the user of the RES5102 should assure that it is used in such an environment. Immunity IEC 60601 test...
- Page 19 where P is the maximum output power rating of the transmitter in watts (W) according to the transmitter manufacturer and d is the recommended separation distance in metres (m). Field strengths from fixed RF transmitters, as determined by an elec- tromagnetic site survey, a should be less than the compliance level in each...
- Page 20 A. The ISM (industrial, scientific and medical) bands between 0,15 MHz and 80 MHz are 6,765 MHz to 6,795 MHz; 13,553 MHz to 13,567 MHz; 26,957 MHz to 27,283 MHz; and 40,66 MHz to 40,70 MHz. The amateur radio bands between 0,15 MHz and 80 MHz are 1,8 MHz to 2,0 MHz, 3,5 MHz to 4,0 MHz, 5,3 MHz to 5,4 MHz, 7 MHz to 7,3 MHz, 10,1 MHz to 10,15 MHz, 14 MHz to 14,2 MHz, 18,07 MHz to 18,17 MHz, 21,0 MHz to 21,4 MHz, 24,89 MHz to 24,99 MHz, 28,0 MHz to...
Need help?
Do you have a question about the RES5102 and is the answer not in the manual?
Questions and answers