Table of Contents
Advertisement
Quick Links
Advertisement
Table of Contents

Summary of Contents for Agria 9700e
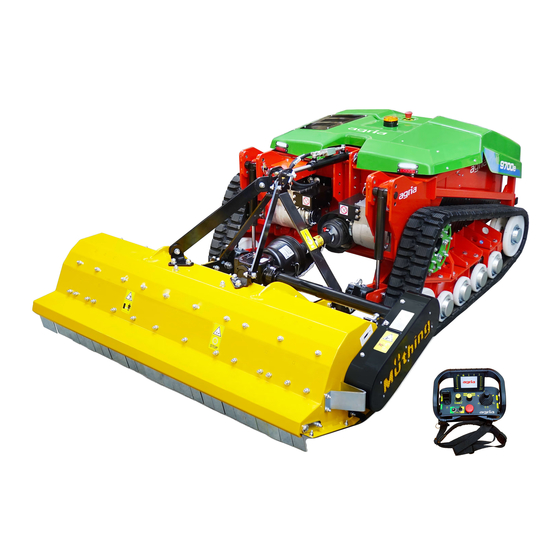
- Page 1 Translation of the original Operating Instructions Remote-controlled All-electric Tool Carrier agria 9700e 9700 111 Before commissioning please read the operating instructions and note the safety and warning information! Operating instruction No. B998010GB 11.22...
-
Page 2: Nameplate
• Spare battery and battery charger • USB flash drive for diagnostics • Original Operating Instructions • Machine identity card (in envelope on the machine) Please complete the machine identity card and return to Agria-Werke. agria 9700e... -
Page 3: Symbols
Keep children away from acid, batter- ies and chargers! Warning of hot surfaces Explosive substances Do not dispose of as domestic waste Send to recycling facility for disposal - agria-Service - = contact your agria service cen- Remote-controlled All-electric Tool Carrier agria 9700e... -
Page 4: Designation Of Parts Fig. A
Designation of parts Fig. A Legend: Leader lines refer to a directly visible component. Arrows refer to the position of functional units that are concealed in the view. Remote-controlled All-electric Tool Carrier agria 9700e... - Page 5 Cover hood rechargeable battery box Service flap Electrical box Lower maintenance flap Charging plug Three-point mounting bracket: Upper link Lower link catch hook PTO shaft with electric drive Hydraulic unit Option: Additional hydraulic connection Remote-controlled All-electric Tool Carrier agria 9700e...
-
Page 6: Table Of Contents
Remote control ................................ 56 7 Decommissioning / Disposal ..........................57 Inspection and Maintenance Overview........................58 Hydraulic diagram..............................59 Designation of parts Fig. B ............................61 Paints, Charger, Wear parts ............................. 62 Declaration of Conformity ............................63 Remote-controlled All-electric Tool Carrier agria 9700e... -
Page 7: Safety Instructions
The remote-controlled implement carrier agria The use of public transportation routes is subject to 9700e is a machine that is used to mount and oper- the Road Traffic Act in its latest version. ate approved mounted implements (intended use). - Page 8 Only work in light conditions that guarantee an ad- is too great or in the event of disturbances in the equate view of both machine and working area. transmission frequency. Always keep your distance Do not operate the machine during a thunderstorm. Remote-controlled All-electric Tool Carrier agria 9700e...
- Page 9 Keep the machine and attachments clean, to avoid mote control and on the machine - when leaving the the risk of fire. machine. Regularly check nuts and bolts for tightness and re- tighten if necessary. Remote-controlled All-electric Tool Carrier agria 9700e...
- Page 10 Several rectly when you connect hydraulic components. hours may be required to charge a completely dis- charged battery. Only use original agria battery High-pressurized hydraulic oil can penetrate chargers. your skin and cause severe injuries. Danger to life! See a doctor immediately when you are hurt.
- Page 11 Caution - hot parts! Allow the machine to cool down after use before carrying out any care and maintenance work. Marking emergency stop switch Warning of hand injuries! Do not hose down parts with water! Attachment point for lashing or lifting the machine Remote-controlled All-electric Tool Carrier agria 9700e...
-
Page 12: Technical Data
= 71 dBA when running at 3 m distance Bearing lubricant: ....................Permanent lubrication Weight (without mounted implement): ..................780 kg Cutting height adjustment: ....................50-185 mm Ground clearance: ........................50-185 mm Dimensions (mm): Remote-controlled All-electric Tool Carrier agria 9700e... -
Page 13: Devices And Operating Elements
40° (when used with heavy mounted implements already from 30°), we recommend to equip the machine with crawler tracks with field cleat profile (agria art.-no. 9620 011). Transmissions and electric motors The driving wheels (A/2) of the crawler tracks are fastened on the planetary gears (A/16). -
Page 14: Remote Control
The 'release' button activates or restarts the radio contact between the remote control and the machine. (7) Moving the hydraulic functions The analogue lever is used to operate the working height, the angles of slope and the additional hy- draulic unit of the mounted implement. (8) Mounted implement on/off Remote-controlled All-electric Tool Carrier agria 9700e... - Page 15 Moves the cursor downwards, reduces values. (20) Enter Change settings. (21) Floating position As soon as you have lifted the mounted implement, you can activate the floating position with this button. (22) Not assigned Remote-controlled All-electric Tool Carrier agria 9700e...
-
Page 16: Display On The Remote Control
(7) Residual charge of the battery in the remote control (8) Direction of rotation PTO shaft with display on/off (9) Set target speed of the PTO shaft (10) Floating position (11) Signal strength of the radio remote control Remote-controlled All-electric Tool Carrier agria 9700e... - Page 17 Check the temperatures on menu page 3 of the remote control. (10) An error message is pending. Check the error codes on page 4 of the remote control, or -agria-Service- Remote-controlled All-electric Tool Carrier agria 9700e...
- Page 18 Driving position 1 ranges up to 2.5 km/h, driving positions 2 and 3 are individually adjustable. Using the arrow keys (B/18, B/19), set the selected driving position and press Enter (B/20) to confirm. (7) Model (8) Note driving direction The arrow indicates the set driving direction. Remote-controlled All-electric Tool Carrier agria 9700e...
- Page 19 The travel speed is reduced if the temperature of a component is above the threshold for power reduction. The machine is switched off completely when a shutdown temperature is reached. Warning symbols and error codes are displayed on page 1 and 3 of the remote control. Remote-controlled All-electric Tool Carrier agria 9700e...
- Page 20 The machine is steerable again and can continue to be operated as usual. • If the machine does not continue to run, contact the -agria Customer Service- or read out the errors and report them to your dealer, see page 53.
- Page 21 The machine is thus reversing compared to the standard setting. (1) Take note of the pre-set travel direction. You can acknowledge the message with the Enter (B/20) key. (2) Schematic depiction of the travel direction Remote-controlled All-electric Tool Carrier agria 9700e...
-
Page 22: Installing And Removing Implements
Connect the drive shaft. Observe the operating instructions of the drive shaft manufacturer. Note the speed and sense of rotation specified by the manufacturer when starting the mounted implement. The mounted implement is now ready for use. Remote-controlled All-electric Tool Carrier agria 9700e... - Page 23 6. Agria flange attachment for catch hook with cap nut (AF 24) 7. Agria flange fixing screw with cap nut (AF 24) With the adapter for agria mounted implements (agria art.-no. 9755 111) you can operate agria mounted implements with your agria 9700e.
- Page 24 3.6.2 Mounted implements und accessories for mounted implements Mount the catch hook extension You can extend the lower links of the 9700e. Use the catch hook extensions (agria art.-no. 9740 131). 1. Open the nut (1) (AF24). 2. Remove the screw (2).
- Page 25 3 Devices and Operating Elements Mounting/exchanging the upper link extension You can install an upper link of long design (agria art.-no. 9740 111) on the 9700e. The hydraulic lines are pressurised. Hydraulic oil could leak when uncoupling the upper link.
- Page 26 3.6.3 Kat. 1 connection dimensions With the agria 9700e, you can also use many mounted implements that are equipped with a KAT.1 mount- ing frame. The distance of the lower link mounting brackets ranges from 710 mm to 740 mm.
-
Page 27: Instructions For Correct Conditioning Of The Rechargeable Batteries For The Remote Control
The remote control is powered by a Li-Ion rechargeable bat- tery. The charger as well as a spare rechargeable battery nec- essary for this are enclosed. Only use original agria or autec rechargeable batter- ies. An insufficient battery charge level leads to errors in the radio transmission. -
Page 28: Attachment Points
As soon as the machine no longer needs to be lifted, mount the hood and tighten the five half-round screws TX30 hand- tight. Never stay under a suspended load and never pass under- neath it. Danger to life! Remote-controlled All-electric Tool Carrier agria 9700e... -
Page 29: Commissioning And Operation
Do not use any conductive tools to clean the plug of soiling. There is a risk of electric shock. Do not make any changes to the battery charger settings! Only store the machine in uninhabited and non-serviced rooms. Remote-controlled All-electric Tool Carrier agria 9700e... - Page 30 If the bottom LED (3) shines red, the amperage made available by the battery charger is displayed in Ampere (A). If the LED shines green, the charge quantity with which the machine was charged is displayed in Ampere hours (Ah). Code 6C1 indicates the charging program. Remote-controlled All-electric Tool Carrier agria 9700e...
- Page 31 If the bottom LED (3) shines red, the amperage made available by the battery charger is displayed in Ampere (A). If the LED shines green, the charge quantity with which the machine was charged is displayed in Ampere hours (Ah). Code 6C1 indicates the charging program. Remote-controlled All-electric Tool Carrier agria 9700e...
-
Page 32: Starting The Machine - Basic Actions
• Observe the sense of rotation and the speed the manufac- turer prescribes for the mounted implement. Carefully read the operating instructions of the remote control and of the mounted implement before use. Remote-controlled All-electric Tool Carrier agria 9700e... -
Page 33: Starting The Machine
PTO shaft drive. This takes approx. 5 sec. The radio system shows the machine data on the display. Wait until all fields of the display are filled with the respective data. The machine is now ready for use. Remote-controlled All-electric Tool Carrier agria 9700e... -
Page 34: Working With The Machine
The zero turn is only possible if you specify a direction and the speed simultaneously with the joystick (B/1). To do so, move the joystick (B/1) all the way to the right or left and somewhat up or down. Remote-controlled All-electric Tool Carrier agria 9700e... - Page 35 When the floating position is activated it may take a moment until the hydraulic system reacts to a com- mand given via the analogue lever (B/7). Remote-controlled All-electric Tool Carrier agria 9700e...
- Page 36 Note that the crawler tracks with field cleat profile re- act more strongly to extreme situations than crawler tracks with standard profile. Keep your hands away from the crawler track mecha- nisms while the machine is in operation. Remote-controlled All-electric Tool Carrier agria 9700e...
-
Page 37: Stopping The Machine
Attention: The braking distance of the machine de- pends on the ambient conditions. This is particularly im- portant when you drive downhill! The parking brake takes effect when the machine has come to a standstill. Remote-controlled All-electric Tool Carrier agria 9700e... -
Page 38: Maintenance And Repair
When working with oil, fuel and grease, wear suitable protective gloves and use skin care products if necessary. Remote-controlled All-electric Tool Carrier agria 9700e... -
Page 39: General
LED of the remote control (B/10) will flash rapidly. On no account continue working with the machine if the EMERGENCY STOP switches are not functioning correctly. In that case contact: - agria-Service - Remote-controlled All-electric Tool Carrier agria 9700e... -
Page 40: Moving The Machine
(1). Driving without safety brake is dangerous to life! You must absolutely ensure that the brake is re- mounted with the screws (1) after maintenance. Remote-controlled All-electric Tool Carrier agria 9700e... -
Page 41: Lithium-Ion Rechargeable Battery
If the capacity of the rechargeable battery is too low or if its performance decreases due to its runtime, you can have it replaced at your -agria- specialist workshop-. In addition, contact the -agria- cus- tomer service to organise the return of the used rechargeable battery. -
Page 42: Wire Mesh Filter Electrical Box
When exchanging the mounted implement, some hydraulic oil may remain inside the mounted implement. Check the oil level more often when the mounted implements are frequently ex- changed to ensure that there is always enough liquid in the reservoir. Remote-controlled All-electric Tool Carrier agria 9700e... -
Page 43: Lubrication Points
Only carry out maintenance work on the hydraulic system when the machine has cooled down. Lubrication points Lubrication points Lubricate the lift cylinder of the upper link and the two lift cylin- ders of the lower link every 25 operating hours with a grease gun. Remote-controlled All-electric Tool Carrier agria 9700e... -
Page 44: Crawler Tracks
Insufficient track tension is the main cause of loosing the tracks. Intensive sun radiation during work leads to a significant elongation of the crawler tracks and thus to a reduction of the track tension. Remote-controlled All-electric Tool Carrier agria 9700e... - Page 45 Repeat the instructions above, until you have checked the en- tire length of both crawler tracks. Have the crawler tracks changed if they are damaged. The crawler tracks must only be changed by a specialist work- shop or by - agria-Service -. Remote-controlled All-electric Tool Carrier agria 9700e...
-
Page 46: V-Belt For Mounted Implement Drive
(AF24). 4. Once the desired V-belt tension (4) is reached, fix the car- riage and close the maintenance flap. 5. Once more secure the screw (3) by lightly tightening it. Remote-controlled All-electric Tool Carrier agria 9700e... - Page 47 4. Replace the V-belts (4) should they be damaged. 5. Tension the V-belts (4), fix the carriage and close the maintenance flap. 6. Replacement of the belts should only be carried out by a specialist workshop or by - agria-Service -. Remote-controlled All-electric Tool Carrier agria 9700e...
-
Page 48: Remote Control
The expected service life of a rechargeable bat- tery is 3 to 6 years. This also depends on the conditioning. Further information on the remote control Remote control Remote-controlled All-electric Tool Carrier agria 9700e... -
Page 49: Cleaning
• Do not cover the machine with a plastic sheet or similar. The moisture accumulating underneath can lead to greater corrosion. Remote-controlled All-electric Tool Carrier agria 9700e... -
Page 50: Labels
5 Maintenance and Repair 5.12 Labels Worn and missing warning and mandatory symbols for operating and safety instructions must be replaced. Remote-controlled All-electric Tool Carrier agria 9700e... - Page 51 Warning symbol for hot parts 105 021 Warning of hand injuries 105 958 Spraying water is prohibited 104 224 Sign Caution! Voltage 112372 Sign Do not open 112373 Sign Caution! Hand injuries 112174 Sign Emergency Stop switch Remote-controlled All-electric Tool Carrier agria 9700e...
-
Page 52: Troubleshooting And Remedies
Observe the safety instructions! Have faults on the machine that make a major intervention neces- sary always repaired by a specialist agria workshop that has the necessary tools. Any improper interven- tion can cause damage to the machine or override safety equipment, thus increasing the risk of injury when using the machine. -
Page 53: Usb Diagnostics
USB diagnostics In case you get errors displayed on the remote control, you can read and save the errors on the controller. You can send this data to your agria dealer for diagnostic purposes. To do this, proceed as follows: •... - Page 54 - agria customer service - 0x4203 High temperature dis- - agria customer service - charging 0x2000 Overcurrent - agria customer service - 0x2001 Short circuit - agria customer service - 0x3000 Overvoltage - agria customer service - Remote-controlled All-electric Tool Carrier agria 9700e...
- Page 55 - agria customer service - fault 0xFF05 Pack parallel error - agria customer service - The complete list of error codes can be found in the repair manual or at: - agria customer service - Remote-controlled All-electric Tool Carrier agria 9700e...
-
Page 56: Remote Control
Return the operating elements to idle position. If the control flashes four times dur- to the commands A1-A8, L1-L8, H1-H8 and message remains ing startup. SAFETY is active or defective. - agria-Service - See remote control operating instructions RC = remote control Remote-controlled All-electric Tool Carrier agria 9700e... -
Page 57: Decommissioning / Disposal
Do not dispose of as domestic waste. If you have any questions regarding the disposal of rechargeable batteries, please contact the -agria customer service-. Remote-controlled All-electric Tool Carrier agria 9700e... -
Page 58: Inspection And Maintenance Overview
= maintenance tasks that are to be performed by a specialist workshop = maintenance tasks that are performed by a specialist workshop during the first maintenance = once a year = every 6 years = pay attention to execution Remote-controlled All-electric Tool Carrier agria 9700e... -
Page 59: Hydraulic Diagram
Electric motor / hydraulic pump (1.2) 4/3-way valve (2) Lower link lift cylinder (3) Upper link lift cylinder (4) Throttle check valve (5) Lock valve (6) Quick-action coupling upper link (7) Quick-action coupling optional connection Remote-controlled All-electric Tool Carrier agria 9700e... - Page 60 Hydraulic oil escaping under high pressure can penetrate your skin and cause severe injuries. Danger to life! To avoid injuries, use suitable devices when you try to locate leaks or contact the agria specialised workshop! Remote-controlled All-electric Tool Carrier agria 9700e...
-
Page 61: Designation Of Parts Fig. B
Moving the selected hydraulic functions Mounted implement on/off Hydraulic control circuits Green LED, radio connection EMERGENCY STOP switch Red LED Cruise control Drift Warning lamps Escape Menu - page change "up" "down" Enter Floating position Not assigned Remote-controlled All-electric Tool Carrier agria 9700e... -
Page 62: Paints, Charger, Wear Parts
112 337 Bio hydraulic oil Container 110 394 V-belt for mounted implement drive attention to version! 104 961 Crawler track Piece 9620 011 Crawler track field cleat profile Pair 105 469 Remote control battery Remote-controlled All-electric Tool Carrier agria 9700e... -
Page 63: Declaration Of Conformity
Declaration of Conformity Remote-controlled All-electric Tool Carrier agria 9700e... - Page 64 Agria-Werke GmbH Bittelbronner Straße 42 D-74219 Möckmühl Tel.: +49 6298 39-0 Fax: +49 6298 39-111 E-mail: info@agria.de Internet: www.agria.de Your local agria specialist dealer:...
Need help?
Do you have a question about the 9700e and is the answer not in the manual?
Questions and answers