Advertisement
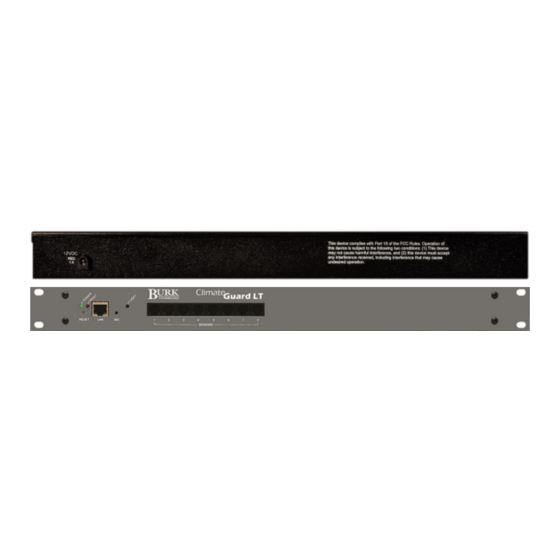
ClimateGuard LT
Environmental Monitor
QUICK START GUIDE
This Quick Start Guide will show you how to set up the Climate Guard LT in five simple steps. For detailed configuration and
setup information, visit www.burk.com/downloads, select the Climate Guard support page and download the Climate
Guard & Plus-X EM Installation and Operation Manual.
1
UNPACKING
In addition to this Quick Start Guide, you will find the
following in each package:
(1) Climate Guard LT Unit
(1) Ethernet Cable
(1) Power Cord
2
NETWORK SETUP
1. Plug in the power cord and connect the Climate Guard LT to your network via the rear-panel
Ethernet connector.
2. If your network supports DHCP functionality, a dynamic IP address will be assigned to the unit. If
DCHP is not supported on your network skip ahead to step 3 now. To access the unit, launch a web
browser and enter the hostname CLIMATEGUARDLT/ in the browser's address field then skip to step
5. Be sure to include the forward-slash symbol in the hostname.
3. If your network doesn't support DHCP, the Climate Guard LT will assign itself the default IP address
192.168.0.100. You will need to connect a PC with a web browser to the Climate Guard LT at this IP
address before you can change the network settings on the unit. One way to do this is to unplug
your PC from any other LAN and connect your PC to the Climate Guard LT via a network switch or a
cross-over ethernet cable. Then configure your PC with a compatible IP address so that you may
connect to the Climate Guard LT. Running Windows, the following steps will allow you to configure
your PC with a compatible IP address:
1
From the Control Panel, select Network Connections.
2
Double-click the icon for the network you will be using.
3
On the General tab, click Properties.
4
Click Internet Protocol version 4 "TCP/IPv4".
4. Open a browser and enter the Climate Guard LT default IP address of 192.168.0.100.
5. The web page will prompt you to set a password for the administrator account.
6. The login screen will then be displayed. Enter the username admin and the password you supplied
above.
7. The first screen displayed after initial login is an abbreviated Network page requiring you to enter a
static IP address for the Climate Guard LT. Check with your network administrator for an available
IP address that is not within the DHCP address range.
5
Select Properties.
6
Choose "Use the following IP address" and enter an IP address of
192.168.0.x, where x is any valid address location except 100.
7
Enter Subnet Mask 255.255.255.0
8
Click OK.
PHONE:
(978) 486 - 3711
M-F 9am - 5pm EST
8. Your browser will be automatically redirected to the new IP address. If your initial
connection was made without DHCP, your PC should now be restored to its prior
network settings and both the PC and the Climate Guard LT should be connected
to the normal LAN.
9. Log in to the Climate Guard LT at its new static IP address, go to the Settings tab
on the web page and select Network to change the network information.
Add the following network information and select save to confirm the changes.
a. NetBIOS/Hostname – This name should be changed from its default value of
CLIMATEGUARDLT so conflicts will not occur if multiple devices of the same
model are installed on the network.
b. IP Address – This field will display the static IP address you entered in a
previous step.
c. Subnet Mask – Check with your network administrator otherwise the factory
default setting can be used.
d. Gateway – Check with your network administrator otherwise the factory
default setting can be used.
e. HTTP Port – Check with your network administrator. The factory default setting
is port 80.
f. Primary and Backup DNS - Check with your IT administrator otherwise the value
8.8.8.8 can be used.
10. To verify communication, open a command prompt on your computer and ping
the address you just assigned to the unit to ensure it is correctly configured.
7 Beaver Brook Rd.
Littleton, MA 01460
www.Burk.com
CUSTOMER SUPPORT
EMAIL:
IL:
support@burk.com
Advertisement
Table of Contents

Summary of Contents for BURK Technology ClimateGuard LT
- Page 1 ClimateGuard LT 7 Beaver Brook Rd. Littleton, MA 01460 Environmental Monitor QUICK START GUIDE www.Burk.com This Quick Start Guide will show you how to set up the Climate Guard LT in five simple steps. For detailed configuration and setup information, visit www.burk.com/downloads, select the Climate Guard support page and download the Climate Guard &...
- Page 2 External sensors connect to the front panel Sensor inputs. The pinouts for the front panel Sensor inputs are follows: Sensor input cabling may be extended using RJ-12 Couplers and additional Sensor Cables, available from Burk Technology. Digital sensors may be daisy chained using Burk part numbers: RJ-12 Splitter, Sensor Cable, and Sensor Sensor Cable...
Need help?
Do you have a question about the ClimateGuard LT and is the answer not in the manual?
Questions and answers