
Related Manuals for Delphi 15336034


Summary of Contents for Delphi 15336034
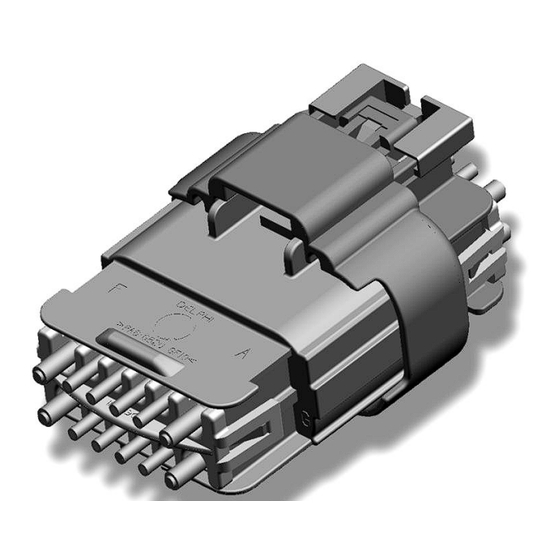
- Page 1 12 - 16-way Connector Family for GT 150-280 Terminal System SEALED Assembly / Disassembly REV 04, May 2013 15326085 15326566 15336051 15336056 15358989 15453981...
-
Page 2: Table Of Contents
The information contained in these assembly instructions is subject to alteration without prior notice and does not represent any obligation on the part of DELPHI. All information is correct at the time of releasing. Reprinting or translation is not permitted without written permission from DELPHI. -
Page 3: Exploded View
Seal PART-NO. see page 4 PART-NO. see page 4 PART-NO. see page 4 Tab Housing 12-way PART-NO. see page 4 GT 150 Male Terminals GT 280 Male Terminals PART-NO. see page 4 delphi.com/connectors REV 04 – May 15, 2013 3/36... -
Page 4: List Of Components
(pre-assembled parts) PART-NO. amount Receptacle Hsg 12-way+Seal+PLR+CPA 15326940 Receptacle Hsg 14-way+Seal+PLR+CPA 15336038 Receptacle Hsg 16-way+Seal+PLR+CPA 15326566 Tab Hsg 12-way+PLR 15336034 Tab Hsg 14-way+PLR 15336042 Tab Hsg 16-way+PLR 15326085 * - These Part-No.'s are for reference delphi.com/connectors REV 04 – May 15, 2013... - Page 5 Receptacle Hsg 12-way+Seal+PLR 15326939 Receptacle Hsg 14-way+Seal+PLR 15336037 Receptacle Hsg 16-way+Seal+PLR 15326084 Tab Hsg 12-way+PLR 15336034 Tab Hsg 14-way+PLR 15336042 Tab Hsg 16-way+PLR 15326085 * - These Part-No.'s are for reference delphi.com/connectors REV 04 – May 15, 2013 5/36...
-
Page 6: View Of Versions
Assembly Manuals 12 - 16 way Connector Family for GT 150-280 Terminal System (sealed) VIEW OF VERSIONS Male 12-way Female 12-way PN 15336034 PN 15326940 Male 14-way Female 14-way PN 15336042 PN 15336038 Male 16-way Female 16-way PN 15326085 PN 15326566 delphi.com/connectors... - Page 7 Assembly Manuals 12 - 16 way Connector Family for GT 150-280 Terminal System (sealed) VIEW OF VERSIONS Male 12-way Female 12-way PN 15336034 PN 15326939 Male 14-way Female 14-way PN 15336042 PN 15336037 Male 16-way Female 16-way PN 15326085 PN 15326084 delphi.com/connectors...
-
Page 8: Female Sequence
12 - 16 way Connector Family for GT 150-280 Terminal System (sealed) RECEPTACLE HOUSING 12-WAY PRE-ASSEMBLY INSERTING SEAL Step F-1: Insert Seal into the Receptacle Housing 12-way Seal is pushed up to resistance Step F-1 completed. delphi.com/connectors 8/36 REV 04 – May 15, 2013... -
Page 9: Step F-2: Inserting Plr
RECEPTACLE HOUSING 12-WAY INSERTING PLR Step F-2: Using assembly tool (see tool examples on page 32) insert PLR until it is correctly closed in pre-position-windows. PLR is locked in pre-position-windows Step F-2 completed. delphi.com/connectors 9/36 REV 04 – May 15, 2013... -
Page 10: Step F-3: Inserting Cpa
12 - 16 way Connector Family for GT 150-280 Terminal System (sealed) RECEPTACLE HOUSING 12-WAY INSERTING CPA Step F-3: Insert CPA until it is locked in pre-assembled position CPA is locked in pre-position Step F-3 completed. delphi.com/connectors 10/36 REV 04 – May 15, 2013... -
Page 11: Assembly
Terminal is fully engaged under the flex locking arm Optional Plug Seal correctly inserted Ø M = 4.5 +/- 0.15 mm Ø P = 1.5 +/- 0.15 mm (see Drawing No. 12124630) Step F-4 completed. delphi.com/connectors 11/36 REV 04 – May 15, 2013... -
Page 12: Step F-5: Inserting Gt 280 Female Terminals
Terminal is fully engaged under the flex locking arm Optional Plug Seal inserted Ø M = 6.35 +/- 0.15 mm Ø P = 3.1 +/- 0.15 mm (see Drawing No. 12124630) Step F-5 completed. delphi.com/connectors 12/36 REV 04 – May 15, 2013... -
Page 13: Step F-6: Inserting Tpa
The TPA is only an option. It must be ordered separately. Step F-6: Insert TPA onto Receptacle Housing 12-way until it is correctly locked. correctly locked one of two TPA locks Step F-6 completed. delphi.com/connectors 13/36 REV 04 – May 15, 2013... -
Page 14: Step F-7: Pushing Plr
Step F-7: Push the PLR to the end position to secure te Terminals locking arms. Terminal locking arm is locked through PLR in end PLR is locked position in end-position-windows Step F-7 completed. delphi.com/connectors 14/36 REV 04 – May 15, 2013... -
Page 15: Step F-8: Electrical Test
Assembly Manuals 12 - 16 way Connector Family for GT 150-280 Terminal System (sealed) RECEPTACLE HOUSING 12-WAY ELECTRICAL TEST Step F-8 Perform electrical test. Check assembly and dimensional correctness. delphi.com/connectors REV 04 – May 15, 2013 15/36... -
Page 16: Male Sequence
Using assembly tool (see tool examples on page 32) insert PLR until it is correctly closed in pre-position-windows (PLR should be inserted to a depth of 12,8 mm). PLR is locked in pre-position-windows Step M-1 completed. delphi.com/connectors 16/36 REV 04 – May 15, 2013... -
Page 17: Assembly
Terminal is fully engaged under the flex locking arm Optional Plug Seal correctly inserted Ø M = 4.5 +/- 0.15 mm Ø P = 1.5 +/- 0.15 mm (see Drawing No. 12124630) Step M-2 completed. delphi.com/connectors 17/36 REV 04 – May 15, 2013... -
Page 18: Step M-3: Inserting Gt 280 Male Terminals
Terminal is fully engaged under the flex locking arm Optional Plug Seal inserted Ø M = 6.35 +/- 0.15 mm Ø P = 3.1 +/- 0.15 mm (see Drawing No. 12124630) Step M-3 completed. delphi.com/connectors 18/36 REV 04 – May 15, 2013... -
Page 19: Step M-4: Inserting Tpa
The TPA is only an option. It must be ordered separately. Step M-4: Insert TPA onto Tab Housing 12-way until it is correctly locked. correctly locked one of two TPA locks Step M-4 completed. delphi.com/connectors 19/36 REV 04 – May 15, 2013... -
Page 20: Step M-5: Pushing Plr
12 - 16 way Connector Family for GT 150-280 Terminal System (sealed) TAB HOUSING 12-WAY PUSHING PLR Step M-5: Push the PLR to the end position. correctly PLR is locked secured in end-position- Terminal lock windows Step M-5 completed. delphi.com/connectors 20/36 REV 04 – May 15, 2013... -
Page 21: Step M-6: Electrical Test
Assembly Manuals 12 - 16 way Connector Family for GT 150-280 Terminal System (sealed) TAB HOUSING 12-WAY ELECTRICAL TEST Step M-6 Perform electrical test. Check assembly and dimensional correctness. delphi.com/connectors REV 04 – May 15, 2013 21/36... -
Page 22: Connecting Sequence
12 - 16 way Connector Family for GT 150-280 Terminal System (sealed) CONNECTORS CONNECTING CONNECTING CONNECTORS Step C-1: Connect Tab Housing 12-way with Receptacle Housing 12-way. Tab Housing correctly closed lock Step C-1 completed. delphi.com/connectors 22/36 REV 04 – May 15, 2013... -
Page 23: Step C-2: Locking Cpa
Push the CPA to the end position to secure the connectors lock arm. Locking arm is correctly secured CPA is pushed up to resistance (it hits the Connector lock arm) Step C-2 completed. THE END OF ASSEMBLY / CONNECTING SEQUNCE delphi.com/connectors 23/36 REV 04 – May 15, 2013... -
Page 24: Disassembly Sequence
Assembly Manuals 12 - 16 way Connector Family for GT 150-280 Terminal System (sealed) delphi.com/connectors REV 04 – May 15, 2013 24/36... - Page 25 12 - 16 way Connector Family for GT 150-280 Terminal System (sealed) CONNECTORS DISCONNECTING UNLOCKING CPA Step D-1: Move the CPA to its pre-assembled position using removal tool 10804886. Step D-1 completed. delphi.com/connectors 25/36 REV 04 – May 15, 2013...
- Page 26 12 - 16 way Connector Family for GT 150-280 Terminal System (sealed) CONNECTORS DISCONNECTING CONNECTORS Connector lock arm Step D-2: Push (arrow 1) lock arm and still pushing disconnect (arrow 2) Male and Female Connector. Step D-2 completed. delphi.com/connectors 26/36 REV 04 – May 15, 2013...
- Page 27 12 - 16 way Connector Family for GT 150-280 Terminal System (sealed) TAB HOUSING 12-WAY MALE DISASSEMBLY REMOVING PLR Step D-3: Remove the PLR completely using removal tool 10803527. Step D-3 completed. delphi.com/connectors 27/36 REV 04 – May 15, 2013...
- Page 28 12 - 16 way Connector Family for GT 150-280 Terminal System (sealed) TAB HOUSING 12-WAY REMOVING TPA Step D-4: Unlock (arrow 1) TPA using removal tool 10804886 and remove (arrow 2) completely. Step D-4 completed. delphi.com/connectors 28/36 REV 04 – May 15, 2013...
- Page 29 10714738 straight into the channel of cavity, deflect the locking arm to unseat the Terminal and gently pull on the cable to remove (operation 2) GT 280 Male Terminal from the Tab Housing 12-way. Step D-5 completed. delphi.com/connectors 29/36 REV 04 – May 15, 2013...
- Page 30 10757862 straight into the channel of cavity, deflect the locking arm to unseat the Terminal and gently pull on the cable to remove (operation 2) GT 150 Male Terminal from the Tab Housing 12-way. Step D-6 completed. delphi.com/connectors 30/36 REV 04 – May 15, 2013...
- Page 31 12 - 16 way Connector Family for GT 150-280 Terminal System (sealed) RECEPTACLE HOUSING 12-WAY FEMALE DISASSEMBLY REMOVING PLR Step D-7: Remove the PLR completely using removal tool 10803527. Step D-7 completed. delphi.com/connectors 31/36 REV 04 – May 15, 2013...
- Page 32 12 - 16 way Connector Family for GT 150-280 Terminal System (sealed) RECEPTACLE HOUSING 12-WAY REMOVING TPA one of two TPA locks Step D-8:Unlock (arrow 1) TPA using removal tool 10804886 and remove (arrow 2) completely. Step D-8 completed. delphi.com/connectors 32/36 REV 04 – May 15, 2013...
- Page 33 10714738 straight into the channel of cavity, deflect the locking arm to unseat the Terminal and gently pull on the cable to remove (operation 2) GT 280 Female Terminal from the Receptacle Housing 12-way. Step D-9 completed. delphi.com/connectors 33/36 REV 04 – May 15, 2013...
- Page 34 10757862 straight into the channel of cavity, deflect the locking arm to unseat the Terminal and gently pull on the cable to remove (operation 2) GT 150 Female Terminal from the Receptacle Housing 12-way. Step D-10 completed. THE END OF ASSEMBLY / DISASSEMBLY INSTRUCTIONS delphi.com/connectors 34/36 REV 04 – May 15, 2013...
-
Page 35: Table Of Tools
Removal tool for PLR removal 10803527 Removal tool for CPA and TPA removal 10804886 Alternative removal tool for GT150/280 Male and Female Terminals 12094429 Help tool for blind plug seal assembly 10915402 delphi.com/connectors REV 04 – May 15, 2013 35/36... -
Page 36: Revisions
REV 03 E-catalog version created Jan 20, 2012 Added PNs for version without CPA . REV 04 May 15, 2013 Added blind plug seal assembly and help tool. DEV: TCK KR PL delphi.com/connectors REV 04 – May 15, 2013 36/36...
Need help?
Do you have a question about the 15336034 and is the answer not in the manual?
Questions and answers