Table of Contents
Advertisement
Quick Links
Advertisement
Table of Contents

Related Manuals for AlliedStar AS 100

Summary of Contents for AlliedStar AS 100
- Page 3 Notice The information in this document is subject to change. Neither Alliedstar nor any of its subsidiaries shall be liable for errors contained herein or for incidental damages in conjunction with the furnishing, performance, or use of this material. No part of this publication may be reproduced without the permission of Alliedstar.
-
Page 4: Table Of Contents
Scanning the Upper and Lower Jaw ..26 Status Indicator Overview ......3 Scanning the Buccal Bite Registration .29 AS 100 Holder Overview ........3 Refining and Checking the 3D Model ...30 AS 100 Packing List ........4 Completing and Saving the 3D Model .31 AS 100 Software Overview ....5... -
Page 5: Safety Information
WARNING: Warns you to avoid injury to yourself or others by following the safety instructions precisely. CAUTION: Alerts you to a condition that might cause serious damage. Important: Alerts you to a condition that might cause problems. Tip: Provides extra information and tips. AS 100 User Manual: Installation and Operation... -
Page 6: As 100 Overview
AS 100 Overview AS 100 is designed to acquire 3D models in the followings: Upper jaw Lower jaw Buccal bite registration AS 100 Components AS 100 consists of the following parts: 1. Reusable tip 2. Start / stop scan button... -
Page 7: Status Indicator Overview
The scanner goes into sleep mode when put into the holder or left idle for 10 seconds. To use it again, take it out of the holder or pick it up and press any button on the scanner. AS 100 User Manual: Installation and Operation... -
Page 8: As 100 Packing List
AS 100 Packing List Part Quantity Scanner handpiece Reusable tip Holder set Screw pack for holder AS 100 User Manual: Installation and Operation AS 100 User Manual: Safety, Regulatory and Technical Specifications AS 100 Overview... -
Page 9: As 100 Software Overview
ScanPro Interface Overview The AS 100 scanner operates with ScanPro software. The ScanPro interface enables you to acquire 3D models in two ways: Partial arch scan: Several teeth in the preparation area on both the upper and lower jaws, and buccal ... -
Page 10: Toolbar Overview
Lower Jaw button: Acquires a 3D image of the lower jaw. Buccal Bite Registration button: Acquires a 3D image of the bite. Switch Upper/Lower Jaw button: Changes the acquisition mode from upper to lower or vice versa, if you accidentally scan teeth on the wrong jaw. AS 100 Software Overview... - Page 11 Delete button: Delete all models from the current case. Quadrant Snapshot button: Displays a preview of five 2D images showing different views of the model. Transparency button: Set the transparency of the scanned model. AS 100 User Manual: Installation and Operation...
- Page 12 Bottom view Return to the up-level toolbar (icon on the right) Snapshot button: Takes a snapshot of the 3D model as it appears on your screen. Intraoral Camera button: Enables you to select 2D intraoral images. AS 100 Software Overview...
- Page 13 Option menu button: Enables you to access Import/Export scan data, Scan history, Preference and About dialogs. Scanner Status Icons Scanner is not connected Scanner is in sleep mode Scanner is connecting Scanner is in the holder Scanner is overheating Scanner tip is not detected AS 100 User Manual: Installation and Operation...
- Page 14 Scanner is in pause state AS 100 Software Overview...
-
Page 15: Option Menu Overview
Preference Dialog Overview The Preferences dialog enables you to select the software and scanner settings. AS 100 User Manual: Installation and Operation... - Page 16 Implant cut out diameter: Set the diameter of the automatic cut out areas in implant mode, it is recommended to choose a value slightly larger than the diameter of the scan body used. Preparation cut out diameter: Set the diameter of the automatic cut out areas in preparation scan AS 100 Software Overview...
- Page 17 UI element size: Select the size of interface icons to adapt to different screen resolutions. Monochrome color: Select the color when displaying the 3D model in monochrome. Jaw/Bite switch: Select the style of jaw/bite switch. AS 100 User Manual: Installation and Operation...
-
Page 18: About Dialog Overview
When this option is enabled, the user can customize the number of days and the path to save the scan history. Create support file: Export software and firmware logs. About Dialog Overview The About dialog displays software version, firmware version and scanner serial number information. AS 100 Software Overview... - Page 19 AS 100 User Manual: Installation and Operation...
-
Page 20: Setting Up The Scanner
Setting Up the Scanner Setting Up the Scanner To set up the scanner, follow these steps: Visit www.allied-star.com and download the installation file and user manual according to the product model. Double-click the software installation file SetupScanPro_x.x.x.x.exe (where x.x.x.x represents the internal version number of the ScanPro software) Choose a language from the drop-down list and click Ok to install Follow the instructions on the screen to complete the installation... -
Page 21: Using The Scanner Holder
Place the base of the desktop holder on the desktop, and fix the holder bracket on the base with screws. Choose an appropriate length and fix the USB cable to the end of the base of the desktop holder. AS 100 User Manual: Installation and Operation... -
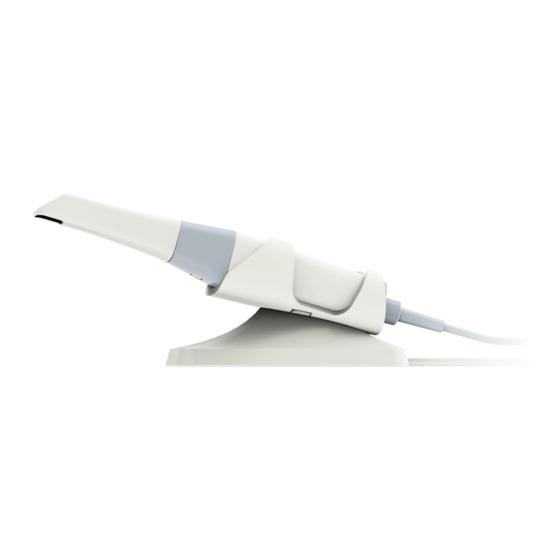
Page 22: Installing The Wall Mount Holder
Place the scanner on the desktop holder as shown. Installing the Wall Mount Holder To use the holder as a wall mount holder, follow these steps: Method 1 Select an area that you can access easily. Insert screws through the holes in the holder bracket to affix it to a solid surface. ... - Page 23 Select an area that you can access easily. Fix the screws to a solid surface. Hang the holder to the screws through the holes on the back of the holder base. AS 100 User Manual: Installation and Operation...
- Page 24 If the holder is not properly installed, there is a risk that the holder can fall off the wall, resulting in damage to the scanner. Setting Up the Scanner...
-
Page 25: Getting Started
In the ScanPro window, click Login in the title bar to display the login window. Click the "Sign up" button to register the organization, and complete the email verification. Type your Alliedstar DataHub account information in the username and password fields, Click the Log in button. -
Page 26: Audio Prompts
Click the Option menu button and select Preferences Customize the configuration options. You can now start acquiring 3D models. Audio Prompts Scanning sound When the Enable scanning sound option is enabled, your computer will play a continuous sound when you are successfully scanning. -
Page 27: Preparing The Teeth
For detailed information on cleaning, disinfection and sterilization, please refer to the AS 100 User Manual: Safety, Regulatory and Technical Specifications. Avoid any liquid from leaking into the air outlet near the tip mount or the air inlet at the rear of the scanner (see the figure below), otherwise the scanner may be damaged. -
Page 28: Starting Scanning
Make sure the lens window at the base of the scanner is clean by wiping it with a moist, lint-free cloth or lens tissue. Slide the tip onto the scanner as shown below. Starting Scanning To start scanning, place the tip of the scanner on the surface of the tooth to stabilize the scanner and press the Start Scan button. -
Page 29: Scanning Protocol
It is recommended to start the first sweep from the occlusal surface, you should start with the first molar. The second sweep can scan both the lingual and buccal sides, and the third scan covers the opposite side of the second sweep. AS 100 User Manual: Installation and Operation... -
Page 30: Acquiring A 3D Model Using The Common Scan Workflow
Acquiring a 3D Model Using the Common Scan Workflow The common scan workflow (default workflow) allows you to scan either a partial or full arch. For either type of scan, you should scan upper jaw, lower jaw, and buccal bite registration. Once this basic information has been scanned, other scan types (such as scan body scanning) can be used to acquire other information. - Page 31 It is recommended to scan these areas until the holes disappear. When the occlusal surface scan is complete, scan the lingual or buccal surface of the teeth in the arch. AS 100 User Manual: Installation and Operation...
- Page 32 When the lingual or buccal scan is completed, scan the opposite side of the arch. Re-dry the teeth as appropriate throughout the acquisition process. If you need to remove soft-tissue artifacts, mismatches, or unwanted views during the acquisition, click the tool, then draw a curve that covers the region to be removed on the 3D model.
-
Page 33: Scanning The Buccal Bite Registration
The example below shows a buccal bite registration. You can use the toolbar on the left side to switch between the scanned occlusion views, or delete the scanned occlusion views for rescanning. AS 100 User Manual: Installation and Operation... -
Page 34: Refining And Checking The 3D Model
You can scan one or two buccal bite registrations. It is recommended to scan one on the left side and one on the right side of the patient’s mouth. After scanning the buccal bite registrations, rotate the model and zoom the view to ensure that ... -
Page 35: Completing And Saving The 3D Model
To complete the scan and save the 3D model, follow these steps: Click the Finish button and the following page will be displayed. If you entered patient information in the previous step, it will be displayed on this page. AS 100 User Manual: Installation and Operation... - Page 36 Complete the patient information, if necessary, you can add some attachments to the case. Click the Upload to cloud button to upload the case and 3D model data to DataHub. Click the Save to file system button to save the case and 3D model data to the ...
-
Page 37: Acquiring A 3D Model Using The Scan Body Workflow
Press the mode button on the scanner to select the upper jaw scan mode Place the tip of the scanner on the surface of the tooth to stabilize the scanner and press the AS 100 User Manual: Installation and Operation... - Page 38 Start Scan button. Wait until a 3D image appears on the 3D model display screen, and then slowly move it along the arch at 0-5mm from the teeth. The image will be automatically scanned and displayed on the 3D model display area. Slowly move the tip of the scanner along the occlusal surface to scan the remaining teeth in ...
- Page 39 Press the mode button on the scanner to select the lower jaw scan mode Repeat steps 3 to 6 until the lower jaw scan is completed. Check whether there are obvious holes on the 3D model and rescan if necessary. AS 100 User Manual: Installation and Operation...
-
Page 40: Scanning The Buccal Bite Registration
When you confirm that the 3D model of the upper and lower jaw is complete, continue with the buccal bite registration acquisition. Scanning the Buccal Bite Registration To acquire a buccal bite registration, follow these steps: On the ScanPro interface, select the Buccal Bite Registration acquisition mode Press the mode button on the scanner to select the buccal bite registration mode Place the tip of the scanner into the buccal side in the patient’s mouth, then rotate the tip to... -
Page 41: Marking The Implant Areas
You can click and hold the middle mouse button to rotate the 3D model when using tools such as Cut , Lock and Mark tooth Click the Return button to quit Mark tooth tool. AS 100 User Manual: Installation and Operation... -
Page 42: Installing And Scanning The Scan Body
Installing and Scanning the Scan Body After installing the scan body, follow the steps below to scan the scan body: After making the implant areas, click the Config Scan button at the bottom of the ScanPro interface. Click the Add scan body button in the pop-up window. Click the Scan Body button below. - Page 43 "Implant cut out diameter" option to fit the scan body you choose. After the adjustment, the change will take effect the next time you open the software. AS 100 User Manual: Installation and Operation...
-
Page 44: Refining And Checking The 3D Model
Start the scanner and scan the part of the scan body areas that has been cut out. Start the scan body scanning from the surface 1-2 teeth away from the scan body, so that the system can recognize the 3D structure. ... - Page 45 Click the Quadrant Snapshot button to open the Quadrant Snapshot window, which displays multiple views of the model. Click the Occlusion analysis button to analyze the occlusion space. AS 100 User Manual: Installation and Operation...
-
Page 46: Completing And Saving The 3D Model
If you find obvious holes when checking the 3D model, click the Scan button and rescan the areas to fill the holes. Repeat steps 1 through 3 until you are satisfied with the 3D model. Completing and Saving the 3D Model To complete the scan and save the 3D model, follow these steps: Click the Finish button and the following page will be displayed. -
Page 47: Acquiring A 3D Model Using The Preparation Workflow
Import scan data. 2. Select the .scan file you want to import, and click Open. Wait for the software to import the data, and the 3D model will be displayed after the import is complete. AS 100 User Manual: Installation and Operation... -
Page 48: Scan The Preparation Areas
3. Click the Mark tooth button, and then click in the center of the occlusal surface of the preparation. A 3D ball will display on the occlusal surface indicating a preparation area. 4. Rotate the 3D model if necessary, and mark all the preparation areas. You can click and hold the middle mouse button to rotate the 3D model when using tools such as Cut , Lock... - Page 49 Click the Add preparation button in the pop-up window Click the Preparation button below AS 100 User Manual: Installation and Operation...
- Page 50 Check whether the part that the software automatically cut out from the preparation areas is sufficient to contain the preparation. If the cut out part is not enough to contain the preparation, you can click the cut button, and cut off the necessary part to cover the preparation.
-
Page 51: Refining And Checking The 3D Model
Refining the 3D model allows you to obtain higher accuracy data for further processing. To refine the 3D model, follow these steps: Click the Refine button, the refining progress bar will be displayed. Depending on your computer configuration, the refining process may take several minutes. AS 100 User Manual: Installation and Operation... - Page 52 After the refining is complete, manipulate the refined 3D model using the following methods: Click the Common scan button to view the 3D model before preparing. Click the Preparation button to view the 3D model after preparing. Click and hold on the 3D model to rotate it.
-
Page 53: Completing And Saving The 3D Model
If you entered patient information in the previous step, it will be displayed on this page. Complete the patient information, if necessary, you can add some attachments to the case. AS 100 User Manual: Installation and Operation... - Page 54 Click the Upload to cloud button to upload the case and 3D model data to DataHub. Click the Save to file system button to save the case and 3D model data to the specified local directory. Acquiring a 3D Model Using the Preparation Workflow...
-
Page 55: Maintenance
The removable scanner tips can be high-level disinfected for up to 50 cycles. After 50 cycles, discard the tip. The removable scanner tips can be autoclaved for up to 60 cycles. After 60 cycles, discard the tip. See AS 100 User Manual: Safety, Regulatory and Technical Specifications for more information. For detailed information on cleaning, disinfection and sterilization, please refer to the AS 100 User Manual: Safety, Regulatory and Technical Specifications. -
Page 56: Troubleshooting
Troubleshooting AS 100 Troubleshooting Instructions Problem Description Action There is mismatching and overlap on Remove mismatched data and excessive tissue using the Cut tool the 3D model. and rescan. After bite registration, there is a gap or Delete the incorrect bite view, and rescan. - Page 57 2. Click the "Scanner is not connected" icon to try to reconnect. 3. Disconnect the USB connector of the scanner from the computer, and then reconnect it to the computer. The scanner will automatically power on and connect. AS 100 User Manual: Installation and Operation...
- Page 58 Troubleshooting...
Need help?
Do you have a question about the AS 100 and is the answer not in the manual?
Questions and answers