Table of Contents
Advertisement
Quick Links
Refer to the service manual in the GSPN(see rear cover) for the more information.
BASIC
: CM1069
MODEL
: CM1089
MODEL CODE : CM1089A/XEU
CONTENTS
1. Precaution
2. Specifications
3. Operating Instructions
4. Disassembly and Reassembly
5. Alignment and Adjustments
6. Troubleshooting
. Wiring Diagrams
. Reference
Advertisement
Table of Contents

Related Manuals for Samsung CM1089A/XEU


Summary of Contents for Samsung CM1089A/XEU
- Page 1 BASIC : CM1069 MODEL : CM1089 MODEL CODE : CM1089A/XEU CONTENTS 1. Precaution 2. Specifications 3. Operating Instructions 4. Disassembly and Reassembly 5. Alignment and Adjustments 6. Troubleshooting . Wiring Diagrams . Reference Refer to the service manual in the GSPN(see rear cover) for the more information.
-
Page 2: Table Of Contents
• Contents 1. Precaution ................... . 3 1-1 Safety precautions . -
Page 3: Precaution
1. Precaution... -
Page 4: Safety Precautions
1. Precaution Follow these special safety precautions . Although the microwave oven is completely safe during ordinary use, repair work can be extremely hazardous due to possible exposure to microwave radiation, as well as potentially lethal high voltages and currents . 1-1 Safety precautions ( All repairs should be done in accordance with the 13. -
Page 5: Special High Voltage Precautions
1. Precaution 1-2 Special High Voltage Precautions High Voltage Warning Do not attempt to measure any of the high voltages --this includes the filament voltage of the H. V. Capacitor magnetron . High voltage is present during any cook cycle . Before touching any components or wiring, always unplug the oven and discharge the high voltage capacitor (See Figure 1-1) -
Page 6: Specifications
2. Specifications 2-1 Table of Specifications Model Items Model Basic Model New Model Name CM1069 CM1089A Power Consumption Microwave 1,600W 1,600W Output Power 230V : 1,050W / 240V : 1,100W 230V : 1,050W / 240V : 1,100W (IEC-705 TEST PROCEDURE) (IEC-705 TEST PROCEDURE) Operating Frequency 2,450MHz... -
Page 7: Operating Instructions
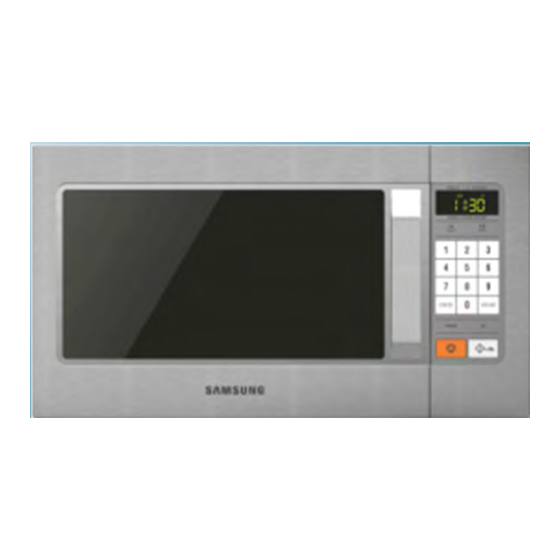
3. Operating Instructions 3-1 Control Panel 1. DISPLAY 7. DEFROST BUTTON 2. POWER LEVEL BUTTON 8. SOUND BUTTON 3. NUMBER BUTTONS 9. DOUBLE QUANTITY BUTTON 10. +30S BUTTON 4. CHECK BUTTON 5. PROGRAMME BUTTON 11. START BUTTON 6. STOP/CANCEL BUTTON... -
Page 8: Features & External Views
3. Operating Instructions 3-2 Features & External Views HANDLE VENTILATION HOLES OVEN LAMP DISPLAY DOOR LATCHES DOOR CERAMIC PLATE SAFETY INTERLOCK CONTROL HOLES PANEL 336mm 412mm 517mm... -
Page 9: Disassembly And Reassembly
4. Disassembly and Reassembly 4-1 Replacement of Magnetron, Motor Assembly and Lamp Remove the magnetron including the shield case, permanent magnet, choke coils and capacitors (all of which are contained in one assembly) . Disconnect all lead wires from the magnetron and lamp . Remove a screw securing air cover . - Page 10 4. Disassembly and Reassembly 4-1 Replacement of Magnetron, Motor Assembly and Lamp (Continued) 4. Remove screws securing the magnetron to the wave guide . Take out the magnetron very carefully . Remove screws from the back panel . Take out the fan motor .
-
Page 11: Replacement Of High Voltage Transformer
4. Disassembly and Reassembly 4-1 Replacement of Magnetron, Motor Assembly and Lamp (Continued) Remove the oven lamp from hole of air cover . NOTE1: When removing the magnetron, make sure that its antenna does not hit any adjacent parts, or it may be damaged . - Page 12 4. Disassembly and Reassembly 4-2 Replacement of High Voltage Transformer (Continued) Remove the mounting bolts . Replace the High Voltage Transformer After replace, reconnect the leads correctly and firmly. PRECAUTION Servicemen should remove their watches whenever working close to or replacing the magnetron . PRECAUTION There exists HIGH VOLTAGE ELECTRICITY with high current capabilities in the circuits of the HIGHVOLTAGE TRANSFORMER secondary and filament terminals.
-
Page 13: Replacement Of Door Assembly
4. Disassembly and Reassembly 4-3 Replacement of Door Assembly Parts Disassembly Photo Explaination Insert flat screwdriver into the gap between Door “A” and Door “C” to remove Removal of Door “C” . Be careful when handling Door Door “C” “C” because it is fragile .Then remove the door assembly . -
Page 14: Reassembly Test
4. Disassembly and Reassembly 4-3 Replacement of Door Assembly (Continued) 4-3-1 Reassembly Test After replacement of the defective component parts of the door, reassemble it and follow the instructions below for proper installation and adjustment so as to prevent an excessive microwave leakage. - Page 15 4. Disassembly and Reassembly 4-5 Replacement of Drive Motor (Continued) Lift out the motor . When replacing the motor, be sure to remount it in the correct position . NOTE : The shaft of motor should fit tip coupler. 6. When reassemble a drive motor cover . give a turn in a COVER FIXING SCREW : 180°...
-
Page 16: Replacement Of Control Circuit Board
4. Disassembly and Reassembly 4-6 Replacement of Control Circuit Board 4-6-1 Removal of Control Box Assembly DIsconnect the connectors from the control box assembly . Remove screws securing the control box assembly . Remove the circuit tail of switch membrane from circuit board . -
Page 17: Alignment And Adjustments
5. Alignment and Adjustments PRECAUTION 1. High voltage is present at the high voltage terminals during any cook cycle . 2. It is neither necessary nor advisable to attempt measurement of the high voltage . 3. Before touching any oven components or wiring, always unplug the oven from its power source and discharge the high voltage capacitor . -
Page 18: High Voltage Diode
5. Alignment and Adjustments 5-5 High Voltage Diode Isolate the diode from the circuit by disconnecting its leads . With the ohm-meter set at the highest resistance scale, measure across the diode terminals . Reverse the meter leads and read the resistance . A meter with 6V, 9V or higher voltage batteries should be used to check the front-to back resistance of the diode (otherwise an infinite resistance may be read in both directions). -
Page 19: Output Power Of Magnetron
5. Alignment and Adjustments 5-8 Output Power of Magnetron PRECAUTION MICROWAVE RADIATION PERSONNEL SHOULD NOT ALLOW EXPOSURE TO MICROWAVE RADIATION FROM MICROWAVE GENERATOR OR OTHER PARTS CONDUCTING MICROWAVE ENERGY . The output power of the magnetron can be measured by performing a water temperature rise test . Equipment needed : •... -
Page 20: Procedure For Measurement Of Microwave Energy Leakage
5. Alignment and Adjustments 5-10 Procedure for Measurement of Microwave Energy Leakage Pour 275±15cc of 20±5°C(68±9°F) water in a beaker which is graduated to 600cc, and place the beaker in the center of the oven . Start to operate the oven and measure the leakage by using a microwave energy survey meter . -
Page 21: Error Code Numbering Rule
5. Alignment and Adjustments 5-13 Error Code Numbering Rule ERROR CODE NUMBERING RULE is applied to a microwave oven and an oven .(CMO, OTR, Grill, Convection, Commercial etc .) All sensors and devices have their own number . ex) Gas Sensor = 1, Temp . Sensor = 2, . . . Of each device, No .1 and No .2 refer to “Open Error”... - Page 22 5. Alignment and Adjustments Weight Sensor Error Code Gas Sensor Error Case (E-1X) E-31 Open (When value of HEX is above “FF” for 5 seconds) E-32 Short In case the initial value of HEX is under “14” for 30 seconds while a weight sensor in E-33 operation .
-
Page 23: Troubleshooting
6. Troubleshooting PRECAUTION 1. CHECK GROUNDING BEFORE CHECKING FOR TROUBLE. 2. BE CAREFUL OF THE HIGH VOLTAGE CIRCUIT . 3. DISCHARGE THE HIGH VOLTAGE CAPACITOR . 4. WHEN CHECKING THE CONTINUITY OF THE SWITCHES OR TRANSFORMER, DISCONNECT ONE LEAD WIRE FROM THESE PARTS AND THEN CHECK CONTINUITY WITHOUT THE POWER SOURCE ON . - Page 24 6. Troubleshooting 6-1 Electrical Malfunction Parts Cause Diagnosis Remedy If a small amount of food is heated for a long To increase the oven 1) Too small a load time, period of microwave may turn off during water into water into Microwave operation .
- Page 25 6. Troubleshooting 6-1 Electrical Malfunction (Continued)
- Page 26 6. Troubleshooting 6-1 Electrical Malfunction (Continued)
- Page 27 6. Troubleshooting 6-1 Electrical Malfunction (Continued)
-
Page 28: Unsatisfactory Cooking
6. Troubleshooting 6-2 Unsatisfactory Cooking Parts Cause Diagnosis Remedy Check the terminals with a multimeter to see 1) Open cathode Replace magnetron . of magnetron if the heater circuit is open . Check the H . V . Diode for continuity in the reverse and normal directions using meter . -
Page 29: Wiring Diagrams
7. Wiring Diagrams 7-1 Wiring Diagrams (This Document can not be used without Samsung’s authorization) MAGNETRON HIGH VOLTAGE DIODE TO CHASSIS PRIMARY SWITCH HIGH VOLTAGE CAPACITOR DOOR SENSING SWITCH MONITOR SWITCH BOTTOM CENTER SYMBOL COLOR ORANGE HIGH VOLTAGE WHITE TRANSFORMER... - Page 30 © Samsung Electronics Co ., Ltd . March . 2013 Printed in Korea...
Need help?
Do you have a question about the CM1089A/XEU and is the answer not in the manual?
Questions and answers