Table of Contents
Advertisement
Quick Links
Advertisement
Table of Contents

Related Manuals for Acer B193W


Summary of Contents for Acer B193W
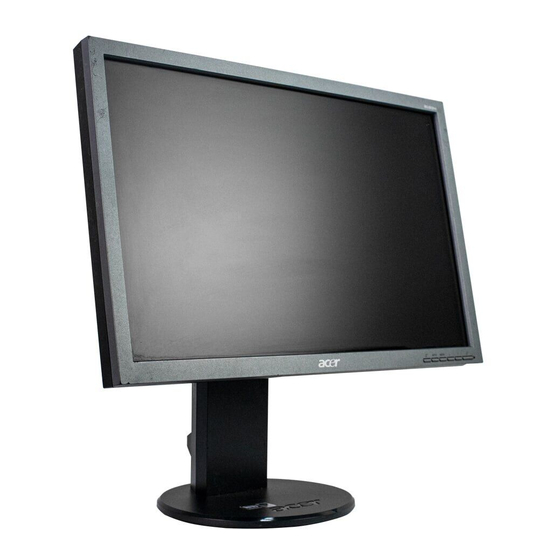
- Page 1 Acer B193W Service Guide...
- Page 2 Service Guide Version and Revision Version Release Date Revision History TPV model T97AMLD8W7ABDN/ Mar.-28-2008 Initial Release T97AMLD8W7ABHN...
- Page 3 Any Acer Incorporated software described in this manual is sold or licensed "as is". Should the programs prove defective following their purchase, the buyer (and not Acer Incorporated, its distributor, or its dealer) assumes the entire cost of all necessary servicing, repair, and any incidental or consequential damages resulting from any defect in the software.
- Page 4 DIFFERENT part number code to those given in the FRU list of this printed Service Guide. You MUST use the list provided by your regional Acer office to order FRU parts for repair and service of customer machines. Warning: (For FCC Certified Models) Note: This equipment has been tested and found to comply with the limits for a Class B digital device, pursuant to Part 15 of the FCC Rules.
- Page 5 Precautions Do not use the monitor near water, e.g. near a bathtub, washbowl, kitchen sink, laundry tub, swimming pool or in a wet basement. Do not place the monitor on an unstable trolley, stand, or table. If the monitor falls, it can injure a person and cause serious damage to the appliance.
-
Page 6: Table Of Contents
Table Of Contents Chapter 1 Monitor Features ………………………………………… Introduction ……………………………………… Electrical Requirements ……………………………………… LCD Monitor General Specification ……………………………………… LCD Panel Specification ……………………………………… Support Timing ……………………………………… Monitor Block Diagram ……………………………………… Main Board Diagram ……………………………………… Software Flow chart ……………………………………… Main Board Layout ………………………………………... -
Page 7: Chapter 1 Monitor Features
This will alleviate the growing health concerns. It is also a space saving design, allowing more desktop space, and comparing to the traditional CRT monitor, it consumes less power and gets less weight in addition MTBF target is 50k hours or more. Chart of B193W Panel TPM190A1(PW01) V001... -
Page 8: Electrical Requirements
Electrical Requirements Standard Test Conditions All tests shall be performed under the following conditions, unless otherwise specified. Ambient light Dark room (< 1 cd/m Viewing distance 40 cm for LCD performance, 20 cm for LCD failures Warm up time >30 minutes Analog Input signal 700 mVss Control temperature... -
Page 9: Lcd Monitor General Specification
LCD Monitor General Specification Driving system TFT Color LCD Active Display Area 408.24 (H) x 255.15 (V) Pixel pitch 0.2835(H) x 0.2835(W) LCD Panel Contrast Ratio 800 : 1 Response time Luminance of White 300(Typ.) cd/㎡ Separate Sync. H/V TTL Input H-Frequency 30kHz –... -
Page 10: Lcd Panel Specification
LCD Panel Specification TPM190A1(PW01) is a 19” wide TFT Liquid Crystal Display module with 2ch-LVDS interface. This module supports 1440 x 900 WXGA+ mode and can display 16.7M colors. The inverter module for Backlight is not built in. General Specifications... - Page 11 Function Block Diagram Electrical Characteristics...
- Page 12 Optical Specifications...
-
Page 13: Support Timing
Support Timing Horizontal Vertical Nominal Nominal Nominal Sync Sync Pixel Mode Resolution Total Frequency Freq. Polarity Polarity Clock +/- 0.5kHz +/- 1 Hz (MHz) 640x480@60Hz 800 x 525 31.469 59.940 25.175 640x480@72Hz 832 x 520 37.861 72.809 31.500 640x480@75Hz 840 x 500 37.500 75.00 31.500... -
Page 14: Monitor Block Diagram
Monitor Block Diagram The LCD MONITOR will contain a main board, a power board, and key board which house the flat panel control logic, brightness control logic and DDC. The power board will provide AC to DC Inverter voltage to drive the backlight of panel and the main board chips each voltage. -
Page 15: Main Board Diagram
Main Board Diagram Crystal LCD Interface (X401) (CN301) 14.31818MHZ Key Board U401 Control Scalar IC TSUM5PFHL-LF (CN402) (Include MCU ,ADC, OSD) · H sync V sync D-Sub Connector Connector (CN101) (CN102) -
Page 16: Software Flow Chart
Software Flow Chart... - Page 17 Remark: 1) MCU initializes. 2) Is the EEPROM blank? 3) Program the EEPROM by default values. 4) Get the PWM value of brightness from EEPROM. 5) Is the power key pressed? 6) Clear all global flags. 7) Are the AUTO and SELECT keys pressed? 8) Enter factory mode.
-
Page 18: Main Board Layout
Main Board Layout Symbol Description Symbol Description CN402 WAFER CN102 DVI 24PIN CONNECTOR U103/U104/U105/ CN701 WAFER 9P RIGHT ANELE PITCH IC AZC099-04S SOT23-6L U106/U107 CN301 CONNECTOR U403 IC M24C04-WMN6TP SO8 CN101 D-SUB 15PIN U402 SST25LF020A-33-4C-SAE U401 IC TSUM5PFHL-LF U701 AP1117E33LA... -
Page 19: Installation
Installation To install the monitor on your host system, please follow the steps below: Steps 1.Connect the video cable A: Make sure both the monitor and computer are switched off. B: Connect the VGA video cable to the computer. C: Connect the digital cable (only for dual-input models). (1) Make sure both the monitor and computer are switched off. -
Page 20: Attaching/Removing The Base
Attaching/Removing The Base Install: Align the base with the stand and push the base towards the top of the monitor, and then rotate the base clockwise. Tighten the screw clockwise. Remove: Reverse the steps to remove the base. Screen Position Adjustment In order to optimize the best viewing position, you can adjust the height/tilt/swivel/pivot of the monitor. - Page 21 Tilt Please see the illustration below for an example of the tilt range. Swivel With the built-in pedestal, you can swivel the monitor for the most comfortable viewing angle. Monitor Pivot Adjust height to the top position before rotation the monitor. Rotate clockwise until the monitor stops at 90°.
-
Page 22: Chapter 2 Operating Instructions
Chapter 2 Operating Instructions Press the power button to turn the monitor on or off. The other control buttons are located at front panel of the monitor. By changing these settings, the picture can be adjusted to your personal preferences. •... -
Page 23: Ecolor Management (Osd)
eColor Management (OSD) -
Page 24: How To Adjust A Setting
How to Adjust a Setting... - Page 25 Adjusting the picture...
-
Page 27: Logo
Logo When the monitor is power on, the LOGO will be showed in the center, and disappear slowly. How To Optimize The DOS-Mode Plug And Play Plug & Play DDC2B Feature This monitor is equipped with VESA DDC2B capabilities according to the VESA DDC STANDARD. It allows the monitor to inform the host system of its identity and, depending on the level of DDC used, communicate additional information about its display capabilities. -
Page 28: Chapter 3 Machine Disassembly
Chapter 3 Machine Disassembly This chapter contains step-by-step procedures on how to disassemble the monitor for maintenance. Disassembly Procedure 1. Remove the HINGE ASSEMBLY as the following indicator. (Fig 1) Fig 1 2. Remove the back cover and bezel. (Fig 2) Fig 2... - Page 29 3. Remove the lamp connectors and the screw. (Fig 3-4) Fig 3 Fig 4 4. Remove the screws to remove the panel. Put attention to the LVDS cable.(Fig 5) Fig 5 5. Remove the screws to remove the main board and power board.( Fig 6) Fig 6...
-
Page 30: Chapter 4 Troubleshooting
Chapter 4 Troubleshooting This chapter provides troubleshooting information for the B193W: 1. No Power No power Press power key and look if the picture is normal Please reinsert and make sure the AC of 100-240 is normal Reinsert or check the power section Measure U701 Pin2=3.3V,... - Page 31 2. No Picture (LED is orange) No picture The button if under X401 oscillate Replace X401 control waveform is normal Check Correspondent Check reset circuit of component U401 is normal Measure U701 Pin2=3.3V, Replace U401 Check X401 oscillate waveform is normal Replace U701 Replace X401 Check HS/VS from...
- Page 32 3. Panel Power Circuit White screen Measure Q301 base X401 oscillate waveform is normal is low level? Replace X401 Check CN301 is solder Check reset circuit of and Q301,Q302 is OK? U401 is normal Check Correspondent Check Correspondent component. component. Replace U401 Replace PANEL...
- Page 33 4. Key Board OSD is unstable or not working Is Key Pad Board connecting normally? Connect Key Board Replace Button Switch Is Button Switch normally? Replace Key Board Is Key Pad Board normally? Check Main Board...
- Page 34 5. Power Board No power No power Check to CN902 Pin10,11 =14V and Pin6,7 = 5 V Check Interface board Check AC line volt 120V or 220V Change F901, Check BD901, L901, IC901 Check the voltage of C905(+) Check bridge retified circuit Check start voltage for the Pin2 of IC901 Change IC901 Check the auxiliary voltage is smaller than 20V...
- Page 35 W/LED No Backlight Check the 14V voltage input Check the adapter Check ON/OFF signal Check Interface board Check IC801 pin12=12V? Change Q805.Q808 or Q810 Check the pin9&10 of IC801 have PWM wave Change Q801/Q804/Q811/Q812 Replace IC801 Check the resonant wave of pin3 &...
-
Page 36: Chapter 5 Connector Information
Chapter 5 Connector Information The following figure shows the connector locations on the monitor: D-SUB connector... - Page 37 DVI Connector...
-
Page 38: Exploded Diagram
NOTE: To scrap or to return the defective parts, you should follow the local government ordinance or regulations on how to dispose it properly, or follow the rules set by your regional Acer office on how to return it. Exploded Diagram (Model: B193W) - Page 39 Part List Above picture show the description of the following component. Item Picture Description HINGE ASSEMBLY MAIN FRAME Panel...
- Page 40 Power Board Main Board FFC CABLE...
-
Page 41: Chapter 7 Schematic Diagram
Chapter 7 Schematic Diagram Main Board FB102 MVCC VGA_B+ R105 100R 1/16W 5% C102 DSUB_B+ BEAD 0.047uF H_Sy nc R102 0R05 1/10W 5% R103 1K 1/16W 5% R108 C105 DSUB_H V_Sy nc R104 1K 1/16W 5% 5pF/50V DSUB_V D109 75R 1/16W 5% R106 R107 C103... - Page 42 CN301 PA[0..9] PB[0..9] PA[0..9] PB[0..9] LVB3P LVB0M RXO0- LVA3P LVB3M LVB0P RXO0+ LVA3M LVBCKP LVB1M RXO1- LVACKP LVBCKM LVB1P RXO1+ LVACKM LVB2P LVB2M RXO2- LVA2P LVB2M LVB2P RXO2+ LVA2M LVB1P LVA1P LVB1M LVBCKM RXOC- LVA1M LVB0P LVBCKP RXOC+ LVA0P LVB0M LVB3M RXO3- LVA0M...
- Page 43 CMVCC VCC1.8 C710 0.1uF 16V FB702 300 OHM CN701 VCC3.3 C705 C704 SM340A D701 MVCC 0.1uF/16V 100uF25V CMVCC Q702 CMVCC KN2907AS R705 BKLT-VBRI R709 BKLT-EN R710 NC 10K 1/16W 5% PANEL_ID# PANEL_ID# 2 Volume# Q703 R706 Volume# Mute KN2907AS BKLT-VBRI Mute 2 adj_BACKLIGHT 2 VCC3.3...
- Page 44 VCC1.8 VDDC VDDP FB403 VCC3.3 FB401 AVDD VCC3.3 FB402 VPLL VCC3.3 VCC1.8 0 OHM +-5% 1/8W C412 300OHM 300OHM VCC3.3 C409 C408 C403 C404 C406 Del C209 C402 C410 C411 0.1uF/16V C407 0.1uF/16V 10uF/50V 0.1uF/16V C405 0.1uF/16V 10uF/50V 0.1uF/16V VDVI VMPLL VPLL AVDD...
- Page 45 Power board 100 OHM 1/4W R918 R941 R945 R946 R944 1K 1/4W 1K 1/4W 1K 1/4W 1K 1/4W +14V 100 OHM 1/4W R919 L904 C912 1.1uH ZD902 BD901 0.001uF RLZ TE-11 16B 2KBP08M 100 OHM 1/4W R920 C922 C917 C918 680uF/25V 680uF/25V R943...
- Page 46 C838 1500pF T801 D805 R817 R821 POWER X'FMR BAW56 10K 1/10W 1% 1K 1/10W 1% CN801 CONN R856 F801 15 OHM 1/4W C819 0R05 1/4W 0.0022uF +14V C801 C802 C824 D810 5pF/6KV 470uF/25V 0.1uF R801 D801 R819 R855 1.5K OHM 1% 1/10W BAV99 R804 3.6K OHM 1% 1/10W...
- Page 47 +5V_Audio FB602 add FB602 +5V_Audio BEAD FB601 C602 BEAD R608 100uF/25V CN601 change V type 0R05 1/8W U601 IC with Heat-sink(90G6258-2) CN602 EUA6021AIIT1 add C617 C618 R606 10K 1/10W 5% C606 0.47uF/16V CN601 R607 10K 1/10W 5% C607 0.47uF/16V LOUT+ LIN+ LOUT+ PHONEJACK...
- Page 48 Key board ZD001 UDZSNP5.6B add ZD001 and ZD002 for ESD solution LED001 LED CN001 ZD002 UDZSNP5.6B LBADC1 R001 2K OHM 1/16W LBADC2 LED_BLUE# POWER_Key LED_RED# LED_BLUE# LED_RED# R002 2K OHM 1/16W C001 C002 C003 C004 C005 CONN R003 1K 1/16W 5% MENU LBADC1 VOL-...
Need help?
Do you have a question about the B193W and is the answer not in the manual?
Questions and answers