Table of Contents
Advertisement
Available languages
Available languages
Quick Links
Advertisement
Chapters
Table of Contents

Subscribe to Our Youtube Channel
Related Manuals for A.O. Smith ITS Series


Summary of Contents for A.O. Smith ITS Series
- Page 1 Indirecte boiler Dual coil indirect calorifier Ballon double échangeur ITS 400/500/600/750/1000 Installatie-, Gebruikers- en Servicehandleiding Installation, User and Service Manual Manuel d'installation, d'utilisation et d'entretien...
- Page 2 Farnborough Hampshire 5500 AB Veldhoven www.aosmith.co.uk GU14 ONR UK The Netherlands A.O. Smith siège France A.O. Smith siège social Europe 14, allée Charles Pathé De Run 5305 T : 01 3975 5140 18000 Bourges Boîte postale 70 info@aosmith.nl France 5500 AB Veldhoven www.aosmith.fr...
- Page 3 Inhoudsopgave / Table of contents / Table des matières Deze handleiding bestaat uit 3 talen. 1 - NL Handleiding ITS 400 t/m 1000 ................... 5 2 - EN Manual ITS 400 trough 1000 .................. 21 3 - FR Notice ITS 400 à 1000 .................... 37 This manual consists of 3 languages.
- Page 4 Installatie-, Service- en Gebruikershandleiding...
- Page 5 A.O. Smith Water Products Company. A.O. Smith Water Products Company behoudt zich het recht voor de specificaties zoals vermeld in deze handleiding te wijzigen.
- Page 6 Installatie-, Service- en Gebruikershandleiding...
-
Page 7: Table Of Contents
Onderhoud voorbereiden ..................17 Waterzijdig onderhoud .................... 17 Garantie ......................... 19 Garantie algemeen ....................19 Garantie tank ......................19 Voorwaarden installatie en gebruik ................. 19 Uitsluitingen ......................20 Omvang garantie ....................20 Claims ........................20 Verplichtingen voor A.O. Smith ................20 0312734_ITS_400-1000_NLENFR_V4.0, 2019-03-08... - Page 8 Installatie-, Service- en Gebruikershandleiding...
-
Page 9: Technische Specificaties
Technische specificaties 1.1 Vloerbelasting Houd in verband met het gewicht van het toestel rekening met de maximale vloerbelasting, zie de tabel (1.6 "Algemene gegevens"). 1.2 Watersamen- Het toestel is bedoeld om drinkwater op te warmen. Het drinkwater moet voldoen aan stelling de regelgeving voor drinkwater voor menselijke consumptie. -
Page 10: Algemene Gegevens
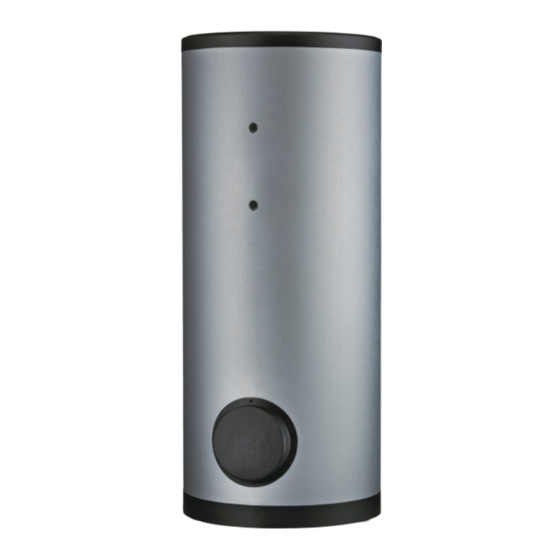
1.6 Algemene gegevens Algemene gegevens Eenheid ITS 400 ITS 500 ITS 600 ITS 750 ITS 1000 Inhoud 1007 Ledig gewicht Maximale vloerbelasting 1347 Energie-efficiëntieklasse (Energie Label) Stilstandsverlies Maximale werkdruk tank kPa (bar) 1000 (10) 1000 (10) 1000 (10) 1000 (10) 1000 (10) Maximale werkdruk warmtewisselaars kPa (bar) - Page 11 Doorsnede vooraanzicht toestel IMD-1294 R0.0 0312734_ITS_400-1000_NLENFR_V4.0, 2019-03-08...
- Page 12 Installatie-, Service- en Gebruikershandleiding...
-
Page 13: Installatie
Installatie 2.1 Aansluitschema De figuur geeft het aansluitschema weer. Dit schema wordt gebruikt in de paragraven waarin het eigenlijke aansluiten wordt beschreven. Installatie Schema Legenda 2. inlaatcombinatie (verplicht) 3. T&P-ventiel (aanbevolen) 4. afsluiter (aanbevolen) 5. terugslagklep (verplicht) 6. circulatiepomp (optioneel) A. - Page 14 Let op Een inlaatcombinatie is verplicht. Monteer deze zo dicht mogelijk bij het toestel. Waarschuwing Tussen inlaatcombinatie en het toestel mag nooit een afsluiter of terugslagklep geplaatst worden. Warmwaterzijdig 2.2.2 Zie (B) in het aansluitschema (2.1 "Aansluitschema"). Opmerking Isolatie van lange warmwaterleidingen voorkomt onnodig energieverlies. 1.
-
Page 15: Vullen En Aftappen
Vullen en aftappen Installatie Schema Legenda 2. inlaatcombinatie (verplicht) 3. T&P-ventiel (aanbevolen) 4. afsluiter (aanbevolen) 5. terugslagklep (verplicht) 6. circulatiepomp (optioneel) A. koudwatertoevoer B. warmwaterafvoer C. circulatieleiding F. ingang warmtewisselaar G. uitgang warmtewisselaar IMD-0383 R2.0 3.1 Vullen Om het toestel te vullen gaat u als volgt te werk: 1. -
Page 16: Aftappen
3.2 Aftappen 1. Sluit de afsluiter in de warmwaterleiding. 2. Sluit de toevoerkraan van de inlaatcombinatie (2). 3. Open de aftapkraan. 4. Belucht het toestel (of installatie) zodat het helemaal kan leeglopen. Installatie-, Service- en Gebruikershandleiding... -
Page 17: Onderhoud
Onderhoud Let op Onderhoud mag alleen door een erkend service- en onderhoudsmonteur worden uitgevoerd. Bij elke onderhoudsbeurt dient de boiler waterzijdig onderhouden te worden. Het onderhoud dient in de volgende volgorde te worden uitgevoerd. 1. Onderhoud voorbereiden 2. Waterzijdig onderhoud 3. - Page 18 Werkvolgorde: 1. Draai de bouten van de reiningsopening los. 2. Verwijder de deksel en de pakking. 3. Inspecteer de tank en verwijder de losse kalkaanslag en verontreinigingen. 4. Indien de kalkaanslag niet handmatig verwijderd kan worden, dient ontkalkt te worden met een ontkalkingmiddel. Neem contact op met de leverancier/fabrikant voor een advies over het te gebruiken ontkalkingmiddel.
-
Page 19: Garantie
Indien binnen één jaar na de oorspronkelijke installatiedatum van een door A.O. Smith geleverde boiler, na onderzoek en ter uitsluitende beoordeling van A.O. Smith, blijkt dat een deel of onderdeel, met uitzondering van de tank, niet of niet juist functioneert ten gevolge van fabricage- en/of materiaalfouten, zal A.O. Smith dit deel of onderdeel vervangen of repareren. -
Page 20: Uitsluitingen
A.O. Smith Water Products Company verkoopt. Het onderzoek van de boiler bedoeld in de artikelen 1 en 2 zal plaatsvinden in een laboratorium van A.O. Smith. 5.7 Verplichtingen voor Met betrekking tot haar boilers respectievelijk de ter vervanging geleverde (delen of A.O. - Page 21 Any brand names mentioned in this manual are registered trademarks of their Trademarks respective owners. A.O. Smith Water Products Company accepts no liability for claims from third parties Liability arising from unauthorised use, use other than that stated in this manual, and use other than in accordance with the General Conditions registered at the Chamber of Commerce.
- Page 22 Installation, Service and User Manual...
- Page 23 Water-side maintenance ..................33 Warranty ........................ 35 General warranty ....................35 Tank warranty ......................35 Conditions for installation and use ................35 Exclusions ....................... 36 Scope of warranty ....................36 Claims ........................36 Obligations of A.O. Smith ..................36 0312734_ITS_400-1000_NLENFR_V4.0, 2019-03-08...
- Page 24 Installation, Service and User Manual...
-
Page 25: Technical Specifications
Technical specifications 1.1 Floor load Allow for the water heater's weight and the maximum floor load; refer to the table (1.6 "General specifications"). 1.2 Water composition The water heater is intended for heating drinking water. The drinking water must comply with the regulations governing drinking water for human consumption. The table gives an overview of the specifications. -
Page 26: General Specifications
1.6 General specifications General specifications Unit ITS 400 ITS 500 ITS 600 ITS 750 ITS 1000 Contents litres 1007 Empty weight Max. floor load 1347 Energy Efficiency Class (Energy Label) Heat Loss Max. operating pressure tank kPa (bar) 1000 (10) 1000 (10) 1000 (10) 1000 (10) - Page 27 Unit ITS 400 ITS 500 ITS 600 ITS 750 ITS 1000 Connection circulation Rp ¾" Rp ¾" Rp ¾" Rp ¾" Rp ¾" Diameter inspection opening Connection T&P Rp ¾" Rp ¾" Rp ¾" Rp ¾" Rp ¾" Connection immersion well/temp. sen. Rp ¾"...
- Page 28 Installation, Service and User Manual...
-
Page 29: Installation
Note These products can be installed as vented and unvented. This manual only discusses unvented installations. For information about vented installations please contact A.O. Smith. Installation Diagram Legend 1. pressure relief valve (mandatory if mains water pressure is too high) 3. - Page 30 2.2.2 Hot Water side See (B) in the installation diagram (2.1 "Installation diagram"). Note Insulating long hot water pipes prevents unnecessary energy loss. 1. Optional: fit a temperature gauge (12) so you can check the temperature of the tap water. 2.
-
Page 31: Filling And Draining
Filling and draining Note These products can be installed as vented and unvented. This manual only discusses unvented installations. For information about vented installations please contact A.O. Smith. Installation Diagram Legend 1. pressure relief valve (mandatory if mains water pressure is too high) 3. -
Page 32: Draining
3.2 Draining 1. Close the stop valve (4) between the cold water head tank and the cold water inlet (A). 2. Open the drain valve (9). 3. Bleed the water heater (or installation) so that it drains completely. Installation, Service and User Manual... -
Page 33: Maintenance
Maintenance Warning Maintenance may only be carried out by a competent person. At each service, the water heater undergoes maintenance on water side. The maintenance must be carried out in the following order. 1. Preparation for maintenance 2. Water-side maintenance 3. - Page 34 Work order: 1. Undo bolts from the cover. 2. Remove cover and the gasket. 3. Inspect the tank and remove the loose scale deposits and contamination. 4. If the scale cannot be removed by hand, descale the water heater with a descaling agent.
-
Page 35: Warranty
A.O. Smith shall offer to replace the defective water heater with an entirely new water heater of equivalent size and quality The warranty period given on the replacement water heater shall be equal to the remaining warranty period of the original water heater that was supplied. -
Page 36: Exclusions
A.O. Smith Water Products Company products. Inspection of the water heater as referred to in articles 1 and 2 shall take place in one of the laboratories of A.O. Smith. 5.7 Obligations of A.O. - Page 37 Aucune partie de ce document ne peut être copiée, dupliquée et/ou diffusée par impression, photocopie ou tout autre moyen de reproduction, sans l'accord écrit préalable de A.O. Smith Water Products Company. A.O. Smith Water Products Company se réserve le droit de modifier les spécifications de ce manuel d'instructions. Marques de commerce Toutes les marques mentionnées dans ce manuel d'instructions sont des marques...
- Page 38 Notice d’installation, Mode d’emploi, Notice d’entretien...
- Page 39 Entretien côté eau ....................48 Garantie ......................... 53 Garantie générale ....................53 Garantie sur la cuve ....................53 Conditions d'installation et d'utilisation ..............53 Exclusions ....................... 54 Portée de la garantie ....................54 Réclamations ......................54 Obligations de A.O. Smith ..................54 0312734_ITS_400-1000_NLENFR_V4.0, 2019-03-08...
- Page 40 Notice d’installation, Mode d’emploi, Notice d’entretien...
-
Page 41: Spécifications Techniques
Spécifications techniques 1.1 Charge maximale au Tenez compte de la charge maximale exercée sur le sol par le poids de l'appareil, sol de l'appareil voir le tableau (1.6 "Données générales"). 1.2 Composition de l'eau L'appareil est destiné à réchauffer de l'eau potable. L'eau potable doit être conforme aux régulations d'eau potable pour la consommation humaine. -
Page 42: Données Générales
1.6 Données générales Données générales Unité ITS 400 ITS 500 ITS 600 ITS 750 ITS 1000 Capacité 1007 Poids à vide Charge maximale au sol de l'appareil 1347 Class Efficacité Énergétique. (Étiquette d’Énergie) - Consommation d’entretien Pres. de fonctionnement max. du cuve kPa (bar) 1000 (10) 1000 (10) - Page 43 Unité ITS 400 ITS 500 ITS 600 ITS 750 ITS 1000 Raccord immersion ainsi/capteur de Rp ¾" Rp ¾" Rp ¾" Rp ¾" Rp ¾" température Raccord anode Rp 1¼" Rp 1¼" Rp 1¼" Rp 1¼" Rp 1¼" Vue de frontale des appareils IMD-1298 R0.0 0312734_ITS_400-1000_NLENFR_V4.0, 2019-03-08...
- Page 44 Notice d’installation, Mode d’emploi, Notice d’entretien...
-
Page 45: Installation
Installation 2.1 Schéma de raccor- Cette illustration représente le schéma de raccordement. Ce schéma est utilisé dans dement les paragraphes suivants contenant une description du raccordement proprement dit. Schéma de raccordement Légende 2. groupe de sécurité (obligatoire) 3. soupape thermique (recommandée) 4. - Page 46 Attention Un groupe de sécurité est obligatoire. Montez-le le plus près possible de l'appareil. Avertissement Entre la combinaison d'entrée et l'appareil, vous ne pouvez jamais monter de vanne d'arrêt ou de clapet anti-retour. Côte eau chaude 2.2.2 Voir (B) du schéma de raccordement (2.1 "Schéma de raccordement"). Note L'installation des longues conduites d'eau chaude évite les pertes énergétiques inutiles.
-
Page 47: Remplissage É Vidange
Remplissage é Vidange Schéma de raccordement Légende 2. groupe de sécurité (obligatoire) 3. soupape thermique (recommandée) 4. vanne d'arrêt (recommandée) 5. clapet anti-retour (obligatoire) 6. circulateur de bouclage (option) A. alimentation en eau froide B. sortie d'eau chaude C. conduit de circulation bouclage ECS F. -
Page 48: Vidange
3.2 Vidange 1. Fermez la vanne d'arrêt dans la conduite d'eau chaude. 2. Fermez le robinet d'arrivée du groupe de sécurité (2). 3. Ouvrez le robinet de vidange. 4. Purgez l'appareil (ou l'installation) pour qu'il (elle) puisse se vider complètement. Notice d’installation, Mode d’emploi, Notice d’entretien... -
Page 49: Effecteur L'entretien
Effecteur l'entretien Attention L'entretien ne peut êntre effectué que par un professionnel de la maintenance ou de l'entretien agréé. A chaque entretien, l'appareil doit être contrôlé côté eau et côté gaz. L'entretien doit s'effectuer dans l'ordre suivant. 1. Préparer l'entretien 2. - Page 50 Ordre du travail : 1. Faites tourner les boulons de l’ouverture de nettoyage. 2. Éliminez le couvercle et le joint. 3. Inspectez le réservoir. Éliminez la couche de calcaire accumulée et les saletés. 4. Si la couche de calcaire ne peut être éliminée manuellement, il convient de retirer le calcaire avec un détartrant.
-
Page 51: Garantie
Si, moins de trois ans après la date initiale de l'installation d'un chauffe-eau livré par A.O. Smith, après examen par et sur l'appréciation exclusive de A.O. Smith, la cuve en acier thermo vitrifié présente des fuites suite à une formation de rouille ou de corrosion du côté... -
Page 52: Exclusions
5.5 Portée de la garantie Les obligations de A.O. Smith conformes à la garantie accordée se limite à la livraison gratuite de l'entrepôt des pièces ou parties à remplacer ou de l'appareil à...
Need help?
Do you have a question about the ITS Series and is the answer not in the manual?
Questions and answers