Advertisement
- 1 INTRODUCTION
- 2 Plug-fitting Instructions (UK only)
- 3 Rear panel connections
- 4 Front panel controls
- 5 Display functions
- 6 Remote control
- 7 Apple device compatibility
-
8
Operating instructions
- 8.1 Loading and unloading discs
- 8.2 Normal disc play
- 8.3 Locating a specific track during playback
- 8.4 Locating a specific track when playback is stopped
- 8.5 Repeating discs and tracks
- 8.6 Playing tracks in random order
- 8.7 Using the Remain function
- 8.8 Programming disc play
- 8.9 Using the set-up menu
- 8.10 Filter Settings
- 8.11 Auto Play Setting
- 8.12 Auto Power Down Setting
- 9 Filter settings
- 10 Custom installation (C.I.) use
- 11 Troubleshooting
- 12 Technical specifications
- 13 Limited warranty
- 14 Documents / Resources
INTRODUCTION
Ventilation

The unit will become hot when in use. Do not stack multiple units on top of each other. Do not place in an enclosed area such as a bookcase or in a cabinet without sufficient ventilation.
Ensure that small objects do not fall through any ventilation grille. If this happens, switch off immediately, disconnect from the mains supply and contact your dealer for advice.
Positioning
Choose the installation location carefully. Avoid placing it in direct sunlight or close to a source of heat. No naked flame sources, such as lighted candles, should be placed on the unit. Also avoid locations subject to vibration and excessive dust, cold or moisture. The unit can be used in a moderate climate.
This unit must be installed on a sturdy, level surface. Do not place in a sealed area such as a bookcase or in a cabinet. Do not place the unit on an unstable surface or shelf. The unit may fall, causing serious injury to a child or adult as well as serious damage to the product. Do not place other equipment on top of the unit.
Due to stray magnetic fields, turntables or CRT TVs should not be located nearby due to possible interference.
Electronic audio components have a running in period of around a week (if used several hours per day). This will allow the new components to settle down and the sonic properties will improve over this time.
Power sources
The unit should be operated only from the type of power source indicated on the marking label. If you are not sure of the type of power-supply to your home, consult your product dealer or local power company.
This unit can be left in Standby mode when not in use and will draw <1W in this state. To turn the unit off, switch off at the rear panel. If you do not intend to use this unit for a long period of time, unplug it from the mains socket.
Overloading
Do not overload wall outlets or extension cords as this can result in a risk of fire or electric shock. Overloaded AC outlets, extension cords, frayed power cords, damaged or cracked wire insulation and broken plugs are dangerous. They may result in a shock or fire hazard.
Be sure to insert each power cord securely. To prevent hum and noise, do not bundle the interconnect leads with the power cord or speaker leads.
Cleaning
To clean the unit, wipe its case with a dry, lint-free cloth. Do not use any cleaning fluids containing alcohol, ammonia or abrasives. Do not spray an aerosol at or near the unit.
Battery disposal
Please dispose of any discharged batteries according to local environmental/electronic waste disposal guidelines.
Loudspeakers
Before making any connections to loudspeakers, make sure all power is turned off and only use suitable interconnects.
Servicing
These units are not user serviceable. Never attempt to repair, disassemble or reconstruct the unit if there seems to be a problem. A serious electric shock could result if this precautionary measure is ignored. In the event of a problem or failure, please contact your dealer.
Plug-fitting Instructions (UK only)
The cord supplied with this appliance is factory-fitted with a UK mains plug fitted with a 3-amp fuse inside. If it is necessary to change the fuse, it is important that a 3-amp fuse is used. If the plug needs to be changed because it is not suitable for your socket, or becomes damaged, it should be cut off and an appropriate plug fitted following the wiring instructions below. The plug must then be disposed of safely, as insertion into a mains socket is likely to cause an electrical hazard. Should it be necessary to fit a 3-pin BS mains plug to the power cord, the wires should be fitted as shown in this diagram. The colours of the wires in the mains lead of this appliance may not correspond with the coloured markings identifying the terminals in your plug. Connect them as follows:

The wire which is coloured BLUE must be connected to the terminal which is marked with the letter 'N' or coloured BLACK.
The wire which is coloured BROWN must be connected to the terminal which is marked with the letter 'L' or coloured RED.
The wire which is coloured GREEN/YELLOW must be connected to the terminal which is marked with the letter 'E' or coloured GREEN.
If a standard 13-amp (BS 1363) plug is used, a 3-amp fuse must be fitted or, if any other type of plug is used, a 3-amp or 5-amp fuse must be fitted, either in the plug or adaptor, or on the distribution board.
Rear panel connections

-
AC power socket
Once you have completed all connections to the amplifier, plug the AC power cable into an appropriate mains socket and turn the unit on. Your compact disc player is now ready for use. -
Power On/Off
Switches the unit on and off. -
Control Bus
-
In: Allows un-modulated commands from multi-rooms systems or other components to be received by the unit.
Out: Loop out for control bus commands to another unit.
-
-
IR (Infra Red) Emitter In
Allows modulated IR commands from multi-room systems or IR repeater systems to be received by the unit. Commands received here are not looped out of the Control Bus. Refer to the 'Custom Installation' section for more information. -
Line Output
Use good quality interconnect cables from these sockets to any line level input on your amplifier. For best results and matched performance, we recommend connection to a Cambridge Audio Azur amplifier. -
S/P DIF co-axial digital output
For input to a separate DAC, such as Cambridge Audio DacMagic*, or digital recording machine. To obtain best results, use a high quality 75ohm digital RCA interconnect cable (not one designed for normal audio use). -
TOSLINK Optical digital output
Use to connect to the input of a separate DAC* or digital recording machine. Use a high quality TOSLINK fibre optic interconnect cable.
 Note: To obtain the best results from your system we recommend using only high quality Cambridge Audio interconnects. This will ensure that you hear your system as we designed it. Please ask you dealer for details.
* For more information, see the DacMagic page on the Cambridge Audio website: www.cambridgeaudio.com/products.php
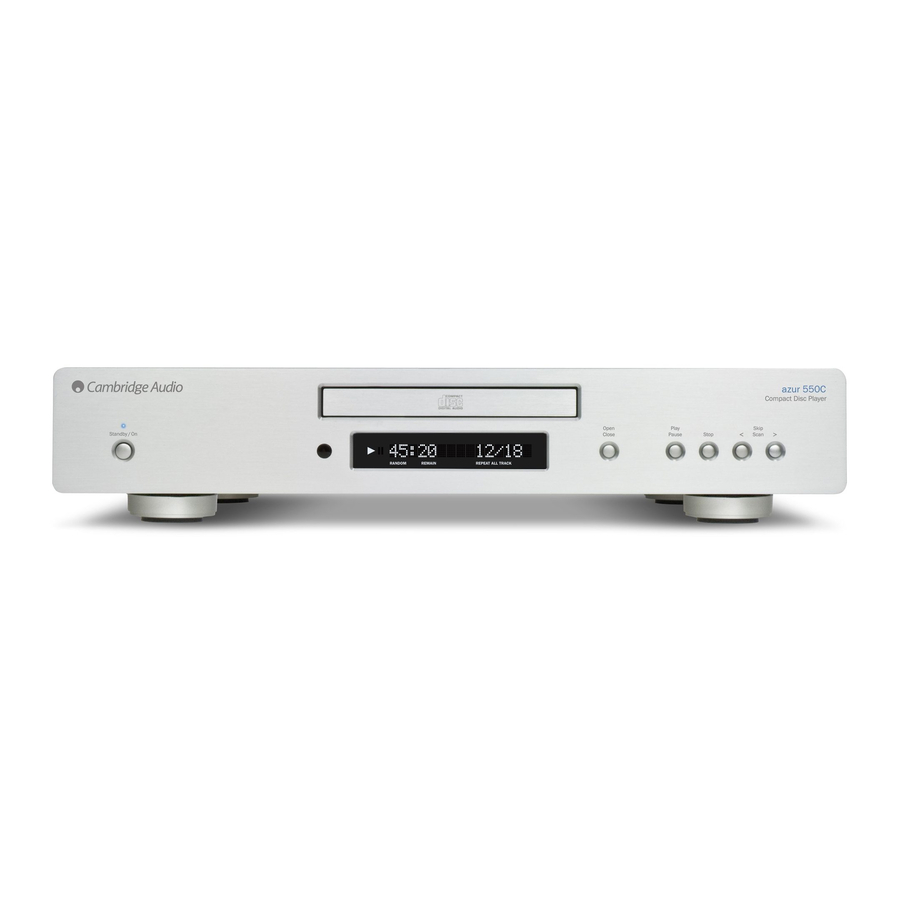
Front panel controls

-
Standby/On
Switches the unit between On and Standby mode. The blue LED will remain bright when the unit is on, becoming dim when the unit is in a special eco-friendly standby mode. The unit consumes less than one watt of power during standby. The unit can remain in Standby mode when not in use. It is advisable to switch the unit off at the mains if it is not likely to be used for an extended period of time.
![warning]() Note: For convenience, the player can be programmed to automatically enter Standby mode after a period of inactivity. To enable this feature, see "Using the set-up menu".
Note: For convenience, the player can be programmed to automatically enter Standby mode after a period of inactivity. To enable this feature, see "Using the set-up menu". -
Open/Close
Allows you to open and close the disc tray. After placing a CD in the tray, press Open/Close to close the tray. -
Infrared sensor
Receives IR commands from the supplied remote control. A clear, unobstructed line of sight between the remote control and the sensor is required. -
Play/Pause
Plays the disc and pauses play. -
Stop
Stops the CD playing. -
Skip/Scan
Enables you to skip between and search within tracks. Press briefly to skip a track. Press and hold to scan through a track.
Display functions

-
Play
Illuminated during disc playback. -
Pause
Indicates that disc playback has been paused. -
Display
Alpha-numeric characters which display playback information. On inserting a disc, the CD player will take a few seconds to read the Table of Contents (TOC) information from the disc. The display will then show the number of tracks on the CD and the total length of the CD.
If the CD incorporates CD-text, the name of the album will scroll once (the number of tracks remains stationary throughout). Once playback of an individual track begins, the track number, total number of tracks and play-time will be displayed. On a CD containing CD-text, the track name will scroll once. Pressing the![]() (Info) button on the remote control will re-display the CD-text.
(Info) button on the remote control will re-display the CD-text. -
Random
Indicates random playback mode. -
Remain
Illuminated when displaying time remaining on track or disc. -
Repeat All/Track
Illuminated when 'Repeat Track' or 'Repeat All' is selected.
Remote control
The 550C and 650C are supplied with an Azur Navigator remote control that operates both this CD player and Cambridge Audio Azur range amplifiers. Insert the supplied AAA batteries to activate. Always use alkalinetype batteries.

![]() Standby/On
Standby/On
Switches the amplifier between On and low power ecofriendly Standby mode.
![]() Open/Close
Open/Close
Opens and closes the disc tray.
![]() Numerical track select
Numerical track select
Press the number of the desired track. The track will then play automatically from the start of the track.
![]() Track select
Track select
To select a track number greater than nine, press -/-followed by the track number. Playback of the chosen track starts automatically.
![]() Play/
Play/ ![]() Stop/
Stop/ ![]() Pause
Pause
Press the relevant button to play, stop or pause the CD.
Skip:
![]() Right Skip Press to skip forward by one track on the CD.
Right Skip Press to skip forward by one track on the CD.
![]() Left Skip Press to skip backward by one track on the CD.
Left Skip Press to skip backward by one track on the CD.
 Scan
Scan
Press and hold to scan within the selected track. Hold down for seven seconds to increase scan speed. Press the right button to fast forward, the left button to rewind.
![]() Info
Info
Used with CDs that support CD-text. In stop mode, press to toggle between album name and total time on the display. During playback, press to toggle between track name and track time.
![]() Bright
Bright
Alters the brightness of the display backlight. There are three levels of brightness: Bright, Dim and Off.

Read the 'Operating Instructions' section of this manual for information on the functions of these buttons.
Note: these buttons will function only when the display backlight is in either 'Bright' or 'Dim' modes. If it is set to 'Off', the functions do not respond.
Please note that the following buttons will only operate a matching Cambridge Audio Azur amplifier:
![]() Source
Source
Cycles through the amplifier's source inputs.
![]() Mute
Mute
Mutes the audio on the amplifier. The mute mode is indicated by the source and speaker LEDs flashing. Press again to cancel mute.
Note: The speaker outputs, Pre-out and headphone outputs will all be muted. The Record outputs are unaffected.
![]() Speaker A/B
Speaker A/B
Toggles the speaker terminals on the rear panel to output speaker A only, speaker B only, both speakers A and B or no speaker output at all. The speaker indicators on the front panel of the amplifier show which speaker terminals are selected.
 Volume controls
Increases or decreases the volume of the amplifier output.

The six source select buttons are used to directly select the input source to the amplifier.
Note: the Tape Monitor input works in a slightly different way – please refer to your amplifier user's manual for details.
Apple device compatibility
The Azur 550AC/650AC Navigator remote control can control the basic functions of Apple devices such as Apple TV and Apple's iPod/iPhone/iPad range when docked in a Cambridge Audio or Apple dock.
Press and hold the source button that corresponds to the input that the Apple product is connected to whilst also pressing one of the buttons below.
The functions are slightly different depending on the Apple product.
![]() Select
Select
![]() Play/pause
Play/pause
![]() Stop or Menu
Stop or Menu
 Press briefly to skip or navigate left or right. Press and hold to scan forwards or backwards.
 Used to control volume and/or navigate menus.

Used to navigate menus.
In addition, the Azur remote can be paired with up to six specific Apple devices using any of the six source buttons. This can be useful if you have more than one Apple product.
For more information on pairing refer to your Apple device's instruction manual.
Pairing – To pair with an Apple device, press and hold the required source button along with the button for six seconds. Some devices like Apple TV have visual indication once pairing is achieved.
Un-pairing – To un-pair an Apple device, press and hold any of the source buttons along with the button for six seconds.
Operating instructions
Loading and unloading discs
- Press the Open/Close button.
- When the disc tray has opened fully, place a disc carefully in the tray with the label side facing up.
- To close the disc tray, press the Open/Close button again. When the tray, with a correctly loaded disc, is fully closed the CD player will read the disc and display the content information.
- The disc tray can be opened at any time by pressing the Open/Close button. Only remove the disc after the tray has fully opened.
Note:
- Do not put anything except a compact disc into the tray. Foreign objects may damage the mechanism.
- Do not force the tray by hand during the opening and closing operations.
- To avoid dirt and dust entering the mechanism, keep the disc tray closed.
- If the compact disc is badly scratched or too dirty, the player may not be able to read it or play it.
- Never load more than one disc into the disc tray at any time.
Normal disc play
![]()
This unit has been designed to play compact discs, recordable CDs (CD-R) and re-writable CDs (CD-RW) bearing the identification logo shown here. No other discs can be used. Any CD-R/CD-RW discs should contain properly recorded TOC (Table of Contents) information so that they can be played back. This unit can play only the discs recorded in the CD-DA format designed for music reproduction. Do not attempt to play a disc containing other data, such as a CD-ROM for PCs with mp3 or WMA files, on this unit.
- Switch on your amplifier and set its input selector to the correct position. Adjust the volume control to a minimum.
- Press the Open/Close button to open the disc tray and load a disc.
- Press the Open/Close button again to close the tray. The CD player will read the disc.
- To begin playback, press Play.
- When the last track has finished playing, the display will return to Table of Contents (TOC).
- To stop the disc at any point, press the Stop button. Pressing the Pause button while the disc is playing will pause the disc and illuminate the pause icon on the display. Playback can be resumed by pressing Play again.
Locating a specific track during playback
- A single short press of the Skip/Scan > button will take you to the beginning of the next track on the CD. Repeat as necessary.
- A single short press of the Skip/Scan < button will take you to the beginning of the previous track.
Locating a specific track when playback is stopped
- A single short press of the Skip/Scan > button will skip between tracks.
- Press Play to start playback from the selected track.
Repeating discs and tracks
- Ensure that the disc is loaded.
- Press the Repeat button on the remote control. 'Repeat All' will appear on the display. Press Play. The whole disc will now be repeated until the function is turned off.
![]()
- To repeat a specific track, press Repeat twice while the track is playing. 'Repeat Track' will appear on the display. Press Play and the selected track will now repeat until the function is turned off.
![]()
Alternatively, press Repeat twice, select the chosen track using the numerical buttons on the remote control and press Play. - Press Repeat again either before or during playback to turn off the repeat function.


Note:
- 'Repeat Track' is not available in Program mode.
- Selecting 'Repeat Track' when 'Random' mode has been selected will automatically cancel 'Random' mode.
Playing tracks in random order
- Ensure that a disc is loaded.
- Press the Random button on the remote control. 'Random' will appear on the display.
- Press Play. The CD player will now play the entire disc in random order.
![]()
It is also possible to press the Random button during playback to listen to tracks in random order. - Press Random to exit the Random function. The disc will continue playing to the end in the correct order.
- Press the Stop button at any time to stop the disc.

Note: Selecting 'Random' mode when 'Repeat Track' has been selected will automatically cancel 'Repeat Track' mode.
Using the Remain function
- Ensure that the disc is playing.
- Press the Remain button on the remote control once to display the time remaining for the track playing.
![]()
- Press Remain a second time to show the total remaining disc time.
![]()
- Press Remain again either before or during playback to return to normal play mode.
![]()


Programming disc play
It is possible to program the 550/650C to play back in any order only the tracks you wish to listen to.
- Ensure that a disc is loaded. The display should show the TOC data.
- Press Program on the remote control. The Program set-up will appear in the display (as long as the display backlight is set to 'Bright' or 'Dim' modes). 'ST:01' will flash.
![]()
- Using the
![]() or
or ![]() buttons, skip to or enter the track number that you want to program as your first track.
buttons, skip to or enter the track number that you want to program as your first track.
![]()
- Press
![]() . The desired track is now programmed. The program number automatically increases by one for the next entry.
. The desired track is now programmed. The program number automatically increases by one for the next entry.
![]()
- Repeat steps three and four until all your desired tracks are entered. A maximum of 30 tracks can be programmed.
- To go back and change a programmed track, press
![]() to locate the desired program step, 'ST:0-' does not flash.
to locate the desired program step, 'ST:0-' does not flash.
![]()
Press![]() to choose the replacement track. 'ST:0-' flashes to indicate a change of program. Press
to choose the replacement track. 'ST:0-' flashes to indicate a change of program. Press ![]() to select the new track and continue.
to select the new track and continue.
![]()
- Press Program or
![]() to exit.
to exit.
![]()
Press Program again to return to program editing. At this point you can either press![]() again to delete the program and return to TOC display, or press
again to delete the program and return to TOC display, or press ![]() to start playing your selection.
to start playing your selection. - When
![]() is pressed, 'Program Play' appears briefly on the display and playback of the programmed tracks commences.
is pressed, 'Program Play' appears briefly on the display and playback of the programmed tracks commences.
![]()
- You can use the skip and scan functions on your remote control to move through your programmed selection in the same way as normal playback.
- Pressing
![]() during playback will take you back to the 'Program Mode' stage. Pressing
during playback will take you back to the 'Program Mode' stage. Pressing ![]() again at this point deletes the program.
again at this point deletes the program.


Note:
- During programmed playback, it is possible to use the 'Remain' function only to show the time remaining on the track playing. You can not view the time remaining on the disc.
- Only the 'Repeat All' feature can be used during Program mode. You are not able to repeat specific tracks in the program.
Using the set-up menu
The 550/650C allow the setting of some options related to Auto Play, Auto Power Down and the digital filters used by the D/A converters.
- Press and hold Stop for five seconds to open the set-up menu.
- Scroll through the menu (shown below) using the Skip/Scan < > buttons.
- Play/Pause selects a sub-menu. Scroll through sub-menu options with the Skip/Scan < > buttons. The default setting is indicated by the symbol
![]() .
. - Select an option by pressing Play/Pause.
- Return to the sub-menu or exit the options menu by pressing the Stop button.
Note:
- It is not possible to access the set-up menu during disc playback.
- The Stop button on the remote control cannot be used to open the set-up menu. Once you have accessed the menu, however, the remote control can be used to scroll through and select sub-menu options.


Filter Settings
See information.
Auto Play Setting
If required the 550/650C can automatically play disks inserted into the drawer without the Play button having to be pressed. Auto Play is simply enabled in the menu when desired. The default setting for Auto Play is 'Off'.
Auto Power Down Setting
If desired the 550/650C can shut itself down if not used for a period of time. Power down after an inactive period (no disk playback or any functions of the player used) of 5, 10 or 15 minutes can be selected. The default setting for Auto Power Down is 'Off' (i.e. disabled).
Filter settings
The 550C and 650C both use the WM8740 Digital to Analogue Converter (DAC) from Wolfson Microelectronics. The 550C uses one stereo DAC, whilst the 650C uses two DACs in dual differential (i.e. one per channel, in an internally balanced mode). These very high quality parts feature a selectable digital filter with two settings.
The sharp roll-off filter exhibits strong attenuation of aliasing images outside the pass band (i.e. above 22.05kHz) at the expense of a little preand post-ringing in the time domain.
The slow roll-off filter trades a slower roll-off and less attenuation of close in aliasing images for less ringing in the time domain.
There is no 'right' choice and we encourage you to experiment with both filters and pick the one that is best to your ears. The characteristics of both are shown below:
Sharp Roll-off


Slow Roll-off


Custom installation (C.I.) use
The 550C and 650C feature a Control Bus input/output that allow unmodulated remote control commands (positive logic, TTL level) to be received electrically by the unit and looped to another unit if desired. These control commands are typically generated by custom installation (multi-room) systems or remote IR receiver systems. The Control Bus sockets are colour-coded orange.
An IR Emitter Input is also provided that allows modulated IR remote control commands to be received electrically by the unit. Commands on this input operate the unit only and are not looped out demodulated on the Control Bus Output.
In addition the units feature 'direct' IR/Control codes as well as toggle codes for some of their features to simplify programming custom installation systems. Special direct On/Off and Mute commands can be accessed on the supplied remote control for teaching into C.I. systems or learning remotes as follows:
- Press and hold the Standby button. After 12 seconds, the remote first generates a Standby (toggle) command for Azur CD players. Keep holding the button down and after 12 seconds a CD player "On" command will be generated. If the button is held down for a further 12 seconds, a CD player "Off" command is generated. After another 12 seconds, the remote generates a Standby (toggle) command for Azur Amplifiers. A further 12 seconds and an Amp "On" command is generated. Finally, if the button is held down for a further 12 seconds, an Amp "Off" command is generated.
- Press and hold the Mute button. The remote first generates a Mute (toggle) command for Azur Amplifiers. Keep holding the button down and after 12 seconds an Amp "Mute On" command will be generated. If the button is held down for a further 12 seconds, an Amp "Mute Off" command is generated.
A full code table for this product is available on the Cambridge Audio website at www.cambridge-audio.com.
Troubleshooting
There is no power
Ensure the AC power cord is connected securely.
Ensure the plug is fully inserted into the wall socket and is switched on.
Check the unit is switched on at the rear panel.
Check fuse in the mains plug or adaptor.
The player will not read the disc
Check the disc is not loaded upside down.
Check that the disc is not too scratched or dirty.
There is no sound
Ensure that the amplifier is set correctly.
Check that the interconnects are inserted correctly.
The disc is skipping
Check that the disc is not too scratched or dirty.
Ensure the player is on a firm surface and not subject to vibrations.
There is a hum coming from the speaker
Ensure that all cable connections are secure.
The remote handset will not function
Check that the batteries have not expired.
Ensure that nothing is blocking the remote sensor.
In the event that the above solutions do not remedy your problem, please consult our frequently asked questions (FAQ) section on our website: www.cambridge-audio.com/sts/faqs
You can also use this facility to post a question to our Technical Support team.
For all servicing, in or out of warranty, please contact your dealer.
Technical specifications
550C
| D/A Converter | Wolfson Microelectronics WM8740 24-Bit/192kHz capable |
| Filter | 2-Pole Differential Bessel Virtual Earth Balanced |
| Frequency response (+/-0.2dB) | 20Hz - 20kHz |
| THD @ 1Khz 0dBFs | <0.0015% |
| THD @ 1Khz -10dBFs | <0.003% |
| THD @ 20Khz 0dBFs | <0.001% |
| IMD (19/20kHz) 0dBFs | <0.001% |
| Linearity @ -90dBFs | +/- 0.5dB |
| Clock deviation | +/- 20ppm |
| Stopband rejection (>24kHz) | >90dB |
| S/N ratio, A weighted | >100dB |
| Total correlated jitter | <150pS |
| Crosstalk @1kHz | <-100dB |
| Crosstalk @20kHz | <-90dB |
| Output impedance | <50ohms |
| Maximum power consumption | 25W |
| Standby power consumption | <1W |
| Dimensions | 85 x 430 x 305mm (3.4 x 16.9 x 12.2") |
| Weight | 4.8kg (10.6lbs) |
650C
| D/A Converter | Dual Wolfson Microelectronics WM8740 24-Bit/192kHz capable |
| Filter | 2-Pole Dual Differential Bessel Double Virtual Earth Balanced |
| Frequency response (+/-0.1dB) | 20Hz - 20kHz |
| THD @ 1Khz 0dBFs | <0.001% |
| THD @ 1Khz -10dBFs | <0.0005% |
| THD @ 20Khz 0dBFs | <0.002% |
| IMD (19/20kHz) 0dBFs | <0.0005% |
| Linearity @ -90dBFs | +/- 0.5dB |
| Clock deviation | +/- 20ppm |
| Stopband rejection (>24kHz) | >90dB |
| S/N ratio, A weighted | >104dB |
| Total correlated jitter | <140pS |
| Crosstalk @1kHz | <-100dB |
| Crosstalk @20kHz | <-99dB |
| Output impedance | <50ohms |
| Maximum power consumption | 25W |
| Standby power consumption | <1W |
| Dimensions | 85 x 430 x 305mm(3.4 x 16.9 x 12.2") |
| Weight | 4.8kg (10.6lbs) |
Limited warranty
Cambridge Audio warrants this product to be free from defects in materials and workmanship (subject to the terms set forth below). Cambridge Audio will repair or replace (at Cambridge Audio's option) this product or any defective parts in this product. Warranty periods may vary from country to country. If in doubt consult your dealer and ensure that you retain proof of purchase.
To obtain warranty service, please contact the Cambridge Audio authorised dealer from which you purchased this product. If your dealer is not equipped to perform the repair of your Cambridge Audio product, it can be returned by your dealer to Cambridge Audio or an authorised Cambridge Audio service agent. You will need to ship this product in either its original packaging or packaging affording an equal degree of protection.
Proof of purchase in the form of a bill of sale or receipted invoice, which is evidence that this product is within the warranty period, must be presented to obtain warranty service.
This Warranty is invalid if
- the factory-applied serial number has been altered or removed from this product or
- this product was not purchased from a Cambridge Audio authorised dealer.
You may call Cambridge Audio or your local country Cambridge Audio distributor to confirm that you have an unaltered serial number and/or you made a purchase from a Cambridge Audio authorised dealer.
This Warranty does not cover cosmetic damage or damage due to acts of God, accident, misuse, abuse, negligence, commercial use, or modification of, or to any part of, the product. This Warranty does not cover damage due to improper operation, maintenance or installation, or attempted repair by anyone other than Cambridge Audio or a Cambridge Audio dealer, or authorised service agent which is authorised to do Cambridge Audio warranty work. Any unauthorised repairs will void this Warranty. This Warranty does not cover products sold AS IS or WITH ALL FAULTS.
For any service, in or out of warranty, please contact your dealer.

Documents / ResourcesDownload manual
Here you can download full pdf version of manual, it may contain additional safety instructions, warranty information, FCC rules, etc.
Download Cambridge Audio azur 550C/650C - Compact Disc Player Manual
Advertisement


Need help?
Do you have a question about the azur 550C and is the answer not in the manual?
Questions and answers