Advertisement
- 1 Overview
- 2 Before you begin...
- 3 For your safety
- 4 Avoiding damage
- 5 Connecting devices to the PC/laptop
- 6 Storing the receiver in the mouse
- 7 Setting the DPI rate of the mouse
- 8 Surface under the mouse
- 9 Charging the batteries
- 10 Switching the devices on and off
- 11 Configure devices individually
- 12 Cleaning the devices
- 13 If the devices do not work
- 14 Disposing of the devices and batteries
- 15 Technical data
- 16 Documents / Resources
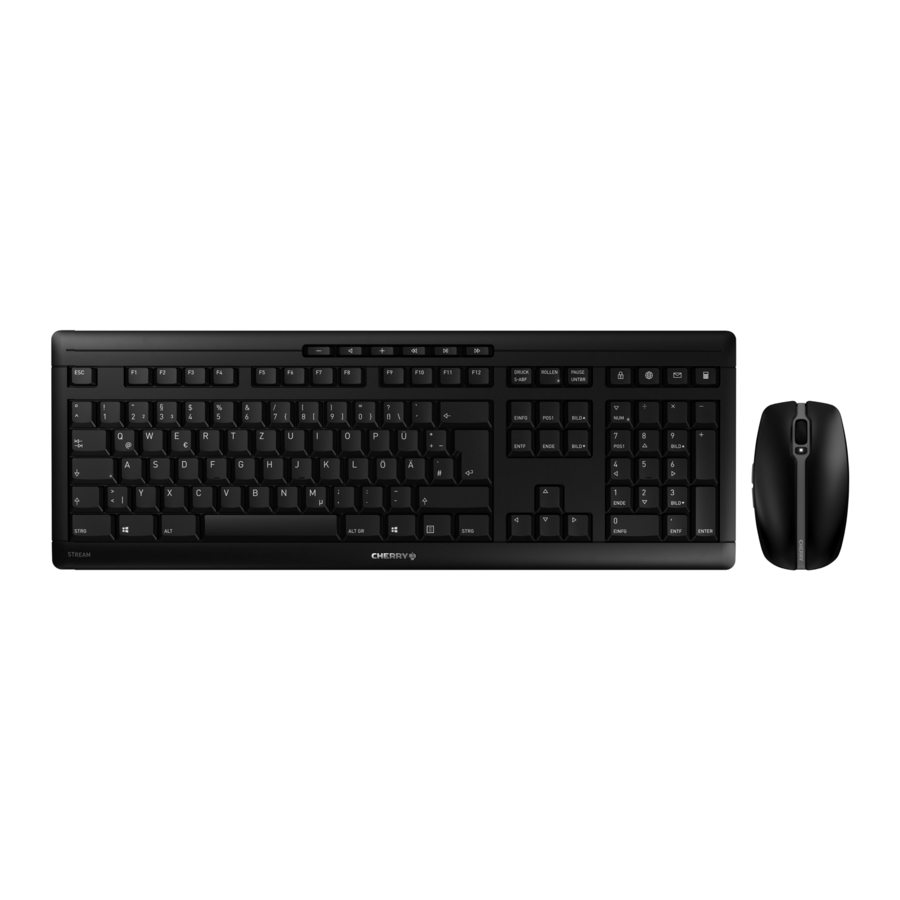
Overview

- Volume down
- Sound on/off
- Volume up
- Previous title
- Play/pause
- Next title
- Socket for charging cable
- Blocking the PC
- Browser, home
- E-Mail program
- Calculator
- Socket for charging cable
- DPI switch
- Browser forward
- Browser back
- Receiver
Before you begin...
|
The operating instructions contain information on effective and reliable use.
|

The CHERRY STREAM DESKTOP RECHARGE is a combination of a wireless keyboard and mouse for operating PCs and laptops.
For information on other products, downloads and much more, visit us at www.cherry.de.
For your safety
Risk of choking from swallowing small parts
- Keep the devices out of the reach of children under 3 years.
Danger of explosions due to wrong or incorrectly inserted batteries
- Use only nickel-metal hydride rechargeable batteries (see "Technical data").
- Insert the batteries in accordance with the markings (+/-) in the battery compartment.
RSI stands for "Repetitive Strain Injury"
RSI arises due to small movements continuously repeated over a long period of time.
- Set up your workspace ergonomically.
- Take several short breaks, with stretching exercises if necessary.
- Change your posture often.
Avoiding damage
Damage to the batteries or devices
- Only charge the batteries in the devices. Do not use an external charger.
Damage to the keyboard
- Do not remove the key caps.
Connecting devices to the PC/laptop
- Pull the receiver out of the compartment on the bottom of the mouse.
- Connect the receiver to a USB 2.0 port on your PC/ laptop if possible (this usually has a white or black guide).
- Insert the rechargeable batteries into the keyboard and mouse.
- Set the switch on the back of the keyboard and the bottom of the mouse to "I".
If the wireless connection is successful, the LEDs on the keyboard and the DPI button on the mouse will light up for about 5 seconds.
Storing the receiver in the mouse
The receiver is so small that it can stay in the USB socket of a laptop while being transported. To avoid any damage, you can also pull out the receiver and deposit it in the mouse to protect it from dirt and loss.
Setting the DPI rate of the mouse
The speed of the mouse pointer increases with the level of the DPI rate.
- To change the DPI rate, press the DPI button on the top of the mouse.
The LED flashes according to the setting:
1x = 1000 dpi, 2x = 1600 dpi, 3x = 2400 dpi
The setting is saved in the mouse and is retained even when the mouse is switched off.
Surface under the mouse
The mouse is most effective on a light-colored, textured surface, which saves energy and ensures optimal motion detection.
A reflective surface is not suitable for using the mouse on.
Charging the batteries
If the voltage of the keyboard or mouse batteries drops, depending on the device, the LEDs of the keyboard or the DPI button flash ten times, after this the signal stops.
This happens if you work with one of the devices after starting the PC/laptop or if you rouse it from sleep mode. Charging the batteries in good time prolongs their service life.
- Connect the charging cable to the socket on the device and a USB port or USB network adapter.
Your power source (PC/laptop) must be switched on. During the charging process you can continue working, and the LED on the back panel of the keyboard or the DPI button on the mouse will light up red.
When the LED on the back panel of the keyboard or the DPI button of the mouse goes out, the batteries of the device are fully charged. The charging circuit prevents overcharging.
Switching the devices on and off
When not in use, the devices switch to sleep mode, which requires much less power. They switch on again automatically as soon as you press a button.
Because they still consume some power in energy-saving mode, you should switch them off manually for extended periods of non-use or for transporting.
- Slide the switch on the back of the keyboard or the bottom of the mouse to the appropriate position:
Off = 0, on = I
Configure devices individually
With the CHERRY KEYS software you can freely assign the mouse buttons and many keys on the keyboard. This allows you to access apps, files, individual text modules or macros at the touch of a button.
You can obtain CHERRY KEYS as a free download at www.cherry.de.
Give it a go!
Cleaning the devices
- Switch the devices off.
NOTE! Aggressive cleaning agents and liquids can damage the devices- Do not use solvents such as benzene, alcohol, scouring agents or abrasive scourers for cleaning the devices.
- Prevent liquid from getting inside the devices.
- Clean the devices with a slightly damp cloth and some mild detergent (such as washing-up liquid).
- Dry the devices with a soft, lint-free cloth.
|
To protect the keyboard surface from dust, liquids and dirt, a specially adapted foil cover is available (CHERRY WetEx®). The protective film can be washed and disinfected. For more information, please visit www.cherry.de. |
If the devices do not work
- Switch the devices off and on again.
- Check whether the batteries are inserted correctly and have sufficient voltage. Charge them if required (see "Charging the batteries").
- Connect the receiver to a USB 2.0 port on your PC/laptop (this usually has a white or black guide). Malfunctions occasionally occur on USB 3.0 ports (blue guide).
- Connect the receiver to another USB 2.0 port on the PC/laptop.
- Reduce the distance between the receiver and the devices by connecting the receiver to a USB port that is close to the devices.
- Use a USB extension cable to place the receiver as close to the devices as possible.
- Make a new connection between the keyboard and the receiver:
- Disconnect the receiver from the USB port and plug it in again.
- Switch off the keyboard (switch on the back panel to "0").
- Within 10 seconds, hold the keyboard as near to the receiver as possible, then press the "Esc" and then the "Q" key.
- While holding down the keys, switch on the keyboard (switch on the back panel to "I"). If the 3 LEDs on the keyboard flash after about 3 seconds, the connection has been established.
- Make a new connection between the mouse and the receiver:
- Disconnect the receiver from the USB port and plug it in again.
- Switch off the mouse (switch on the bottom to "0").
- Within 10 seconds, hold the mouse as near to the receiver as possible and press the scroll wheel.
- While holding down the scroll wheel, switch on the mouse (switch on the bottom to "I"). If the DPI button on the mouse flashes after about 3 seconds, the connection has been established.
Disposing of the devices and batteries
- Do not dispose of devices and batteries with this symbol in household waste.
![]()
- Take the batteries out of the devices.
- Dispose of the devices and batteries in accordance with statutory regulations – at your local dealer or at municipal recycling centers.

Technical data
| Designation | Value |
| Supply voltage | Keyboard: 2.4 V/DC ±15% Mouse: 1.2 V/DC ±15% Receiver: 5.0 V/DC ±5% |
| Charging voltage | 5.0 V/DC ±5% |
| Charging current | Max. 350 mA |
| Power consumption | Keyboard: max. 20 mA Mouse: max. 20 mA Receiver: max. 20 mA |
| Keyboard batteries | 2 NiMH rechargeable batteries with low selfdischarge, type HR03 (AAA), 820 mAh |
| Mouse battery | 1 NiMH rechargeable battery with low selfdischarge, type HR6 (AA), 2050 mAh |
| Transmission frequency | 2400.0... 2483.5 MHz |
| Transmission power | Max. 10 mW (EIRP) |
| Storage temperature | -20°C... +60°C |
| Operating temperature | 0°C... +40°C |

Documents / Resources
References
Download manual
Here you can download full pdf version of manual, it may contain additional safety instructions, warranty information, FCC rules, etc.
Download Cherry JD-856K, JD-856M, JD-856R - Stream Desktop Recharge Manual
Advertisement


Need help?
Do you have a question about the JD-856K and is the answer not in the manual?
Questions and answers