Table of Contents
Advertisement
Advertisement
Table of Contents

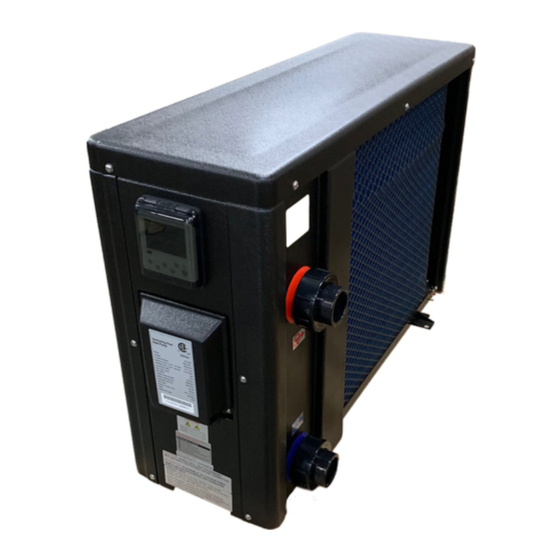
Summary of Contents for Aqua PRO ECO900
- Page 1 Swimming Pool Heat Pump INSTALLATION AND USER MANUAL...
-
Page 3: Table Of Contents
Content Application ....................2 Features ....................2 III. Technical Parameter ................3 Dimension ....................4 Installation instruction ................5 Operation instruction ................9 VII. Testing ....................12 VIII. Precautions ..................12 Maintenance ..................14 Trouble shooting for common faults ..........15... - Page 4 Thank your choosing our heat pump. Please read this instruction manual carefully and operate strictly according to the user manual before starting the heat pump, otherwise the heat pump may be damaged or cause you unnecessary harm. This appliance is not intended for use by persons (including children) with reduced physical, sensory or mental capabilities, or lack of experience and knowledge, unless they have been given supervision or instruction concerning use of the appliance by a person responsible for their safety.
-
Page 5: Application
Application Set swimming pool water temp efficiently and economically to provide you comfort and pleasure. User may choose the model technical parameter according to professional guide, this series of swimming pool heater has been optimized in factory (refer to technical parameter table). Features Sensitive and accurate temp control and water temp display. -
Page 6: Technical Parameter
III. Technical Parameter Model ECO550 ECO900 ≤14000 ≤28000 Applied pool volume (gallons) Operating air temperature (° F) 32~109 Performance Condition: Air 80° F/ Water 80° F/ Humidity 80% Heating capacity (Btu) 50,000 90,000 Heating capacity (Btu) in silence mode 40,000 72,000 C.O.P... -
Page 7: Dimension
Dimension Name Size(mm) Model ECO550 ECO900 1092 ※ Above data is subject to modification without notice. Note: The picture above is the specification diagram of the pool heater, for technician’s installation and layout reference only. The product is subject to adjustment periodically for improvement without further notice. -
Page 8: Installation Instruction
Installation instruction 1, Drawing for water pipes connection. Note:The swimming pool heater must be grounded. (Notice:The drawing demonstration and layout of the pipes is only for reference.) 2, Electric Wiring Diagram Note:1) Must be hard wired, no plug allowed. 2) The swimming pool heater must be grounded. - Page 9 2-wire dry contact connection, and only control the unit On/Off. Jumper is installed by default, if loosen or disconnection “OFF” will display. Options for protecting devices and cable specification MODEL ECO550 ECO900 15.5 Rated Current A Breaker Rated Residual Action Current mA 15.5...
- Page 10 bracket must be strong and antirust treated; 3) Don’t stack substances that will block air flow near inlet or outlet area, and no barrier within 20in behind the main heater, or the efficiency of the heater will be reduced or even halted; 4) The heater needs an appended pump (Supplied by the user).
- Page 11 Pay attention to the following points: 1. The heat pump must be installed OUTSIDE in a well ventilated area to avoid air recirculation, or in a place with adequate room for both installation and maintenance. Please refer to the following illustration: A minimum of 500mm of clearance from walls, shrubbery, equipment, etc.
-
Page 12: Operation Instruction
Operation instruction Symbol Designation Operation Power ON/OFF Press to power on or off the heat pump Up/ Down Press to set desired water temperature Press to select Silence mode Heating mode Only heating is available Timer Timer set up Note: ①... - Page 13 1. Status on the display Defrost Mode Heating Mode Timer ON/OFF 2. Time setting ① Press for 5 seconds to enter time setting. 88:88 is flashing on the display ② Press to adjust the time (fast adjusting by continuous pressing). Then, press to confirm and exit.
- Page 14 ( display: 2 OFF ) by pressing . Then press to confirm ③ After entering the Time ON/OFF setting, press directly without adjusting the time to cancel the relevant Timer setting. ④ Exit automatically if no operation for 30 seconds in the Timer ON/OFF mode, Silence mode ①...
-
Page 15: Testing
VII. Testing Inspection before use A. Check installation of the entire heater and pipe connections according to the pipe connecting drawing; B. Check the electric wiring according to the electric wiring diagram; and grounding connection; C. Make sure that the main heater power switch is off; D. - Page 16 and don’t remove the screen of the fan at any time; D. If there are abnormal conditions such as noise, smell, smoke and electrical leakage, please switch off the machine immediately and contact the local dealer. Don’t try to repair it yourself; E.
-
Page 17: Maintenance
Maintenance Caution: Danger of electric shock 1. “Cut off” power supply of the heater before cleaning, examination and repairing 2. Do not touch the electronic components until the LED indication lights on PCB is off/ turn off. A. In winter season when you don’t swim: 1. -
Page 18: Trouble Shooting For Common Faults
Trouble shooting for common faults Failure Reason Solution No power Wait until the power recovers Swimming pool heat Power switch is off Switch on the power pump Fuse burned Check to change the fuse does not The breaker is off Check to turn on the breaker. - Page 19 Failure code DISPLAY NOT FAILURE DESCRIPTION No water protection Power supply excesses operation range Excessive temp difference between inlet and outlet water (Insufficient water flow protection) Ambient temperature too high or too low protection Anti-freezing reminder DISPLAY FAILURE DESCRIPTION High pressure protection Low pressure protection Phases lack protection (three phase model only) Water outlet temp too high or too low protection...
- Page 20 The factory reserves the final interpretation right. And keep the right to stop or change product specification and design without prior notice at any time, no need to bear the resulting obligations. Version : F51IN...

Need help?
Do you have a question about the ECO900 and is the answer not in the manual?
Questions and answers