Advertisement
Quick Links
Smart Motion
CCTV User Guide
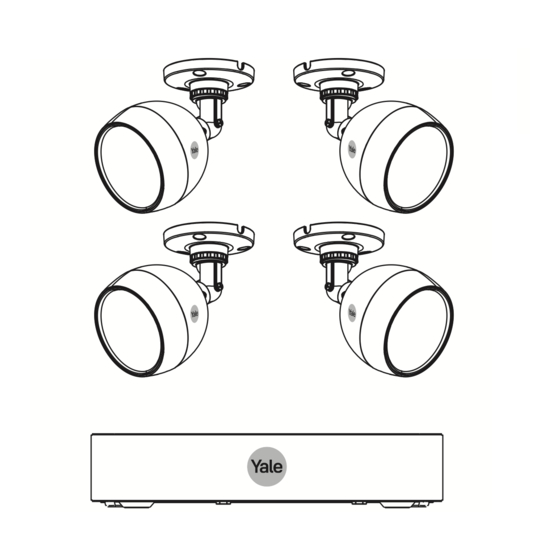
2 cam / 4 channel kit = YSV-2CSMD-4CK
4 cam / 8 channel kit = YSV-4CSMD-8CK
Single Camera Extension Kit = YSV-1CSMD
This manual will guide you through the standard settings and operations for normal
residential CCTV usage. The system is based on a professional system and may contain
advanced features and settings that are typically not needed for residential use.
This manual may be continuously updated and be available at www.yalehome.co.uk/support
Advertisement

Subscribe to Our Youtube Channel
Related Manuals for Assa Abloy yale YSV-2CSMD-4CK


Summary of Contents for Assa Abloy yale YSV-2CSMD-4CK
- Page 1 Smart Motion CCTV User Guide 2 cam / 4 channel kit = YSV-2CSMD-4CK 4 cam / 8 channel kit = YSV-4CSMD-8CK Single Camera Extension Kit = YSV-1CSMD This manual will guide you through the standard settings and operations for normal residential CCTV usage.
- Page 2 Index Plan the camera location Connect cables as described in the Quick Start Guide that was included in the Kit Initial camera set-up 05-06 Adding WiFi/IP cameras to the system 07-09 10-11 Adding an additional WiFi camera after initial set up...
- Page 3 Plan Camera Locations and Connect Cables It is the users responsibility they make sure to follow the local regulations for setting up camera surveillance. Plan the camera location Connect cables according to the quick start guide that came with your kit. (GB) Setting up - (DE) Einrichten - (FR) Configuration - (ES) Configuración - (IT) Impostazione XVR recorder can be connected to a TV or monitor with a HDMI port.
- Page 4 Download App - Personal Registration in the App Scan QR Code to download App for Android or iOS: 1. Click ‘Register’ 2. Enter email 3. Choose a password 4. Click ‘Verification Code’ NOTE: Also look for received mail in the Junk-Mail Box 5.
- Page 5 Initial Set Up - Set Up Via TV / Monitor Follow on-screen instructions Choose Region, Language, Video Standard (PAL in UK and Europe) Set Time Zone, Date and Time ' " ; : & Confirm Password Choose Password hint Write down the password! This will be your master key to access vital functions in the system.
- Page 6 Initial Set Up - XVR Set Up Via TV / Monitor Input email address and ensure the slider switch is coloured yellow. (recommend using the same one as use d for the Yale View App) Email address Enable the tab for security questions, yellow denotes it is enabled. Complete Security Questions (recommended) We strongly recommend inputting an email address in the instance...
- Page 7 Initial Set Up - Adding Cameras Choose one of the two options (can be changed later if you should want to add or remove cameras from your system) Click if you are also adding Click if you only have Wi-Fi camera(s) wired cameras (also known as IP cameras) (Wi-Fi cameras can be added later if needed)
- Page 8 Initial Set Up - Adding Cameras XVR unit needs to be connected to your router, before you can connect camera. Connect Ethernet cables as described in the Quick Start Guide included in the box with the Kit. Additional WiFi cameras can be added later, via the main menu. Click Next Click Next All your cameras should be shown here.
- Page 9 Initial Set Up - Adding WiFi Cameras Select the router you want to connect to. Insert the WiFi password for your router. You can now unplug the ethernet cable from your WiFi camera. It is now wirelessly connected to your router. Camera power can be unplugged and then plugged in again when mounted in the desired location, within range of the router.
-
Page 10: Main Menu Overview
Main Menu Overview Once the initial set up is complete, you should see the Live View screen, which will show different channels relating to your CCTV kit, as image below. Right Click in the Live View screen > brings up the Top Menu. Right Click anywhere else to take you to the <... - Page 11 Main Menu Overview Main Menu Search: Search for and playback recorded video by date and time. Or use the Smart Motion Detection feature to search by Human or Vehicle. Main Menu page 1 AI: Smart Motion Detection (SMD) settings. Note: SMD - Smart Motion Detection works across all channels - depending on how many channels the unit has (4 or 8).
- Page 12 Setting Date, Time and Language System settings: The instructions on this page are all accessed via the SYSTEM tab on the Main Menu Go to SYSTEM>General>Date & Time Set Year, Month, Date and Hour, Minutes Set your time zone according to GMT Click Save Click Apply Ensure DST is selected appropriately.
- Page 13 Setting Up Recording and Motion Detection Setting up recording schedule for SMD - Smart Motion Detection - to detect Human, Vehicular or both. Go to Main Menu Step A: To set up a SCHEDULE (week planning) for recording and event triggers Step B: To set up VIDEO Detection and motion triggers from recording.
- Page 14 Searching in Recorded Video When you have setup your system, this menu is where you can find video recordings to investigate or document events. Search for and playback recorded video by date & time or by searching for human or vehicular shapes Select Year and Month Select Day No changes can be made in the search window...
- Page 15 Backing up a Video Sequence Main Menu > BACKUP External storage media, HDD or a USB memory stick, need to be plugged in to the USB port (back of the XVR unit) Device name will appear in the window. Select Year and Month Select Day...
- Page 16 Adding a WiFi Camera to your XVR Adding a WiFi Camera to your XVR Make sure the relevant Yale WiFi/IP camera has been paired with the same router as the CCTV and is working! See manual that came with WiFi camera. If channel 5 (on a 4 channel XVR) OR channels 9 and 10 (on an 8 channel XVR) are used for a WiFi camera, this will disable the Smart Motion Detection functionality across ALL channels.
- Page 17 Moving WiFi Camera in the Channel List Rearranging WiFi camera in channel list How to move WiFi camera up the channels list for simpler overview when searching and in the App. Main Menu > Camera Go to Channel Type Decide which channel you are changing and tick the relevant box in the IP column.
- Page 18 Setting Up Mail and App Notification You will receive a push notification every time motion is detected via the App. You can also adjust settings in the app, view live feed & view history. If you would like to receive email notifications, please follow the below steps.
-
Page 19: System Information
System Information Go to Rec Estimate Check that all Cameras/channels are ticked. Click select If recording over-runs the hard drive capacity, it will as default overwrite the oldest recording. Main Menu > Storage Warning this will erase all recordings on your hard drive. 1) Go to Disk Manager 2 Tick to select hard drive Click Format... - Page 20 Security & Risk Communications, Parkway Business Centre, Ballymount Rd Lower, THE ASSA ABLOY GROUP is the world’s leading Ballymount, Dublin, Ireland manufacturer and supplier of locking solutions, dedicated to satisfying end-user needs to security, safety and convenience.
Need help?
Do you have a question about the yale YSV-2CSMD-4CK and is the answer not in the manual?
Questions and answers