Gaggenau CI 272 Instruction Manual
Hide thumbs
Also See for CI 272:
- Instruction manual (60 pages) ,
- Information for use (28 pages) ,
- Instructions for use manual (32 pages)
Table of Contents
Advertisement
Quick Links
Advertisement
Table of Contents

Subscribe to Our Youtube Channel
Related Manuals for Gaggenau CI 272


Summary of Contents for Gaggenau CI 272
- Page 1 Gaggenau Instruction manual CI 272...
-
Page 3: Table Of Contents
Transfer function Timer functions Additional information on products, accessories, Cooking timer replacement parts and services can be found at The short-term timer www.gaggenau.com and in the online shop Stopwatch function www.gaggenau-eshop.com Saucepan booster function Activating Deactivating Frying pan booster function... -
Page 4: Intended Use
m Intended use Always monitor the cooking process. Short cooking processes must be monitored continuously. Read these instructions carefully. Please keep When using the cooking functions, set the the instruction and installation manual, as well hotplate on which you have placed the saucepan as the appliance certificate, in a safe place for with the temperature sensor. -
Page 5: Important Safety Information
m Important safety A defective appliance may cause electric ▯ shock. Never switch on a defective information appliance. Unplug the appliance from the mains or switch off the circuit breaker in the Risk of fire! fuse box. Contact the after-sales service. Hot oil and fat can ignite very quickly. -
Page 6: Causes Of Damage
bain marie must not directly touch the Causes of damage bottom of the water-filled pot. Only use heat- resistant cookware. Caution! Risk of injury! Saucepans may suddenly jump due to liquid ▯ – Rough pan bases may scratch the hob. between the pan base and the hotplate. -
Page 7: Protecting The Environment
Protecting the environment Cooking with induction In this section, you can find information about saving Advantages of induction cooking energy and disposing of the appliance. Induction cooking is very different from traditional cooking methods, as heat builds up directly in the item Energy-saving advice of cookware. - Page 8 Some induction cookware does not have a fully Absence of pan or unsuitable size ferromagnetic base: If no pan is placed on the selected hotplate, or if it is ▯ made of unsuitable material or is not the correct size, If the base of the cookware is only partially the power level displayed on the hotplate indicator will ferromagnetic, only the area that is ferromagnetic...
-
Page 9: Getting To Know Your Appliance
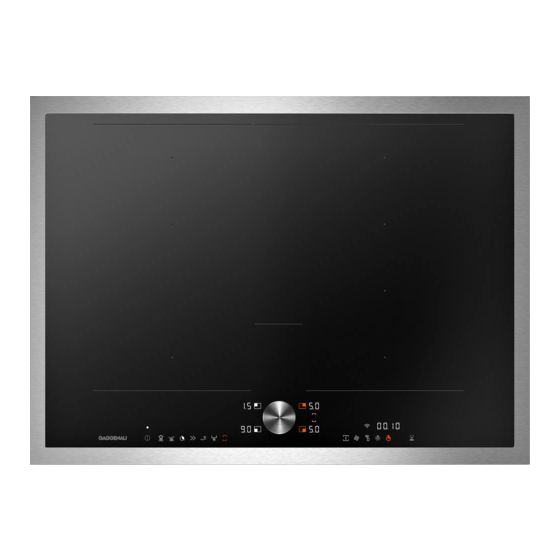
Getting to know your appliance You can find information on the dimensions and power of the hotplates in the overview. ~ "" on page 2 The control panel Indicators Touch keys ª ÿ Flex function activated Main switch « Flex function deactivated ¨... -
Page 10: The Hotplates
The hotplates Hotplate Û Simple hotplate Use cookware that is a suitable size á See section ~ "Flex function" Flexible cooking zone Only use cookware that is suitable for induction cooking; see section ~ "Cooking with induction" Residual heat indicator The hob has a residual heat indicator for each hotplate. -
Page 11: Twistpad With Twist Knob
Twistpad with twist knob Operating the appliance The twistpad is the control panel where you can use the This chapter explains how to set a hotplate. The table twist knob to select the hotplates and heat settings. shows heat settings and cooking times for various meals. -
Page 12: Chef's Recommendations
Chef's recommendations Selecting a hotplate and heat setting The hob must be switched on. Recommendations Select the hotplate. To do this, touch the twist knob in the appropriate area for the required hotplate. ▯ When heating up puree, cream soups and thick sauces, stir occasionally. - Page 13 Cooking table The table shows which heat setting is suitable for each type of food. The cooking time may vary depending on the type, weight, thickness and quality of the food. Heat Cooking setting time (mins) Melting Chocolate coating 1 - 1. Butter, honey, gelatine 1 - 2 Heating and keeping warm...
- Page 14 Heat Cooking setting time (mins) Roasting/frying with little oil* Escalope, plain or breaded 6 - 7 6 - 10 Escalope, frozen 6 - 7 8 - 12 Chop, plain or breaded** 6 - 7 8 - 12 Steak (3 cm thick) 7 - 8 8 - 12 Poultry breast (2 cm thick)**...
-
Page 15: Flex Function
As two independent hotplates Flex function The flexible cooking zone is used like two independent hotplates. You can use the flexible cooking zone as a single hotplate or as two independent hotplates, as required. Activating It consists of four inductors that work independently of See section ~ "Operating the appliance"... -
Page 16: Transfer Function
Unlinking the two hotplates Transfer function Select one of the two hotplates assigned to the flexible cooking zone. You can use this function to transfer the settings of one Touch the ª symbol. hotplate to another. The « symbol appears in the cooking zone display. This function can also be used on the flexible cooking This deactivates the flexible cooking zone. -
Page 17: Timer Functions
‒ A set cooking time or the cooking sensor function Timer functions will also be transferred to the new hotplate. The frying sensor function will not be transferred. ‒ The booster functions can only be moved from left Your hob has three timer functions: to right or from right to left when none of the hotplates are active. -
Page 18: The Short-Term Timer
Stopwatch function Changing or deleting the time Select the hotplate and then touch the symbol. The stopwatch shows the cooking time that has elapsed so far in minutes and seconds (mm.ss). The maximum Change the cooking time using the twist knob or set to duration is 99 minutes and 59 seconds (99.59). -
Page 19: Saucepan Booster Function
Saucepan booster function Frying pan booster function This function allows large volumes of water to be heated This function enables you to heat cookware faster than Š Š up even more quickly than with power setting . The when using heat setting saucepan booster function temporarily increases the After deactivating the function, select the appropriate maximum output of the selected hotplate. -
Page 20: Deactivating
Deactivating Keep-warm function Select a hotplate. Touch the © symbol, turn the twist knob or select This function is suitable for melting chocolate or butter › a different function. The display goes out. The and for keeping food warm. Š heat setting lights up in the display for the hotplate. -
Page 21: Automatic Functions
The frying sensor function is available for all hotplates. Automatic functions The cooking sensor function is available on all hotplates if a wireless temperature sensor is connected. The automatic functions make cooking easy and always In this section, you will find information on: give you excellent results. -
Page 22: Suitable Cookware
Suitable cookware A wireless temperature sensor is required for the cooking sensor function. You can purchase this from specialist retailers or from our technical after-sales Select the hotplate the diameter of which most closely service – you will need to quote the reference number matches that of the base of the cookware and place the CA060300. - Page 23 Temperature settings Temperature setting Suitable for Very low Preparing and preserving sauces, sweating vegetables and frying food in extra virgin olive oil, butter or margarine. Frying food using extra virgin olive oil, butter or margarine, e.g. omelettes. Medium - low Frying fish and Thick food, e.g. meatballs and sausages. Medium - high Frying steaks, medium or well-done, frozen, breaded and fine foods, e.g.
- Page 24 Temperature ranges Setting the boiling point The point at which water starts to boil depends on the Cooking sensor Temperature Suitable for height of your home above sea level. You can set the function range boiling point if water is boiling too strongly or not Heating, Keepting 60 - 70 °C e.g.
- Page 25 Connection failed: Five beeps sound. The ¨ Press the ¨ symbol on the wireless temperature symbol changes immediately from orange to white sensor on the cookware. Once the wireless and the cooking sensor indicators on the hotplates temperature sensor has been detected, the default go out.
-
Page 26: Recommended Dishes
Recommended dishes The following table shows a selection of dishes and is arranged by food type. The temperature and the cooking time depend on the amount, the condition and the quality of the food. Meat Automatic Function Temperature Total cooking time range from signal (mins) Frying with a small amount of oil function... - Page 27 Fish Automatic Function Temperature Total cooking time range from signal (mins) Frying with a large amount of oil function Fish, beer-battered or breaded* Cooking sensor function 175 °C 10 - 15 * Heat the oil with the lid on. Fry one portion after the other with the lid off (the table shows the time required for each portion). Egg-based dishes Automatic function Temperature...
- Page 28 Vegetables and pulses Automatic Temperature Total cooking time function range from signal (mins) Vegetables, e.g. green beans Cooking sensor 115 °C 5 - 10 function Chickpeas, beans Cooking sensor 115 °C 10 - 12 function Lentil stew Cooking sensor 115 °C 15 - 20 function Frying with a large amount of oil function...
- Page 29 Soups Automatic function Temperature Total cooking time range from signal (mins) Simmering function Instant soups, e.g. creamy soups* Cooking sensor function 85 °C 10 - 15 Boiling function Homemade broths, e.g. meat or vegetable soups** Cooking sensor function 100 °C 60 - 90 Instant soups, e.g.
- Page 30 Frozen products Automatic function Tempera- Total cooking time ture range from signal (mins) Frying with a small amount of oil function Escalope Frying sensor function 15 - 20 Cordon bleu* Frying sensor function 10 - 30 Poultry breast* Frying sensor function 10 - 30 Chicken nuggets Frying sensor function...
-
Page 31: Preparation And Maintenance Of The Wireless Temperature Sensor
Preparation and maintenance of the Using the wireless temperature sensor wireless temperature sensor Attach the temperature sensor to the silicone patch and align it correctly. In this section, you will find the following information: ▯ Adhering the silicone patch ▯ Using the wireless temperature sensor ▯... -
Page 32: Declaration Of Conformity
Remove the upper section of the casing. Remove the old battery. Insert the new battery. Make sure that the polarity is correct. Gaggenau hereby declares that the appliance with wireless temperature sensor function meets the basic requirements and other relevant provisions of the Directive 1999/5/EG. -
Page 33: Childproof Lock
Childproof lock Display cleaning protection The hob can be protected against being accidentally If you wipe over the control panel while the hob is turned on, to ensure that children do not switch on the switched on, settings may be changed. To avoid this, the hotplates. -
Page 34: Basic Settings
Basic settings Display Function Signal tones ‹¯ All signals are switched on.* ™‚ Œ Most of the signals are switched off. Time for selecting the hotplate † The hotplate remains selected for 5 seconds. ‚‹ The hotplate remains selected for 10 seconds.* ‚†... -
Page 35: To Access The Basic Settings
To access the basic settings: Suitability test of tableware The hob must be off. This function can be used to check the speed and Switch on the hob. quality of the cooking process depending on the Touch the symbol within the next 10 seconds. cookware. -
Page 36: Cleaning
Hob surround Cleaning To prevent damage to the hob surround, observe the following instructions: Suitable maintenance and cleaning products can be purchased from the after-sales service or in our e-Shop. ▯ Only use warm soapy water ▯ Wash new dish cloths thoroughly before use. ▯... -
Page 37: Frequently Asked Questions (Faq)
Frequently Asked Questions (FAQ) Using the appliance Why can't I switch on the hob and why is the childproof lock symbol lit up? The childproof lock is activated. Place the twist knob on the twistpad. You can find information on this function in section ~ "Suitability test of tableware" Why can I hear an audible signal? Remove any liquid or food remains from the control panel. - Page 38 Cookware Why is it taking so long for the cookware to heat up or why is it not heating up sufficiently despite being on a high heat set- ting? The cookware is too small for the hotplate that is switched on or it is not suitable for induction cooking. Check that the cookware is suitable for induction cooking and that it is placed on the hotplate that best corresponds to its size.
-
Page 39: What To Do In The Event Of A Fault
What to do in the event of a fault Usually, faults are small matters that are easy to eliminate. Please read the information in the table before calling the after-sales service. Display Possible cause Troubleshooting None The power supply has been disconnected. Use other electrical devices to check whether a short-cir- cuit has occurred in the power supply. - Page 40 Display Possible cause Troubleshooting The indicator on the tem- The temperature sensor is disconnected. Press and hold the symbol on the temperature sensor for perature sensor flashes eight seconds and then reconnect the temperature sen- three times. sor to the hob. “Š‹‹‹...
-
Page 41: After-Sales Service
After-sales service In the event of repairs please contact our after-sales sevice. We are committed fo find the best solution also in order to avoid an unnecessary call-out. Please quote the E number (product number) and the FD number (production number) of your appliance when contacting the after-sales service. - Page 44 Gaggenau Hausgeräte GmbH Carl-Wery-Straße 34 81739 München GERMANY www.gaggenau.com...
Need help?
Do you have a question about the CI 272 and is the answer not in the manual?
Questions and answers