Advertisement
Quick Links
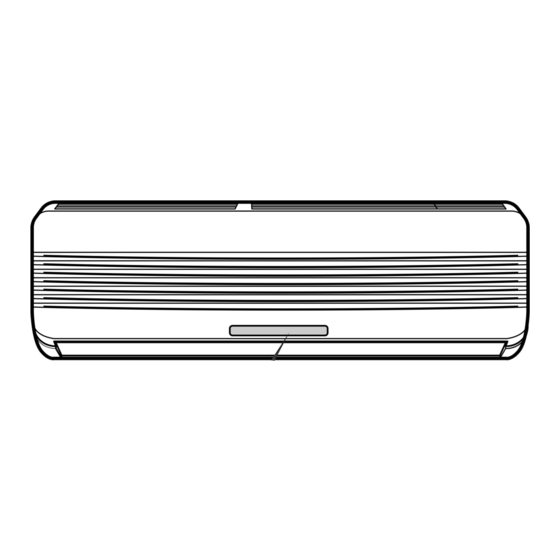
LG Room
Air Conditioner
OWNER'S MANUAL
MODELS:S07A_Series
S09A_Series
S12A_Series
S18A_Series
S24A_Series
website http://www.lgservice.com
IMPORTANT
• Please read this owner's manual carefully and thoroughly
before installing and operating your room air conditioner.
• Please retain this owner's manual for future reference after
reading it thoroughly.
LG
Prior to installation, this air-
conditioning unit must be
submitted for approval by the utility
service which provides electricity
(EN 61000-2, EN 61000-3 Norm).
Advertisement

Subscribe to Our Youtube Channel
Related Manuals for LG S07A Series


Summary of Contents for LG S07A Series
- Page 1 LG Room Air Conditioner OWNER'S MANUAL MODELS:S07A_Series Prior to installation, this air- conditioning unit must be S09A_Series submitted for approval by the utility S12A_Series service which provides electricity (EN 61000-2, EN 61000-3 Norm). S18A_Series S24A_Series IMPORTANT • Please read this owner's manual carefully and thoroughly before installing and operating your room air conditioner.
-
Page 2: Table Of Contents
Room Air Conditioner Owner’s Manual TABLE OF CONTENTS FOR YOUR RECORDS Safety Precautions......3 Write the model and serial numbers here: Model # Serial # Prior to Operation ......6 You can find them on a label on the side of each unit. Dealer's Name Date Purchased Introduction ........7... -
Page 3: Safety Precautions
Safety Precautions Safety Precautions To prevent the injury of the user or other people and property damage, the following instructions must be followed. I Incorrect operation due to ignoring instruction will cause harm or damage. The seriousness is classified by the following indications. This symbol indicates the possibility of death or serious injury. - Page 4 Safety Precautions I Operation Do not share the outlet with Do not use the damaged Do not modify or extend the other appliances. power cord. power cord randomly. • It will cause an electric shock or • Otherwise, it may cause a fire •...
- Page 5 Safety Precautions I Installation Install the drain hose to ensure that drain Install the product so that the noise or hot can be securely done. wind from the outdoor unit may not cause any damage to the neighbors. • Otherwise, it may cause water leakage. •...
-
Page 6: Prior To Operation
Prior to Operation Prior to Operation Preparing for Operation 1. Contact an installation specialist for installation. 2. Plug in the power plug properly. 3. Use a dedicated circuit. 4. Do not use an extension cord. 5. Do not start/stop operation by plugging/unplugging the power cord. 6. -
Page 7: Introduction
Introduction Introduction Symbols used in this Manual This symbol alerts you to the risk of electric shock. This symbol alerts you to hazards that may cause harm to the air conditioner. This symbol indicates special notes. NOTICE Features WARNING: This appliance should be installed in accordance with national wiring regulations. -
Page 8: Operating Instructions
Operating Instructions Operating Instructions Remote Controller 1. Remove the battery cover by pulling it according to the arrow direction. 2. Insert new batteries making sure that the (+) and (-) of battery are installed correctly. 3. Reattach the cover by sliding it back into position. Use 2 AAA(1.5volt) batteries. - Page 9 Operating Instructions Remote Control Operations The controls will look like the following. 1. START/STOP BUTTON Operation starts when this button is pressed Signal transmitter and stops when the button is pressed again. 2. OPERATION MODE SELECTION BUTTON Used to select the operation mode. 3.
- Page 10 Operating Instructions Cooling operation Press the Start/Stop button. The unit will respond with a beep. Open the door on the remote control. To select Cooling Operation or Healthy Dehumidification Operation. Cooling Auto Healthy Heating changeover Dehumidification (Heat pump model only) Press the Jet Cool button to operate the speed cooling mode and the unit will operate in super high fan speed on cooling mode for 30 minutes.
- Page 11 Operating Instructions Auto changeover operation Press the Start/Stop button. The unit will respond with a beep. Open the door of the remote controller. To select Auto Changeover Operation, press the Operation Mode Selection button. Each time the button is pressed, the operation mode is shifted in the direction of the arrow.
- Page 12 Operating Instructions Auto operation (Optional) Press the Start/Stop button. The unit will respond with a beep. Open the door of the remote controller. To select Auto Operation, press the operation mode selection button. Each time the button is pressed, the operation mode is shifted in the direction of the arrow.
- Page 13 Operating Instructions Healthy dehumidification operation Press the Start/Stop button. The unit will respond with a beep. Open the door of the remote controller. To select Healthy Dehumidification Operation, press the Operation Mode Selection button. Each time the button is pressed, the operation mode is shifted in the direction of the arrow.
- Page 14 Operating Instructions Heating operation (Heat pump model only) Press the Start/Stop button. The unit will respond with a beep. Open the door of the remote controller. To select Heating Operation, press the Operation Mode Selection button. Each time the button is pressed, the operation mode is shifted in the direction of the arrow.
- Page 15 Operating Instructions Jet cool operation Press the Start/Stop button. The unit will respond with a beep. Press the Jet Cool button to operate the speed cooling mode and the unit will operate at super high fan speed on cooling mode for 30 minutes. Cooling Auto Healthy...
- Page 16 Operating Instructions Jet heat operation (Optional) Press the Start/Stop button. The unit will respond with a beep. Open the door of the remote controller. To select Heating Operation. Cooling Auto Healthy Heating changeover Dehumidification (Heat pump model only) Press the Jet Heat button to operate the speed heating mode and the unit will operate at super high fan speed on heating mode for 60 minutes.
- Page 17 Operating Instructions PLASMA purification operation(Optional) Press the Start/Stop button. The unit will respond with a beep. Open the door of the remote controller. Press the PLASMA button. Operation will start when the button is pressed and stop when the button is pressed again.
- Page 18 Operating Instructions 2nd F operation Press the Start/Stop button. The unit will respond with a beep. Open the door of the remote control and press the 2nd Function button to operate functions printed in blue unter buttons. (Check the indication of 2nd function on the display of the remote controller.) These buttons can set the timer as follows: CANCEL...
- Page 19 Operating Instructions Additional Features Sleep mode 1. Press the Sleep Mode Auto button to set the time you want the unit to stop automatically. 2. The Timer is programmed in one-hour increments by pressing the Sleep Mode Auto button 1 to 7 times. The sleep mode is available for 1 to 7 times.
- Page 20 Operating Instructions Vertical Airflow Direction Control The up/down airflow (Vertical Airflow) can be adjusted NOTICE by using the remote control. ❏ If you press the CHAOS swing button, the horizontal airflow direction is changed automatically based on the CHAOS algorithm to distribute the air in the room evenly and at the same time to make the human body feel most comfortable, as if enjoying a natural breeze.
- Page 21 Operating Instructions Auto clean(Optional) 1. Whenever you press the Auto Clean button, Auto Clean Function will be reserved and cancelled. 2. Auto Clean function works before and after cooling or dehumidification mode. For details, refer to the below points. AUTO CLEAN 3.
-
Page 22: Maintenance And Service
Maintenance and Service Maintenance and Service CAUTION: Before performing any maintenance, turn off the main power to the system. Indoor Unit Grille, Case, and Remote Control Turn the system off before cleaning. To clean, wipe with a soft, dry cloth. Do not use bleach or abrasives. Supply power must be disconnected before cleaning NOTICE the indoor unit. - Page 23 Maintenance and Service Replacement of purifying filter(Optional) Recomended use period : About 2 years 1. Open front panel and remove air filters. Air filter 2. Remove Triple deodorizing Filters. 3. Insert new Triple deodorizing Filters. 4. Reinsert air filters and close front panel. Air purifying filter Outdoor Unit The heat exchanger coils and panel vents of the outdoor unit should be checked regularly.
- Page 24 Maintenance and Service When the air conditioner is not going to be used for a long time. When air conditioner is not going to be When the air conditioner is to be used again. used for a long time. Clean the air filter and install it in the indoor Operate the air conditioner on mode for 2 to unit.
- Page 25 Maintenance and Service Troubleshooting Check the following points before requesting repairs or service..If the fault persists, please contact your dealer or service center. Case Explanation See page The air conditioner does not • Have you made a mistake in timer operation? operate.
- Page 26 Memo 26 Room Air Conditioner...
- Page 27 P/No.: 3828A20397T Printed in Korea After reading this manual, keep it in a place easily accessible to the user for future reference.
Need help?
Do you have a question about the S07A Series and is the answer not in the manual?
Questions and answers