Advertisement
Available languages
Available languages
Technical Support
If you need any technical help, please visit our official support site and
contact our support team before returning the products:
https://support.reolink.com.
Technische Unterstützung
Wenn Sie technische Hilfe benötigen, besuchen Sie bitte unsere
offizielle Support-Website und kontaktieren Sie unser Support-Team,
bevor Sie die Produkte zurückschicken, https://support.reolink.com.
Support technique
Si vous avez besoin d'aide, veuillez contacter Reolink avant de
retourner votre produit. La plupart des questions peuvent être
répondues via notre centre de support en ligne à l'adresse
https://support.reolink.com.
Assistenza Tecnica
Se avete bisogno di assistenza tecnica, visitate il nostro sito ufficiale di
Centro Assistenza e contattate il team di supporto prima di restituire i
prodotti, https://support.reolink.com.
Soporte técnico
Si necesita cualquier ayuda técnica, por favor, consulte nuestro sitio
oficial de soporte y póngase en contacto con nuestro equipo de
soporte antes de devolver el producto: https://support.reolink.com.
REOLINK INNOVATION LIMITED
FLAT/RM 705 7/F FA YUEN COMMERCIAL BUILDING 75-77 FA YUEN
STREET MONG KOK KL HONG KONG
Product Ident GmbH
EU REP
Hoferstasse 9B, 71636 Ludwigsburg, Germany
Email: prodsg@libelleconsulting.com
APEX CE SPECIALISTS LIMITED
UK REP
Addr.: 89 Princess Street, Manchester, M14HT, UK
Email: info@apex-ce.com
J a n u a r y 2 02 3
Q S G 1 _ A
58.03.005.0075
Operational Instruction
Apply to: RLA-PS1
@ R e o l i n kTe c h
E N/D E /FR /I T/E S
h t t p s ://re o l i n k . c o m
Advertisement
Chapters

Related Manuals for Reolink RLA-PS1


Summary of Contents for Reolink RLA-PS1
- Page 1 Support-Website und kontaktieren Sie unser Support-Team, bevor Sie die Produkte zurückschicken, https://support.reolink.com. Support technique Si vous avez besoin d’aide, veuillez contacter Reolink avant de retourner votre produit. La plupart des questions peuvent être répondues via notre centre de support en ligne à l’adresse https://support.reolink.com.
-
Page 2: Table Of Contents
Content What's in the Box What's in the Box Product Introduction Connection Diagram Install the Product Specifications PoE Switch Power Adapter Cotton Mats Notification of Compliance Mounting Template Pack of Screws Quick Start Guide English English... -
Page 3: Product Introduction
Product Introduction Connection Diagram DC IN DC IN PoE Switch UPLINK PoE Switch UPLINK POWER POWER 1. Power on the PoE switch with the provided power adapter. 2. Connect one end of an Ethernet cable to the uplink port on the PoE switch, and the other end to a router. 3. Connect your devices to the PoE+ ports on the switch via another Ethernet cable. -
Page 4: Install The Product
Install the Product Mount the Switch on a Wall Install the Switch on a Table 1. Drill holes on a wall in accordance with the mounting hole template. 2. Secure the provided screws to the wall, and hang the switch on them. Fix the PoE switch on a table with four cotton mats provided. -
Page 5: Specifications
General reception, which can be determined by turning the equipment off and on, the user is encouraged to try to correct the interference by one or more Operating Temperature: -10°C+45°C (14°F~113°F) of the following measures: Operating Humidity: 10%~90% RH (non-condensing) • Reorient or relocate the receiving antenna. For more specifications, visit https://reolink.com/. • Increase the separation between the equipment and receiver. • Connect the equipment into an outlet on a circuit different from that to Notification of Compliance which the receiver is connected. • Consult the dealer or an experienced radio/TV technician for help. FCC Compliance Statement Changes or modifications not expressly approved by the party responsible for compliance could void the user’s authority to operate the This device complies with Part 15 of the FCC Rules. Operation is subject to equipment. - Page 6 Terms and Privacy Simplified EU Declaration of Conformity Use of the product is subject to your agreement to the Terms of Service Reolink declares that the WiFi camera is in compliance with the essential and Privacy Policy at reolink.com. Keep out of reach of children. requirements and other relevant provisions of Directive 2014/53/EU, the PoE camera and NVR is in compliance with Directive 2014/30/EU. End User License Agreement By using the Product Software that is embedded on the Reolink product, Correct Disposal of This Product you agree to the terms of this End User License Agreement (“EULA”) between you and Reolink. Learn more: https://reolink.com/eula/. This marking indicates that this product should not be disposed with other household wastes.throughout the EU. To prevent possible harm to ISED Statements the environment or human health from uncontrolled waste disposal, recycle it responsibly to promote the sustainable reuse of material This device contains licence-exempt transmitter(s)/re resources. To return your used device, please use the return and...
- Page 7 Katalog Radio Frequency Exposure Statement for IC The device has been evaluated to meet general RF exposure requirements. The device can be used in mobile exposure conditions. Lieferumfang The min separation distance is 20cm. Über das Produkt Verbindungsdiagramm Installation des Produktes Spezifikationen Konformitätserklärung English Deutsch...
-
Page 8: Lieferumfang
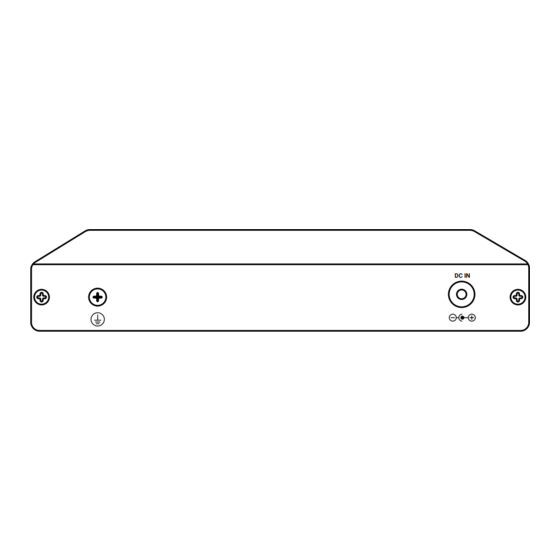
Lieferumfang Über das Produkt DC IN PoE-Switch Netzadapter Baumwoll-Matten PoE Switch UPLINK POWER Erdungsschraube Montageschablone Schraubenpack Schnellstart- DC-Port Leitfaden Strom-LED 10/100Mbps-Downlink-PoE+-Ports (max. 30W pro Port) Gigabit-Ethernet-Uplink-Ports Deutsch Deutsch... -
Page 9: Verbindungsdiagramm
Verbindungsdiagramm Installation des Produktes Den Switch auf einem Tisch installieren 1. Schalten Sie den PoE-Switch mit dem mitgelieferten Netzadapter ein. 2. Verbinden Sie ein Ende eines Netzwerkkabels mit dem Uplink-Port des PoE-Switches und das andere Ende mit einem Router. 3. Verbinden Sie Ihr Gerät über ein anderes Netzwerkkabel mit dem Befestigen Sie den PoE-Switch auf einem Tisch mit vier mitgelieferten PoE+-Port des Switches. Baumwollmatten. Deutsch Deutsch... -
Page 10: Spezifikationen
Spezifikationen Den Switch an der Wand installieren Standard: IEEE802.3af/at Gesamt-Leistungsbudget: 120W Das Allgemeine Betriebstemperatur: -10°C+45°C (14°F~113°F) Betriebsfeuchtigkeit: 10%~90% RH (nicht kondensierend) Weitere Spezifikationen finden Sie unter https://reolink.com/. Konformitätserklärung 1. Bohren Sie Löcher an einer Wand gemäß der Montageschablone. FCC-Konformitätserklärung 2. Befestigen Sie die mitgelieferten Schrauben an der Wand und hängen Sie den Switch daran. Das Gerät erfüllt die Anforderungen von Teil 15 der FCC-Vorschriften. Der Betrieb unterliegt den zwei Bedingungen: Das Gerät darf keine schädlichen Interferenzen verursachen, muss alle empfangenen Interferenzen akzeptieren, inkl. Interferenzen, die unerwünschten Betrieb verursachen können. HINWEIS: Dieses Gerät wurde getestet und entspricht den Grenzwerten für ein digitales Gerät der Klasse B gemäß Teil 15 der FCC Vorschriften. Deutsch Deutsch... - Page 11 Diese Grenzwerte sind so ausgelegt, dass sie einen angemessenen Vereinfachte EU-Konformitätserklärung Schutz gegen schädliche Störungen bei der Installation in Wohngebieten sicherstellen. Dieses Gerät erzeugt und verwendet Hochfrequenzenergie Reolink erklärt, dass die WiFi-Kamera den wesentlichen Vorschriften, und kann diese ausstrahlen. Wenn es nicht gemäß den Anweisungen anderen relevanten Vorschriften der Richtlinie 2014/53/EU entspricht, installiert und verwendet wird, kann es schädliche Störungen im die PoE-Kamera und NVR der Richtlinie 2014/30/EU entspricht. Funkverkehr verursachen. Es kann jedoch nicht garantiert werden, dass bei einer bestimmten Installation keine Störungen auftreten. Wenn dieses Gerät Störungen des Radio- oder Fernsehempfangs verursacht, was Richtige Entsorgung des Produktes durch Ein- und Ausschalten des Geräts festgestellt werden kann, sollte der Benutzer versuchen, die Störungen durch eine oder mehrere der Das Zeichen bedeutet, dass das Produkt in der ganzen EU nicht mit folgenden Maßnahmen zu beheben: anderen Haushaltsabfällen entsorgt werden darf. Um mögliche Schäden • Richten Sie die Empfangsantenne neu aus oder stellen Sie sie um. für die Umwelt oder die menschliche Gesundheit zu vermeiden, recyceln • Vergrößern Sie den Abstand zwischen dem Gerät und dem Empfänger Sie es am besten auf eine geeignete Weise. Um Ihr Altgerät zurückzuge- • Schließen Sie das Gerät an eine Steckdose eines anderen Stromkreises ben, nutzen Sie bitte die Rückgabe- und Sammelsysteme oder wenden an als den, an den der Empfänger angeschlossen ist. Sie sich an den Händler, bei dem Sie das Produkt gekauft haben. Dort • Wenden Sie sich an den Händler oder einen erfahrenen Radio- / TV- kann man das Produkt einem umweltgerechten Recycling zuführen. Techniker, um Hilfe zu erhalten. Änderungen oder Modifikationen, die nicht explizit von der für die Begrenzte Garantie Einhaltung Verantwortlichen erlaubt sind, können Berechtigung des Benutzers zum Betrieb der Geräte aufheben. Dieses Produkt wird mit einer eingeschränkten 2-Jahres-Garantie geliefert, die nur gültig ist, wenn es im offiziellen Reolink-Shop oder bei einem autorisierten Reolink-Händler gekauft wurde.
- Page 12 Erklärung zur Hochfrequenzexposition für IC HINWEIS: Hoffentlich gefällt Ihnen der neue Kauf. Doch bei Unzufriedenheit und Zurückgeben wird dringend empfohlen, das Produkt Das Gerät wurde so bewertet, dass es die allgemeinen vor der Rückgabe auf die Werkseinstellungen zurückzusetzen. RF-Expositionsanforderungen erfüllt. Das Gerät kann unter mobilen Expositionsbedingungen verwendet werden. Datenschutz & AGB Der Mindestabstand beträgt 20 cm. Nutzen des Produkts unterliegt Ihrer Zustimmung zu den AGB und der Datenschutzrichtlinie auf reolink.com. Halten Sie es von Kindern fern. Endbenutzer-Lizenzvertrag Durch Verwenden der in das Reolink Produkt eingebetteten Produktsoftware, erklären Sie sich mit den Bedingungen dieses Endbenutzer-Lizenzvertrags (EULA) zwischen Ihnen und Reolink einverstanden. Mehr: https://reolink.com/eula/. ISED-Erklärung Dieses Gerät enthält lizenzbefreite(n) Sender/Empfänger, die den lizenzbefreiten RSS(s) von Innovation, Science and Economic Development Canada entsprechen. Der Betrieb unterliegt den folgenden zwei Bedingungen: (1) Dieses Gerät darf keine Störungen verursachen. (2) Dieses Gerät muss alle Interferenzen akzeptieren, einschließlich Interferenzen, die einen unerwünschten Betrieb des Geräts verursachen können. Deutsch Deutsch...
- Page 13 Contenu Contenu de la Boîte Contenu de la Boîte Introduction du produit Schéma de connexion Installer le produit Spécifications Commutateur PoE Adaptateur secteur Tapis de coton Avis de Conformité Gabarit de montage Paquet de vis Guide de démar- rage rapide Français Français...
-
Page 14: Introduction Du Produit
Introduction du produit Schéma de connexion DC IN DC IN PoE Switch UPLINK PoE Switch UPLINK POWER POWER 1. Allumez le commutateur PoE avec l’adaptateur électrique fourni. 2. Connectez une extrémité d’un câble Ethernet au port de liaison montante du commutateur PoE, et l’autre extrémité à un routeur. 3. Connectez vos appareils aux ports PoE+ du commutateur via un autre câble Ethernet. Vis de mise à la terre Port DC Voyant d’alimentation Ports PoE+ 10/100Mbps à liaison descendante (Max. 30W par port) Ports de liaison montante Gigabit Ethernet Français Français... -
Page 15: Installer Le Produit
Installer le produit Monter le commutateur sur un mur Installer le commutateur sur une table 1. Percez des trous sur un mur conformément au gabarit des trous de montage. 2. Fixez les vis fournies au mur et suspendez-y l’interrupteur. Fixez le commutateur PoE sur une table avec quatre tapis en coton fournis. Français Français... -
Page 16: Spécifications
Général cet équipement provoque des interférences nuisibles à la réception de la radio ou de la télévision, ce qui peut être déterminé en éteignant et en Température de fonctionnement : -10°C+45°C (14°F~113°F) allumant l’équipement, l’utilisateur est encouragé à essayer de corriger Humidité de fonctionnement : 10%~90% RH (non-condensing) l’interférence par une ou plusieurs des mesures suivantes : Pour plus de spécifications, visitez https://reolink.com/. • Réorienter ou relocaliser l’antenne de réception • Augmenter la séparation entre l’équipement et le récepteur. Avis de Conformité • Brancher l’équipement sur une prise de courant d’un circuit différent de celui auquel le récepteur est connecté. • Consulter le revendeur ou un technicien radio/TV expérimenté pour Déclaration de conformité FCC obtenir de l’aide. - Page 17 NOTA : Nous espérons que vous apprécierez ce nouvel achat. Mais si Déclaration de conformité UE simplifiée vous n’êtes pas satisfait du produit et si vous voulez le retourner, nous vous conseillons vivement de réinitialiser l’appareil aux réglages d’usine Reolink déclare que la caméra WiFi est conforme aux exigences essenti- par défaut avant de le retourner. elles et aux autres dispositions pertinentes de la Directive 2014/53/UE, la caméra PoE et NVR sont conformes à la Directive 2014/30/UE. Conditions et Confidentialité Élimination correcte de ce produit L’utilisation du produit est soumise à votre acceptation des Conditions d’utilisation et de la Politique de confidentialité. Tenez-le hors de la portée des enfants. Ce marquage indique que ce produit ne doit pas être éliminé avec d’autres déchets ménagers dans l’UE. Pour éviter que l’élimination incontrôlée des Contrat de licence d’utilisateur final déchets ne nuise à l’environnement ou à la santé humaine, recyclez-les de manière responsable afin de promouvoir la réutilisation durable des ressources matérielles. Pour retourner votre appareil usagé, veuillez En utilisant le logiciel du produit intégré au produit Reolink, vous acceptez utiliser les systèmes de retour et de collecte ou contacter le détaillant où les termes du présent contrat de licence d’utilisateur final (« CLUF ») le produit a été acheté. Ils peuvent prendre ce produit pour un recyclage entre vous et Reolink. En savoir plus : https://reolink.com/eula/.
- Page 18 Contenuto Déclaration d’exposition aux radiofréquences pour IC L’appareil a été évalué pour répondre aux exigences générales en matière d’exposition aux RF. L’appareil peut être utilisé dans des Cosa c’è nella confezione conditions d’exposition mobiles. La distance de séparation minimale est de 20cm. Introduzione al prodotto Diagramma di collegamento Installazione Specifiche tecniche Avviso di conformità Français Italiano...
-
Page 19: Cosa C'è Nella Confezione
Cosa c’è nella confezione Introduzione al prodotto DC IN PoE Switch Adattatore di Cuscinetti alimentazione PoE Switch UPLINK POWER Vite di messa a terra Sagoma di Confezione di viti Guida rapida Porta CC montaggio LED di alimentazione Porte PoE+ downlink 10/100Mbps (max. 30W per porta) Porte Uplink Gigabit Ethernet Italiano Italiano... -
Page 20: Diagramma Di Collegamento
Diagramma di collegamento Installazione Installare lo switch su un tavolo 1. Accendere lo switch PoE con l’adattatore di alimentazione in dotazione. 2. Collegare un’estremità di un cavo Ethernet alla porta uplink dello switch PoE e l’altra a un router. 3. Collegare i dispositivi alle porte PoE+ dello switch con un altro cavo Fissare lo switch PoE su un tavolo con i quattro cuscinetti di cotone in Ethernet. -
Page 21: Specifiche Tecniche
Specifiche tecniche Montaggio dello switch a parete Standard: IEEE802.3af/at Alimentazione richiesta: 120W Generali Temperatura di funzionamento: -10°C+45°C (14°F~113°F) Umidità di funzionamento: 10%~90% RH (senza condensa) Per ulteriori specifiche, visitate il sito https://reolink.com/. Avviso di conformità 1. Eseguire i fori su una parete in base alla dima dei fori di montaggio. Dichiarazione di conformità FCC 2. Fissare alla parete le viti in dotazione e appendere l’interruttore. Questo dispositivo è conforme alla Parte 15 delle norme FCC. Il funzionamento è soggetto alle due condizioni seguenti: Questo dispositivo non può causare interferenze dannose e deve accettare qualsiasi interferenza ricevuta, comprese quelle che possono causare un funzionamento indesiderato. NOTA: Questo apparecchio è stato testato ed è risultato conforme ai limiti previsti per i dispositivi digitali di Classe B, ai sensi della... - Page 22 Dichiarazione di conformità UE semplificata protezione ragionevole contro le interferenze dannose in un’installazione residenziale. Questa apparecchiatura genera e può irradiare energia in Reolink dichiara che la telecamera WiFi è conforme ai requisiti essenziali radiofrequenza e, se non viene installata e utilizzata secondo le istruzioni, e alle altre disposizioni pertinenti della direttiva 2014/53/UE, mentre la può causare interferenze dannose alle comunicazioni radio. Tuttavia, non telecamera PoE e il NVR sono conformi alla direttiva 2014/30/UE. è possibile garantire che non si verifichino interferenze in una particolare installazione. Se questa apparecchiatura causa interferenze dannose alla ricezione radiotelevisiva, che possono essere determinate spegnendo Smaltimento corretto di questo prodotto e riaccendendo l’apparecchiatura, l’utente è incoraggiato a cercare di correggere l’interferenza con una o più delle seguenti misure: Questo marchio indica che questo prodotto non deve essere smaltito con altri rifiuti domestici in tutta l’UE. Per evitare possibili danni • Riorientare o riposizionare l’antenna ricevente. all’ambiente o alla salute umana dovuti allo smaltimento incontrollato • Aumentare la distanza tra l’apparecchiatura e il ricevitore. dei rifiuti, riciclateli in modo responsabile per promuovere il riutilizzo • Collegare l’apparecchiatura a una presa di corrente su un circuito sostenibile delle risorse materiali. Per restituire il dispositivo usato, diverso da quello a cui è collegato il ricevitore.
- Page 23 NOTA: Ci auguriamo che il nuovo acquisto sia di vostro gradimento. Tuttavia, se non siete soddisfatti del prodotto e intendete restituirlo, vi Il dispositivo è stato valutato per soddisfare i requisiti generali di consigliamo vivamente di ripristinare le impostazioni di fabbrica della esposizione alle radiofrequenze. Il dispositivo può essere utilizzato in fotocamera prima di restituirla. condizioni di esposizione mobile. La distanza minima di separazione è di 20 cm. Condizioni e privacy L’uso del prodotto è soggetto all’accettazione dei Termini di servizio e dell’Informativa sulla privacy su reolink.com. Tenere fuori dalla portata dei bambini. Contratto di licenza con l’utente finale Utilizzando il Software del prodotto incorporato nel prodotto Reolink, l’utente accetta i termini del presente Contratto di licenza con l’utente finale (“EULA”) tra l’utente e Reolink. Per saperne di più: https://reolink.com/eula/. Dichiarazioni ISED Questo dispositivo contiene trasmettitori/ricevitori esenti da licenza che sono conformi agli RSS esenti da licenza di Innovation, Science and Economic Development Canada. Il funzionamento è soggetto alle due...
- Page 24 Índice Contenido de la caja Contenido de la caja Presentación del producto Diagrama de conexión Instalar el producto Especificaciones Switch PoE Adaptador de Almohadilla de corriente algodón Notificación de Cumplimiento Plantilla de montaje Paquete de tornillos Guía de inicio rápido Español Español...
- Page 25 Presentación del producto Diagrama de conexión DC IN DC IN PoE Switch UPLINK PoE Switch UPLINK POWER POWER 1. Encienda el Switch PoE con el adaptador de corriente suministrado. 2. Conecte un extremo de un cable Ethernet al puerto de enlace ascendente del Switch PoE y el otro extremo a un rúter. 3.
- Page 26 Instalar el producto Instalar el Switch en la pared Instalar el Switch en una mesa 1. Taladre agujeros en una pared de acuerdo con la plantilla de agujeros de montaje. 2. Fije los tornillos suministrados a la pared y cuelgue el Switch en ellos. Fije el Switch PoE sobre una mesa con cuatro almohadillas de algodón suministradas. Español Español...
- Page 27 Temperatura de funcionamiento: -10°C - +45°C (14°F - 113°F) • Reoriente o reubique la antena receptora. Humedad de funcionamiento: 10% - 90% HR (sin condensación) • Aumente la separación entre el equipo y el receptor. • Conecte el equipo a un tomacorriente de un circuito distinto al que está Para más especificaciones, visite https://reolink.com/. conectado el receptor. • Consulte al distribuidor o un técnico experimentado en radio/TV para Notificación de Cumplimiento obtener ayuda. Cualquier cambio o modificación no expresamente aprobado por la Declaración de Cumplimiento de la FCC parte responsable por el cumplimiento podría anular la autoridad del...
- Page 28 NOTA: Esperamos que tenga una buena experiencia con nuestro Simplificada Declaración de Conformidad de la UE producto. Si usted no está satisfecho y quiere devolverlo, le es muy recomendable que restablezca la cámara a la configuración de fábrica Reolink declara que la cámara WiFi cumple con los requisitos esenciales antes de la devolución. y otras disposiciones pertinentes de la Directiva 2014/53/UE; la cámara PoE cumple con la Directiva 2014/30/UE. Términos y Privacidad El uso del producto está sujeto a la aceptación de los Términos de Desecho Correcto del Producto Servicio y la Política de Privacidad en reolink.com. Mantenga el producto fuera del alcance de los niños. Esta marca indica que este producto no debe ser desechado con otros residuos domésticos en toda la UE. Para evitar posibles daños al medio Contrato de Licencia de Usuario Final ambiente o a la salud humana causados por el desecho incontrolado de residuos, recíclelo de manera responsable para promover la reutilización Al utilizar el Software del producto que está integrado en el producto sostenible de los recursos materiales. Para devolver su dispositivo ya Reolink, usted acepta los términos de este Contrato de Licencia de...
- Page 29 incluyendo interferencia que pueda causar un funcionamiento no deseado. Declaración de Exposición a RF para IC Este equipo ha sido evaluado para cumplir con los requisitos generales de exposición a RF. El dispositivo puede utilizarse sin restricción en condiciones de exposición portátil. La distancia mínima de separación es de 20 cm. Español...
Need help?
Do you have a question about the RLA-PS1 and is the answer not in the manual?
Questions and answers