
Subscribe to Our Youtube Channel
Related Manuals for Meditub 2646


Summary of Contents for Meditub 2646
- Page 1 INSTALLATION & OPERATING INSTRUCTIONS MediTub W h e r e S a f e t y M e e t s L u x u r y l 30x53 ation Instructions MODELS 2646 3060 2653 3060BL 2952 3060SI 2952WCA 3060WCA 3053...
-
Page 3: Table Of Contents
WALK-IN TUB MANUAL TABLE OF CONTENTS TABLE OF CONTENTS THANK YOU FOR CHOOSING US! ................2 CONTACT INFORMATION ................... 2 PRODUCT REGISTRATION* ..................3 SAVE THIS MANUAL! ....................4 UNPACKING THE UNIT ....................5 PRE-INSTALLATION* ....................6 INSTALLATION PREPARATION ..................7 ELECTRICAL PREPARATION .................. - Page 4 WALK-IN TUB MANUAL Page 2...
-
Page 5: Thank You For Choosing Us
WALK-IN TUB MANUAL THANK YOU & CONTACT INFORMATION THANK YOU FOR CHOOSING US! Our mission is to help you maintain independence over essential bathing needs and improve the quality of life! This is designed to be the most accessible, most comfortable walk-in bathtub on the market today! Until recently, if you have difficulty getting in and out of a bathtub, it was almost impossible for you to take a bath. -
Page 6: Product Registration
WALK-IN TUB MANUAL PRODUCT REGISTRATION PRODUCT REGISTRATION* * To ensure that your warranty is registered with us, complete, sign and return this registration card within 30 days of the purchase. NOTE: Your warranty will not be recognized by us unless this card is fully completed and returned to: 5701 NW 35 Avenue Miami, FL 33142. IMPORTANT To ensure that your warranty is registered and confirmed with the manufacturer, please take a few moments to complete, sign and return the Product Registration Card (below) within 30 day. -
Page 7: Save This Manual
WALK-IN TUB MANUAL SAVE THIS MANUAL SAVE THIS MANUAL! READ THESE INSTRUCTIONS COMPLETELY BEFORE INSTALLING THE PRODUCTS. FAILURE TO DO SO COULD RESULT IN AN IMPROPER INSTALLATION AND COULD VOID THE WARRANTY. RESPONSIBILITY OF THE INSTALLER THE INSTALLER MUST INSPECT AND WATER-TEST THE PRODUCT PRIOR TO INSTALLATION TO ENSURE THE UNIT IS FREE OF DEFECT OR DAMAGE. - Page 8 WALK-IN TUB MANUAL IMPORTANT SAFETY INSTRUCTIONS! INSTRUCTIONS PERTAINING TO A RISK OF FIRE, ELECTRIC SHOCK, OR INJURY TO PERSONS WARNING – WHEN USING THIS UNIT, BASIC PRECAUTIONS SHOULD ALWAYS BE FOLLOWED, INCLUDING THE FOLLOWING: READ AND FOLLOW ALL INSTRUCTIONS. DANGER: TO REDUCE THE RISK OF INJURY, DO NOT PERMIT CHILDREN TO USE THIS UNIT UNLESS THEY ARE CLOSELY SUPERVISED AT ALL TIMES.
- Page 9 WALK-IN TUB MANUAL CLEANING AND MAINTENANCE Pump and pipe circulation systems should be flushed before first use and on a monthly basis when product is under normal use. WARNING! NEVER OPERATE THE WHIRLPOOL JETS WHEN TUB IS EMPTY. Below are the recommended procedures for cleaning: •...
-
Page 10: Unpacking The Unit
WALK-IN TUB MANUAL UNPACKING UNPACKING THE UNIT INSPECTING THE PACKAGING Inspect the carton. If any damages are noted, photograph the damaged area(s) and notify the deliverer/carrier. LIFTING / TRANSPORTING Never lift the walk-in bathtub by the plumbing. Doing so may result in damaging the plumbing and causing a leak. INSPECTING THE UNIT Immediately inspect the unit for damage even if there is no carton damage. -
Page 11: Pre-Installation
WALK-IN TUB MANUAL SAFETY PRE-INSTALLATION* * All Walk-In Bath Tubs are 100% water tested at the factory certified to be free of leaks. T ransportation and mishandling may cause leaks. It is necessary to test the bathtub while there is access to all sides of the bathtub. READ AND FOLLOW ALL INSTRUCTIONS •... -
Page 12: Installation Preparation
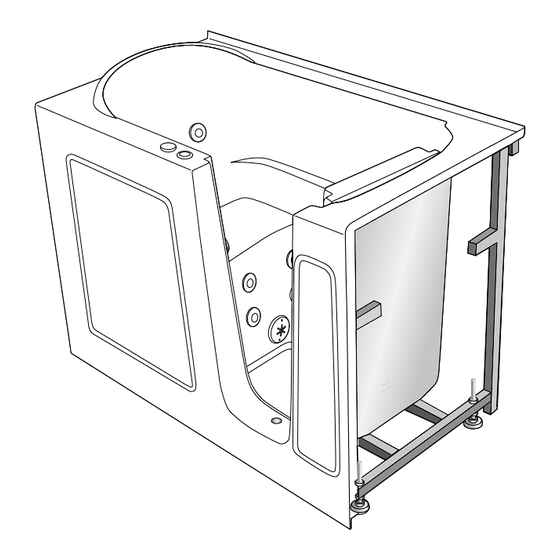
• a. Clean area of any debris or trash. MediTub • b. Use a 5 or 6-foot level and determine if the floor is level. If the floor is not level, adjust all 6 leveling feet to perfectly level the tub. -
Page 13: Electrical Preparation
WALK-IN TUB MANUAL ELECTRICAL PREPARATION ELECTRICAL PREPARATION All electrical wiring must be installed in accordance with the National Electrical Code and with all local codes. All wiring shall be done by a qualified electrician. Run one, two or three branch circuits (as required) from the main electrical service panel to the pump area of the framing structure to provide power to the unit. -
Page 14: Installation Procedures
WALK-IN TUB MANUAL INSTALLATION PROCEDURES INSTALLATION PROCEDURES WARNING! WHEN USING ELECTRICAL PRODUCTS, BASIC PRECAUTIONS SHOULD ALWAYS BE FOLLOWED, INCLUDING THE FOLLOWING: DANGER! RISK OF ELECTRIC SHOCK. CONNECT ONLY TO CIRCUIT PROTECTED BY A GROUND FAULT CIRCUIT INTERRUPTER (GFCI). GROUNDING IS REQUIRED! THE UNIT SHOULD BE INSTALLED BY A QUALIFIED SERVICE REPRESENTATIVE AND GROUNDED. -
Page 15: Drain Connection
WALK-IN TUB MANUAL INSTALLATION INSTRUCTIONS DRAIN CONNECTION To ensure safe transit for your walk-in tub, the overflow drain components are not connected to the unit during the process of production. The following in- structions are provided for installation purposes: Your walk-in tub is supplied with a 1 ½”... -
Page 16: Connecting The Autodrain
Glue the High-Speed Autodrain Fittings, pipe and drain overflow assembly to the sanitary drainage pipe. NOTE: WATER TIGHT INSTALLATION OF THE WASTE/ OVERFLOW IS THE INSTALLER’S RESPONSIBILITY. DRAIN LEAKAGE • IS EXCLUDED FROM MEDITUB WARRANTY OF THIS PRODUCT. overflow overflow... -
Page 17: Installation And Extension Panels
WALK-IN TUB MANUAL INSTALLATION INSTRUCTIONS INSTALLATION AND EXTENSION PANELS ASSEMBLY & PLACEMENT Connect the two panels using pre-drilled holes: Top pannel Inner flange Mortar Side pannel Bathroom (Waterproof) Sheetrock Wall Tile Silicone Screw 2-piece extension panels Molded flange to bolt unit to wall Custom-built wall section(s) for open ends or install against corners of full wall Page 15... -
Page 18: Faucet Installation
WALK-IN TUB MANUAL INSTALLATION INSTRUCTIONS FAUCET INSTALLATION diverter spout shower head cold control handle hot control handle fixing nut fixing nut rubber washer fiber washer fixing nut gasket steel braded 19” hose valve body steel braded 19” hose 72” shower hose local water line Page 16... -
Page 19: Operating Safety Instructions
WALK-IN TUB MANUAL OPERATING SAFETY INSTRUCTIONS INSTRUCTIONS PERTAINING TO RISK OF FIRE, ELECTRICAL SHOCK OR INJURY TO PERSONS WARNING! RISK OF PERSONAL INJURY: Use this unit for its intended use as described in this manual. DO NOT use attachments not recommended by the manufacturer. •... - Page 20 WALK-IN TUB MANUAL The unit must be connected only to a supply circuit that is protected by a ground-fault circuit-interrupter (GFCI). Such a GFCI should be provided by the installer and should be tested on a routine basis. To test the GFCI, push the test button. The GFCI should interrupt power.
-
Page 21: Operating Instructions
WALK-IN TUB MANUAL OPERATING INSTRUCTIONS When entering a our walk-in tub, be sure to close the door, placing the handle in the down position. Before activating any of the jetting controls, you must first fill the bath to a water level at least 2 inches above the highest jet placement. Do not put weight on the door when entering and exiting the tub. - Page 22 WALK-IN TUB MANUAL PURGE CYCLE All air blowers are equipped with a purge cycle to remove residual water from the lines. The cycle will begin approximately 30 minutes after the unit is turned off and will continue for 1 - 2 minutes. WARNING: DO NOT PUSH THE BUTTON ONCE THE CYCLE BEGINS.
-
Page 23: Tub Controls
WALK-IN TUB MANUAL TUB CONTROLS HYDRO CONTROL (PUMP) Used to turn the water jets ON and OFF. AIR CONTROL (BLOWER) Used to turn the air jets ON and OFF. If a 3-SPEED Blower (Optional) system is installed. 1st Press: Blower starts at MAX speed 2nd Press: Blower at MED speed 3rd Press: Blower at MIN speed 4th Press: Blower turns OFF... -
Page 24: Warranty
WALK-IN TUB MANUAL WARRANTY WARRANTY his 10-year warranty is extended to the first user to be free from defects in workmanship and material under normal use and conditions for a period of 10 years from the date of the original purchase. This warranty relates to the bathtub shell, frame and finish. - Page 25 WALK-IN TUB MANUAL WARRANTY retailers, distributors or contractors. Manufacturer does not warranty the installation, plumbing or electrical related connections, of any of our products including Walk-In Baths, shower pans or shower stalls. Improper or negligent installation of the product or other components, alteration made of, or alterations or medications to the system, may cause the product or the system to malfunction.
-
Page 26: Return Policy
WALK-IN TUB MANUAL RETURN POLICY RETURN POLICY We are committed to providing premium customer service. In the event that a product must be returned due to reasons other than defects, as mentioned in the warranty, the following procedures apply: Requests for returns and/or exchanges must be made within 30 days of receipt of product. The product must be in its original packaging and received at our facility in saleable condition. -
Page 27: Product Registration Card
WALK-IN TUB MANUAL PRODUCT REGISTRATION PRODUCT REGISTRATION CARD The completed card should be cut out or copied, completed, and mailed to: 5701 NW 35 Avenue Miami, FL 33142 Product Registration Card Name ..................Address ........................... City ..........State ......Zip ......Phone ........... - Page 28 WALK-IN TUB MANUAL Page 26...
- Page 29 WALK-IN TUB MANUAL Page 27...
- Page 30 WALK-IN TUB MANUAL INSTALLATION & OPERATING INSTRUCTIONS...
Need help?
Do you have a question about the 2646 and is the answer not in the manual?
Questions and answers