Advertisement
Quick Links
PRP1769
#
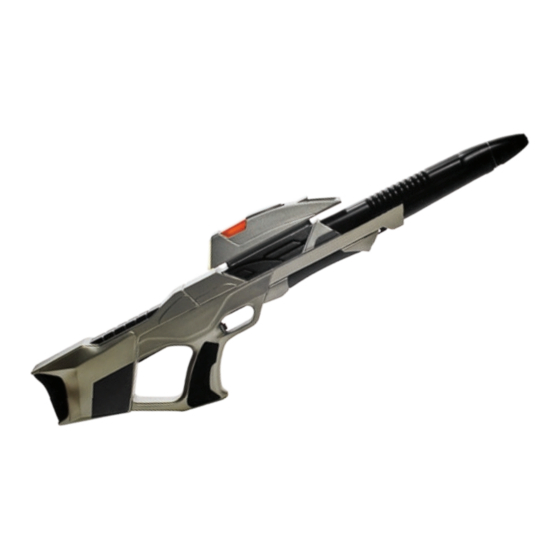
Star Trek: First Contact Phaser Rifle
Prop Kit Assembly Manual
Thank you for your purchase of the Roddenberry.com Star Trek: First Contact Phaser Rifle Prop Kit,
also as used in Star Trek: Insurrection and as the base for the modified rifle from Star Trek: Nemesis.
This is the first time a kit of the First Contact "round-nose" rifle produced using the original master tooling has been
made available, and will produce a static non-electronic prop that's light in weight due to casting the rifle hollow.
Neither electronics nor a carry strap are included. Details for purchasing and installing
simple electronics with modification of the phaser rifle are at Pagse 6 of the instructions.
Modifications to make a Nemesis rifle are not covered in this kit or instruction book.
Optional instructions not strictly necessary for the completion of the basic rifle prop are in blue italics.
Advertisement

Summary of Contents for Roddenberry PRP1769
- Page 1 Star Trek: First Contact Phaser Rifle Prop Kit Assembly Manual Thank you for your purchase of the Roddenberry.com Star Trek: First Contact Phaser Rifle Prop Kit, also as used in Star Trek: Insurrection and as the base for the modified rifle from Star Trek: Nemesis.
- Page 2 #PRP1769 - STAR TREK: F iRST onTACT hASER iFlE SSEmbly AnuAl BASIC INVENTORY: Parts List: Optional Parts (not included): Hollow-cast “round-nose” phaser rifle casting Carry strap (may use plain black 2” seat belt Buttstock carry strap cover webbing screwed onto the rifle or a retractable...
-
Page 3: Preparation And Assembly
#PRP1769 - STAR TREK: F iRST onTACT hASER iFlE SSEmbly AnuAl PREPARATION ANd ASSEMBlY: Wash all your resin castings using soap and water to clean off any traces of mold release which might interfere with the eventual paint finish. Step 1: Start by sanding all mold lines and other spots from the edges of the castings [Fig. - Page 4 #PRP1769 - STAR TREK: F iRST onTACT hASER iFlE SSEmbly AnuAl Step 3; Drill the four 3/32” holes in the left side rifle stock for securing the carry strap cover -- there are 4 divots for location. A tap is not necessary for screwing the 4-40 x 1/2” screws, but it may come in handy. Drill the countersinks in each of the holes in the carry strap cover, test the screws so they appear as flat as possible, and don’t go too deep!
- Page 5 #PRP1769 - STAR TREK: F iRST onTACT hASER iFlE SSEmbly AnuAl Step 7; When dry enough to where you’re sure masking tape won’t lift paint off (you may be waiting a few hours or even until the next day in between painting the different colors -- taking your time with this step makes all the difference in the world in achieving a professional-looking prop), mask where shown in Figs.
- Page 6 #PRP1769 - STAR TREK: F iRST onTACT hASER iFlE SSEmbly AnuAl Step 9; Paint with a brush the sunk-in detailing on the two large inverted trapezoids on both sides of the rifle [Fig. 14]. Apply epoxy to the red plastic cover to the left side, covering the three holes [Fig. 15], (or LEDs if you are lighting up this detail).
- Page 7 #PRP1769 - STAR TREK: F iRST onTACT hASER iFlE SSEmbly AnuAl Step 12; Apply the paper bargraph graphic, and glue on the two force setting buttons [Fig. 20]. Step 13: Glue the orange scope detail to the top of the scope using epoxy or CA [Fig. 21]. Also glue the flashlight reflector to the front of the scope [Figs.
-
Page 8: Important Notes
The physical reproduction by any means known or yet to be invented (including molding and recasting, reverse-engineering, and stereo lithography scanning and printing) of this Roddenberry.com Star Trek: First Contact Phaser Rifle Prop Kit or its parts and graphics, or reproducing any pre-existing parts and graphics, is expressly prohibited under U.S. - Page 9 #PRP1769 - STAR TREK: F iRST onTACT hASER iFlE SSEmbly AnuAl OPTIONAl STRAP INSTAllATION (before painting]: The following options are for more experienced prop and model makers, which should be completed before painting... Step 1: Probably the best way to secure the front end of the optional strap on this rifle (either retracting or dummy) is to use a two-piece post screw (aka Chicago screw) that’s 1/3/4”...
- Page 10 #PRP1769 - STAR TREK: F iRST onTACT hASER iFlE SSEmbly AnuAl OPTIONAl ElECTRONICS INSTAllATION (before painting]: The following assumes you have a minimum rudimentary knowledge of wiring electronic circuits to connect up LED lights with a switch and a battery power supply...
- Page 11 #PRP1769 - STAR TREK: F iRST onTACT hASER iFlE SSEmbly AnuAl A push button trigger may be installed (originally it was a flat “tactile” switch): dremel in a hole where the trigger goes and glue a wired trigger in place.
Need help?
Do you have a question about the PRP1769 and is the answer not in the manual?
Questions and answers