Table of Contents
Advertisement
Quick Links
K0MMANDER
CV/GATE MOTION
CONTROLLER
_
USER MANUAL
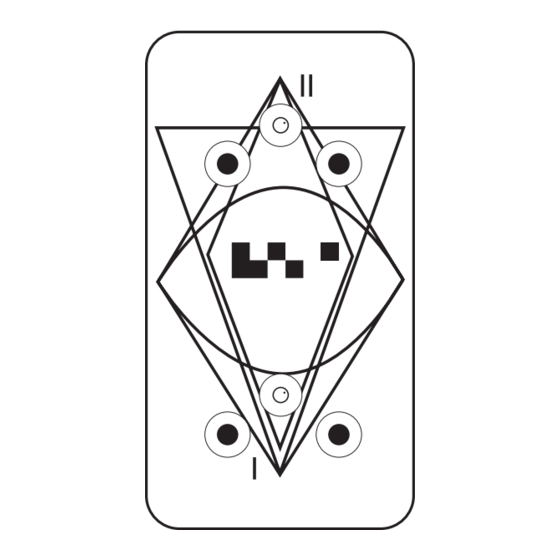
Connections & Controls
1
MOTION SENSORS
The KOMMANDER has two motion sensors, which have three
LEDs each. The two outer ones emit infra red light, the one
in the middle receives the light that is reflected. You might
use different surface textures to reflect the light. It can
be your hand, but also a shoe sole or a piece of paper etc.
Different textures reflect light in a different way. Some work
better than others. Fluted shoe soles sometimes just need
a piece of duct tape to work well with the KOMMANDER. Just
play around with it and you'll find your ideal setup!
2
CV/GATE
The KOMMANDER offers four Control Voltage (CV) outputs.
These are positioned at the back of the unit. CV I and CV II
outputs put out control voltage depending on the motion
detected by the sensor. GATE I and GATE II will constantly
put out the maximum voltage as soon as you move your
hand above the sensor. Note: If you move your hand above
Sensor I, it will affect CV I and GATE I. When you move your
hand over Sensor II, CVII and GATE II will output a voltage.
Getting Started
1. POWER UP
Power up the KOMMANDER with a "9V Boss Style" power
supply (500 mA). The polarity of the tip has to be negative.
2. CONNECT
Connect the CV/Gate outs to the instrument you wish
to control.
3. PLAY
Move your hand or something similar towards the sensors
of the KOMMANDER and go nuts!
The KOMMANDER is a CV/Gate motion controller. It gives
you dynamic access to any of your CV/Gate controllable
instruments. Instead of turning knobs and pushing but-
tons, the KOMMANDER allows you to control your instru-
ments by moving your hand, or foot...
The KOMMANDER offers two sensors with two voltage
outputs each, so you are able to control up to four pa-
rameters at the same time.
EXAMPLE CONNECTIONS
CV I OUT >
GATE I OUT
> GATE IN
PITCH CV IN
CV I
GATE I
CV II
CV II OUT >
FILTER CV IN
GATE II
Advertisement
Table of Contents

Summary of Contents for Koma Elektronik KOMMANDER
- Page 1 Different textures reflect light in a different way. Some work better than others. Fluted shoe soles sometimes just need a piece of duct tape to work well with the KOMMANDER. Just play around with it and you’ll find your ideal setup! CV/GATE The KOMMANDER offers four Control Voltage (CV) outputs.
- Page 2 TRIMMERS When you want to use all CV and Gate outputs at the same On the KOMMANDER’s bottom panel you’ll find four little time, all 4 outputs in a row, we recommend using Doep- holes. Inside are trimmers, which can be adjusted with a fer cables.
Need help?
Do you have a question about the KOMMANDER and is the answer not in the manual?
Questions and answers