Table of Contents
Advertisement
Quick Links
Advertisement
Table of Contents

Summary of Contents for Lindo LVD01
- Page 1 User Manual Dual-Cam Video Doorbell 2K...
-
Page 2: Table Of Contents
Contents What’s Included For Video Doorbell Installation..............5 Product Overview Dual-Cam Video Doorbell 2K Front View............ 6 Dual-Cam Video Doorbell 2K Rear View............. 7 Learn About the LED Indicator Light Status on Doorbell......8 Doorbell Chime................... 9 Learn About the LED Indicator Light Status on Doorbell Chime....10 How the System Works How the System Works................ - Page 3 Doorbell Installation Battery-Powered Find a Mounting Spot................19 Mount the Doorbell on a Wooden Surface..........21 Mount the Doorbell on Surfaces Made Out of Hard Materials....22 Mount the Doorbell..................24 Detach the Doorbell Detach the Doorbell 1................25 Detach the Doorbell 2................26 Recharge the Doorbell Recharge the Doorbell................
- Page 4 12. Notice FCC Statement..................40 FCC Radiation Exposure Statement............41 Customer Service..................41...
-
Page 5: What's Included
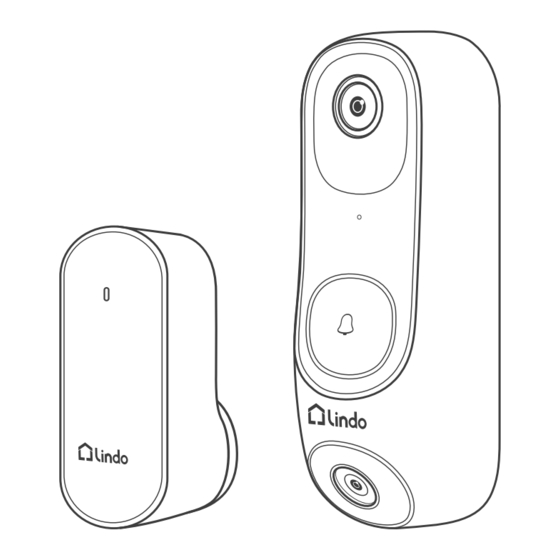
For Video Doorbell Installation Dual-Cam 15° Mounting Wedge Mounting Bracket Screw Hole Video Doorbell 2K (Optional) Positioning Card (Model : LVD01) Doorbell Chime Doorbell Extension Wires and Screw Packs (Model : LDC01) Detaching Pin Wire Nuts (Optional) USB-C Charging Cable... -
Page 6: Product Overview
2.Product Overview Dual-Cam Video Doorbell 2K Front View:... -
Page 7: Dual-Cam Video Doorbell 2K Rear View
Dual-Cam Video Doorbell 2K Rear View:... -
Page 8: Learn About The Led Indicator Light Status On Doorbell
Learn About the LED Indicator Light Status on Doorbell POWER... -
Page 9: Doorbell Chime
Doorbell Chime Front View: Rear View:... -
Page 10: Learn About The Led Indicator Light Status On Doorbell Chime
Learn About the LED Indicator Light Status on Doorbell Chime... -
Page 11: How The System Works
3. How the Syetem Works How the System Works The video doorbell system includes 2 parts. One is the video doorbell at your door. The other is the Chime in your house. The video doorbell detects motion at your porch and allows you to answer the door anytime and anywhere. -
Page 12: Set Up The System
4. Set up the System Download the App and Set up the System Download the Lindo Life app from the App Store (iOS devices) or Google Play (Android devices). Sign up for a Lindo Life account, then follow the onscreen instructions... -
Page 13: Add Device
5. Add Device Create Account 1. Choose region 2. Fill in your email 3. Set your password (8-20 characters) Plug the chime into the power socket 1. Plug it into a power socket where you want the chime to ring and wait for the LED to turn red. -
Page 14: Activate Doorbell
Activate Doorbell 1. Press the “POWER” button until your hear a BEEP, Led light flashes Red and White alternatively. POWER Press the button Bluetooth Connection 1. Click on the Bluethooth name to start Bluetooth pairing. Connect the Device Bluetooth pairing Lindo-LVD01000001... -
Page 15: Wi-Fi Connection
Wi-Fi Connection 1. Select your Wi-Fi (only support 2.4GHz). 2. Enter Wi-Fi password. * If you cannot find your Wi-Fi in the Wi-Fi list, mannually enter your Wi-Fi to get connected. Wi-Fi Connection Wi-Fi Connection Enter the password for “LindoLife” Select the WLAN name and enter password you want the doorbell to connect. - Page 16 Wi-Fi Connection 1. Waiting for doorbell configuration. 2. After the configuration is completed, you can set the doorbell name and enter the APP home page. 3. If you want to go through the installation tutorial, click the "Doorbell Installation" at the bottom. Wi-Fi Connection Wi-Fi Connection Connectting successful...
-
Page 17: Determine The Power Option
6. Determine the Power Option Option 1 - Battery Powered 1. If you don’t have existing doorbell wiring at the front door, use the built-in battery.You are free to determine the doorbell position and the mounting is easy and quick. 2. -
Page 18: Option 2 - Doorbell Wire Powered
Option 2 - Doorbell Wire Powered 1. If you have existing and working doorbell wiring at the front door, the doorbell will be powered by the wires constantly. So you don’t need to detach and charge it after installation. 2. Since the doorbell is connected to the wires, the mounting position is limited. -
Page 19: Doorbell Installation Battery-Powered
7. Doorbell Installation Battery-Powered 7.1 Find a Mounting Spot Take the video doorbell to your front door and check the live view on the app at the same time. Find a location where you can see the desired field of view. Consider the following factors: 1. - Page 20 7.1 Find a Mounting Spot Place the screw hole positioning card against the wall to mark the position.
-
Page 21: Mount The Doorbell On A Wooden Surface
7.2 Mount the Doorbell on a Wooden Surface If you’re mounting the doorbell on a wooden surface, you don’t need to pre-drill pilot holes. Use the provided screws to secure the mounting bracket on the wall, the screw hole positioning card indicates the position of the screw holes. -
Page 22: Mount The Doorbell On Surfaces Made Out Of Hard Materials
7.3 Mount the Doorbell on Surfaces Made Out of Hard Materials 1. If you’re mounting the doorbell on a surface made out of hard materials, like brick, concrete, stucco, drill 2 holes through the screw hold positioning card with a 15/64”(6mm) drill bit. 2. - Page 23 - - - - - - - - - - - - - - - - - - - - - - - - - - - - - - - - - - - - - - - - Wall Mounting Wedge Mounting Bracket...
-
Page 24: Mount The Doorbell
7.4 Mount the Doorbell Align the doorbell with the top of the mounting bracket and then snap the bottom into the place. You’re all set! If you want to detach the doorbell or recharge it, please refer to the following sections. -
Page 25: Detach The Doorbell
8. Detach the Doorbell Detach the Doorbell What you need: Doorbell Detaching Pin Doorbell Detaching Pin Step1 Take the doorbell detaching pin out from the top of doorbell chime. -
Page 26: Detach The Doorbell 2
Step2 Press the pin into the pinhole on the bottom of the doorbell, pull the bottom away from the bracket, and lift the doorbell for removal. Step3 Put the detaching pin back to the top of the chime. -
Page 27: Recharge The Doorbell
9. Recharge the Doorbell Recharge the Doorbell It is strongly recommended that the doorbell should be fully charged before you start to set up. Charging: White light keeps on Fully charged: White light turns off 6 hours from 0% to 100%... -
Page 28: Power The Doorbell With Existing Wires
10. Power the Doorbell with Existing Wires 10.1 Check the Doorbell Wires 1. Ring the existing doorbell to check if it is working. If the doorbell doesn’t ring, your doorbell wires may be defective. Power the doorbell on its own battery or consult an electrician to fix the wires. 2. -
Page 29: Detach The Existing Doorbell Button
10.2 Detach the Existing Doorbell Button If you already have existing doorbell wiring: 1. Remove the existing doorbell button with a Phillips-head screwdriver (not provided). 2. Pull the two wires out carefully when removing the existing doorbell. Straighten the wire ends if necessary. What you need: Philips-Head Screwdriver Phillips-Head Screwdriver (not provided) -
Page 30: Find A Mounting Spot
10.3 Find a Mounting Spot 1. When determining the mounting position of the doorbell, consider these factors: Check if you can reuse the existing holes and anchors on the wall or door frame. If you are drilling the mounting holes for the first time, the recommended mounting height is 48"... -
Page 31: Mount The Doorbell On A Wooden Surface
10.4 Mount the Doorbell on a Wooden Surface If you’re mounting the doorbell on a wooden surface, you don’t need to pre-drill pilot holes. Use the provided screws to secure the mounting bracket on the wall, the screw hole positioning card indicates the position of the screw holes. -
Page 32: Option 1 - Connect The Doorbell With A Mechanical Chime
Extension Wires and Dual-Cam Video Doorbell 2K Phillips-Head Screwdriver Wire Nuts (Optional) (Model : LVD01) (not provided) To prevent short-circuiting, make sure the wires are not touchingeach other after connecting them to the terminals. If the wires are too short, use the extension wires and wire nuts provided to make them longer. -
Page 33: Option 2 - Connect The Doorbell With A Digital Chime
If this happens, just reverse the direction of the diode. What you need: Wires and Wire Nuts (Optional), Diode Video Doorbell, Philips-head Screwdriver Extension Wires and Diode Dual-Cam Video Doorbell 2K Phillips-Head Screwdriver Wire Nuts (Optional) (Model : LVD01) (not provided) Diode... -
Page 35: Option 3 - Connect The Doorbell Directly To A Transformer
Extension Wires and Extension Wires and Dual-Cam Video Doorbell 2K Phillips-Head Screwdriver Wire Nuts (Optional) Wire Nuts (Optional) (Model : LVD01) (not provided) What you need: Wires and Wire Nuts (Optional), Wirewound Resistor, Video Doorbell, Philips-head Screwdriver 47 Ohm 50 Watt... -
Page 36: Mount The Doorbell On The Bracket
10.6 Mount the Doorbell on the Bracket Align the doorbell with the top of the mounting bracket and then snap the bottom into the place. 12.7 Restore Power Switch the master circuit breaker back to ON. You’re all set! If you want to detach the doorbell or recharge it, please refer to the corresponding sections. -
Page 37: App
11. APP Page Guide Home Page 1. When you open Lindo Life App, you will see your device(s) and preview image. Add Device My Home Front Door 2023 01 01 09:41:00 Click to enter live streaming Set the doorbell snooze time... -
Page 38: Live View Page
Live View Page 1. You can zoom in and out with two fingers. 2. When you allow Lindo Life App to access photos, you can save snapshot. Enter doorbell setting page Front Door Current internet speed 100% 123KB/s 2023 01 01 09:41:00... -
Page 39: Event List
Event List 1. When you enter event list, you will see event recordings of last 3 days. 2. After subscription, you will see event recordings of last 30 days, and you can keep the event you love permanently with our Collections feature. - Page 40 12. NOTICE FCC Statement This device complies with Part 15 of the FCC Rules. Operation is subject to the following two conditions: (1) This device may not cause harmful interference, and (2) This device must accept any interference received, including interferencethat may cause undesired operation.
- Page 41 FCC Radiation Exposure Statement This equipment complies with FCC radiation exposure limits set forth for an uncontrolled environment. This equipment should be installed and operated with minimum distance 20cm between the radiator and your body. Customer Service Warranty 12-month limited warranty Email Us Customer Support: support@lindolife.com @Lindo_life...
- Page 42 Lindo Innovation INC. All rights reserved. LINDO and LINDO LIFE Logo are trademarks of Lindo Innovation INC, registered in the Untied States, Japan, European Union and other countries.
Need help?
Do you have a question about the LVD01 and is the answer not in the manual?
Questions and answers