Table of Contents
Advertisement
Quick Links
Advertisement
Table of Contents

Summary of Contents for TerraTec Cinergy 250
- Page 1 Manual (English)
- Page 2 EN55020 EN60950 EN60065. The Cinergy 250 USB is solely intended to be connected to devices that comply with the EN60950 safety standard. The following are the stipulated operating and environmental conditions for said compliance: residential, business and commercial environments and small-company environments.
-
Page 3: Table Of Contents
All inclusive..........................5 Key features.......................... 6 System requirements......................6 Scope of delivery........................6 Using the Cinergy 250 USB for the first time ................7 Installing the drivers......................7 Hardware at a glance......................8 Important settings for sound card owners................9 The TV software........................10 Installation.........................10... -
Page 4: Welcome
We're pleased that you have chosen a TerraTec ReceiverSystem and would like to congratu- late you on this decision. With the TerraTec Cinergy 250 USB you've purchased a sophisti- cated product representing the state of the art of PC/TV technology. We're convinced that our product will prove extremely useful to you and provide you with a great deal of entertainment. -
Page 5: Fully Video-Enabled
Fully video-enabled The Cinergy 250 USB uses TV signals from your antenna or broadband cable. It can also easily process video signals from your VHS recorder, DVD player or camcorder via its composite or SVHS connector. Good hardware isn't everything—that's why the Cinergy 250 USB comes with an extensive software package for convenience in watching videos or recording programs. -
Page 6: Key Features
Audio cable, mini jack (3.5 mm) to RCA · S-video cable (mini 7-pin to RCA) · USB 2.0 cable (0.6 m) · USB 2.0 cable (1.5 m) · TerraTec Cinergy 250 USB CD-ROM · This manual · Service request form · Registration documents Cinergy 250 USB (English) -
Page 7: Using The Cinergy 250 Usb For The First Time
7. Connect the Cinergy 250 USB to one of your computer's USB 2 ports. 8. Follow the instructions as they appear on your screen. When the installation is complete, the Cinergy 250 USB will be available in all relevant appli- cations. -
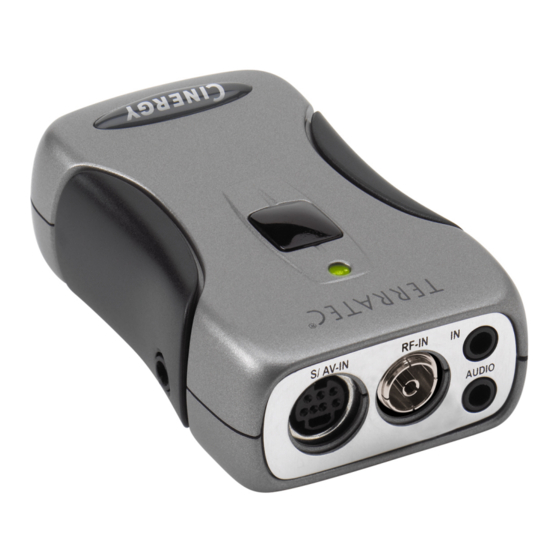
Page 8: Hardware At A Glance
Cinergy via the TV antenna input. Audio In If you are connecting external devices using the Composite or S-video input terminal, you also have to establish an audio connection. Use this jack to do so. Cinergy 250 USB (English) -
Page 9: Important Settings For Sound Card Owners
By checking the check box, you define the Line-In input of your sound card as a recording input source. This is essential if you want to record a video sequence with sound. This completes the configuration of the sound card settings and you can now close the mixer! Cinergy 250 USB (English) -
Page 10: The Tv Software
Cinergy Installation CD. As an alternative to the version on the included CD-ROM, you can also download the current version of the Cinergy TV software from http://www.terratec.com/. Double-click the downloaded file to start the installation. -
Page 11: Launching The Tv Software For The First Time
Click the Scan button. The automatic channel scan will enter its results in the left-hand "Found channels" window. The channel scan in action. Once the standard channel scan has completed, you will be asked whether any stations are missing. Cinergy 250 USB (English) - Page 12 A friendly prompt. If you find that you are missing stations that you would otherwise receive cleanly, repeat the search with the option "All frequencies". Click on "Default" and this option will be displayed. Cinergy 250 USB (English)
- Page 13 Favorites list when using the program. The detected stations that you want to save now have to be copied into the list on the right. To do so, use the center arrow buttons. Cinergy 250 USB (English)
- Page 14 Select the station in the Favorites list and click on the tool icon below the list. Edit stations A dialog box will open in which you can change the name of the station and adjust the fre- quency manually. Cinergy 250 USB (English)
- Page 15 If you have more than one sound card, or if you are not using the line input as your audio input, then adjust the settings in the "Audio" section under "Mixer“ and "Source". · Click "OK" to close the configuration menu. · Happy zapping! Cinergy 250 USB (English)
-
Page 16: The Main Page
Selects an external video source at the S-video input of the TV hardware as the input signal. Selects an external video source at the composite video input of the TV hardware as the input signal. Cinergy 250 USB (English) - Page 17 Pictures" / "My Videos" folder of the current user by default. Stops recording or playback. Takes a still picture of the current TV picture and stores it in the "My Pictures" folder of the current user by default. Cinergy 250 USB (English)
-
Page 18: The Tv Window
Position. Press and hold the left mouse button anywhere within the picture and move the window to the desired position. Full screen/window view. A double-click switches the picture to full-screen display; double- clicking once more restores the picture to its window. Cinergy 250 USB (English) -
Page 19: Context Menu
Like the main menu of the TV software, the context menu is organized in sections to group similar functions. The following sections cover only those functions that have not yet been explained as parts of the main menu. Cinergy 250 USB (English) - Page 20 AdvancedàOpen still image directory. Opens the folder that you have selected for your still images. AdvancedàOpen video directory. Opens the folder that you have selected for your videos. AdvancedàTerratec Scheduler. Opens the application for programming scheduled re- cordings. For more information on the Scheduler, see autostarter à documentation à Scheduler.
- Page 21 Misc. DirectShow configuration. Refer to this for further information when troubleshooting. Language selection Language/Language. Sets the language of the software's user interface. Cinergy 250 USB (English)
-
Page 22: The Configuration Menu
TV card. AudioàSource. Use this to define which audio-in terminal is to supply the audio signal for playback. In normal situations, you will want to select "Line In” or "Input Off. Cinergy 250 USB (English) - Page 23 Furthermore, you can enter the switch time in seconds. When the TV window is open, you can start the multi-channel preview by clicking its corresponding button in the main menu. Cinergy 250 USB (English)
-
Page 24: Configuration: Capture Settings
Considerable file sizes result in a short time even at low resolutions in compressed color space. Additional compres- sion algorithms should therefore be used. Cinergy 250 USB (English) - Page 25 Stop capturing by. You can stop recording without having to confirm a dialog box by pressing the ESC key. To do so, check the corresponding option. If you want to stop recording after a specific amount of time, manually enter the time in seconds or minutes. Cinergy 250 USB (English)
-
Page 26: Configuration: Still Image Capture
Windows clipboard or written to a file for later use. If you choose the file option, you can specify the location for the saved files under File. The default setting saves snapshots in the "My Pictures" folder of the current user. Cinergy 250 USB (English) -
Page 27: Configuration: Stations
It also provides quick access to the Remote Control Editor and the Scheduler. Options… Configuration: About Here you can find information that can prove useful for your own troubleshooting measures or for support inquiries. Cinergy 250 USB (English)
Need help?
Do you have a question about the Cinergy 250 and is the answer not in the manual?
Questions and answers