Advertisement
Quick Links
Hand-Cutting and Skins)
Make sure that the orientation for molded pieces such as the scoop rings and landing gear
housings are maintained as in the plans so that they will bend easily, along the axis of the
foamboard grain. Also confirm that the main posterboard pieces (turtle deck, hatch cover and
canopy) are also cut out with the proper grain to avoid wrinkling. Even if it is not specifically
mentioned in the build steps, please perform dry fits and folds before applying glue or tape.
If you wish to use the skins version of the plans, please consult the 'MiniacRC Mini P40 Skins'
article on the FliteTest website. The downloadable skins are a complete substitute to the plans,
but please refer to the instructions on the article for cutting out the pieces, and then revert to
this guide for the build process.
Building Materials)
- Dollar Tree foamboard
- Exacto craft knife / blade
- Dollar Tree sanding block / sandpaper
- Control rod / music wire (.85 to 1 mm)
- 1/16" Plywood mini control horns (x4)
Recommended Electronics
- Propeller: miniquad/plastic electric/APC prop, 5040 to 6045 size, two to three blade
- Motor: brushless miniquad motor, 2204 to 2205 size, 2300 to 2450 kv
- ESC: brushless miniquad speed controller, 15 to 30 amp as appropriate
- Battery: LiPo, 2S 800 to 1400 mAh, 3S 800 to 1100 mAh, 4S 400 to 700 mAh
- Servos: plastic gear, 5 to 9 gram (three to four servos required)
- Receiver: small airplane RX, 4 to 5 channels required
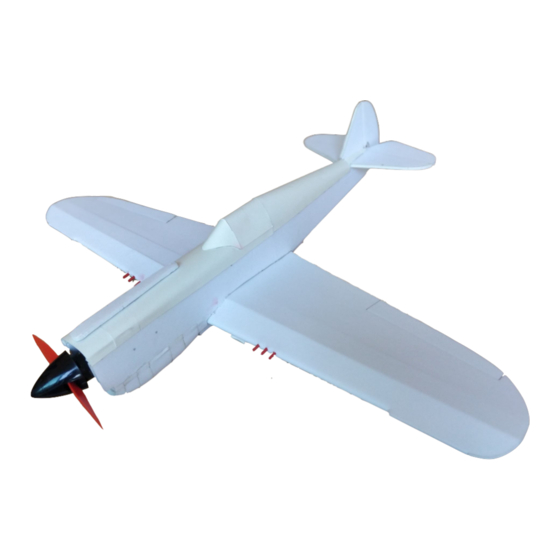
MiniacRC
MIGHTY MINI P40 WARHAWK
FliteTest style RC model
Build Instructions
- Posterboard
- Ruler
- Hot glue gun
- Barbeque / bamboo skewers
- 1/16" Plywood mini firewall [FliteTest Store]
Advertisement

Related Manuals for MiniacRC MIGHTY MINI P40 WARHAWK

Summary of Contents for MiniacRC MIGHTY MINI P40 WARHAWK
- Page 1 MiniacRC MIGHTY MINI P40 WARHAWK FliteTest style RC model Build Instructions Hand-Cutting and Skins) Make sure that the orientation for molded pieces such as the scoop rings and landing gear housings are maintained as in the plans so that they will bend easily, along the axis of the foamboard grain. Also confirm that the main posterboard pieces (turtle deck, hatch cover and canopy) are also cut out with the proper grain to avoid wrinkling. Even if it is not specifically...
-
Page 2: Build Procedure
Build Procedure Wing) Left Wing, Right Wing Left Inboard Spar, Left Outboard Spar Right Inboard Spar, Right Outboard Spar Dihedral Gauge As with other mighty minis, we begin with the wing. Complete the crease lines on each wing using a barbeque skewer. Cut the single bevel on the ailerons and the double bevel on the leading edge. Go back with a sanding block if you’re unsatisfied with the surfaces. Confirm that the spars are placed in the correct orientation by laying them on the base plate of the wing, but make sure to glue them down on the top surface to ensure a clean fold-over. Tape and glue the bases of the two wings together before doing each fold-over to help ensure a consistent airfoil. Insert the aileron servos now if you wish to (skip to the electronics section). - Page 3 Fold up the back portion of the rear belly and add glue to seal the angle. The rear belly should then fit cleanly against the front belly, also aligning well along the bottom surface of the wing. Landing Gear Housing) Right and Left Landing Gear Housings Right and Left Landing Gear Housing Covers Begin by removing paper from the housing and molding it slowly but firmly along its longer axis. If scratch-building, it may help to slightly bevel the two edges with a sanding block or blade. Once it holds shape to a degree, glue one of its sidewalls to the corresponding side of the posterboard housing cover. Once it hardens, apply glue and seal down the other side as well.
- Page 4 Once you are confident that they fall in place properly, apply glue on the sidewalls and lay down each of the six flaps (three on each side) with a ruler to ensure a clean joint. Next, gently bend the crease lines on the top scoop until it meets the shape of the top of the hatch cover. The two crease lines should align with the intersection lines between each section of the hatch cover. Fuselage) Fuselage Turtle Deck, Turtle Deck Former Horizontal Stabilizer, Vertical Stabilizer Establish the two bevel cuts on the rear portion of the fuselage. Use a bamboo skewer or a sanding block to press in the edge opposite to each bevel. This will allow for an easier bend.
- Page 5 skewer across the thin center portion of the elevator adjacent to the hinge line, similar to the FT Mini Mustang. This will ensure that the elevator will act as a continuous control surface. Insert the horizontal stabilizer into the tabs on the fuselage. Apply glue once you are satisfied with the fit. Insert the vertical stabilizer by pressing its tab into the remaining slot on the horizontal stabilizer. You will need to pinch and compress the rectangular protrusion on the bottom of the vertical stabilizer to ensure that it will press into the fuselage without issues. Take ample time to ensure that these pieces are glued in rigidly, with proper 90˚ angles.
- Page 6 Place one end of the front ring against the front of the fuselage sidewall as pictured. Then work it around until the other end meets the opposite sidewall. If you are unsure of the fit, focus the glue on the foamboard edge of the ring, and glue down the extra paper flap afterwards. You will have lots of control over molding the piece into a symmetrical curve even after gluing it down. Repeat the same process for the rest of the rings. Glue one end down. Do a dry fit to ensure that each ring’s paper edge aligns with that of the previous ring. Place glue across the mating surface of the previous ring, and on the opposite sidewall. Mold the ring, following the path of the previous ring until you reach the sidewall, and then glue down the flap. Hold each ring in place, fine tuning the fit to look aesthetically pleasing while the glue hardens. Try to pack the rings together as tightly and cleanly as possible to allow for easy wing attachment later on. The rear scoop piece is very simple compared to the rings. Remove the paper and foam in the marked cavities. Perform the B-folds, but this time the sidewalls should be slightly angled outward rather than sitting upward at 90˚. Placing it against the fuselage behind the last scoop ring will help establish this angle. Apply glue along the remaining cavities and place this piece into position. Glue and seal down its side-flaps similar to the scoop rings.
- Page 7 Firstly, trim the back end of the top surface of the wing, where it meets the sidewalls of the belly. This will result in a flat linear rear for your wing rather than the sharp corner that existed before. This line should now meet up cleanly against the rear of the wing cutout in the fuselage. Secondly, the front belly may need trimming so that the front of the wing sits cleanly up against the airfoil cutout, to ensure that the angle of incidence is non-negative (zero). At this point, the wing should sit comfortably against the fuselage. Apply glue on the sides and rear of the wing cutout on the fuselage, and on the exposed foam on the belly sections (second picture above). Ensure alignment of the wing by centering the rear and front ends of the belly with the bottom of the fuselage. Once you are sure of that, flip the model over on its belly and press down on the fuselage. You may need to apply significant pressure to establish a clean fit between the wing and fuselage with no exposed cavities, especially to ensure that the wing is not tilted down. Scrape off any excess glue as you perform alignment checks. Also make sure that the dihedral angle of the wing is split equally between both sides, by using your line of sight down the fuselage.
- Page 8 Place the canopy on top of the hatch such that it matches the shape of the turtle deck. Drop a thin bead of glue around the bottom perimeter of the posterboard canopy and lay it down symmetrically. As an embellishment, you can poke some holes in the inboard leading edge of the wing and press in small bamboo skewer pieces to resemble the scale appearance of the ground attack P40. Controls and Electronics Installation) Powerpod (assemble according to FliteTest ‘Mighty Mini’ instructions) Mini control horns, mini firewall Control rods Motor, ESC, Servos, Receiver Please refer to the build video of the FliteTest Mini Mustang or Corsair for more thorough control linkage instructions. Center all of your servos before installation.
- Page 9 With about five inches to shift the battery, you should be able to accommodate 2S to 4S batteries of your choice. Even with a 3s 1100 mAh LiPo, there should be plenty of space to access the receiver and servo leads. CG is at the front crease of the wing (inboard). It is best to balance the plane upside down. Having the nose angled a touch down is safer for the first flight. Thank you for building this model. I truly hope you enjoy flying the Mighty Mini P40 Warhawk! - MiniacRC -...
Need help?
Do you have a question about the MIGHTY MINI P40 WARHAWK and is the answer not in the manual?
Questions and answers