Advertisement
5009a Quick Start Guide
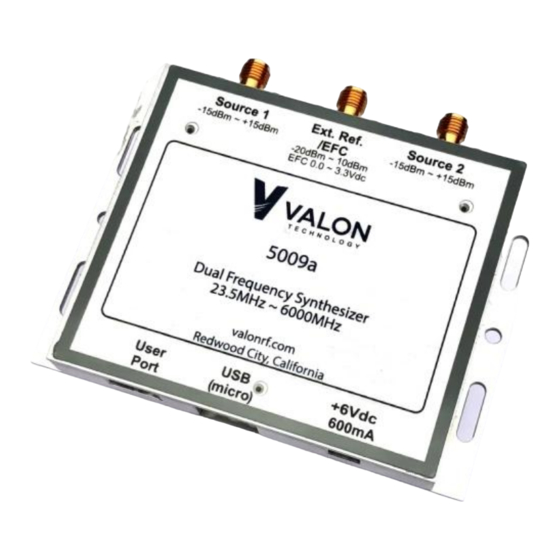
Step 1: Power Supply Connection
You are going to need a 6Vdc ±0.5V at 600mA power supply. Use the supplied red-black Hirose cable to
connect to your power supply. Connect it and you should see two blue LEDs illuminating through the
label just below the Source 1 and Source 2 label markings. Your 5009a will now be set to 2440MHz on
Source 1 and 2480MHz on Source 2.
See "Hints and Kinks – Power Supplies" on back of this document.
Step 2: USB connection
Connect the provided USB cable to your 5009a and host computer. Your computer should recognize it as
a new FTDI Virtual Com Port. If you have trouble, then it is likely you do not have the correct VCP
(virtual com port) driver. (Download FTDI CDM v2.12.00 WHQL Certified.zip from the link below, unzip
and run).
Step 3: Terminal Program
You will need a terminal program to change your 5009a settings. Just about any terminal program will
work. We have provided 5000term.zip . Unzip and running 5000term.exe will automatically find the
correct Virtual Com Port. If you use a different terminal program, your port settings are 9600, 8, None,
1, None.
Step 4: Synthesizer Settings
After launching your terminal program, press the Enter key a few times and check to see that you get a
cursor like this: "-1->", if you do, you have successfully established communications with your 5009a.
Type help to get the help menu
control-c will exit program.
control-f will increase the baud rate to 115200.
control-r will reset the synthesizer to factor default settings..
Consult the Valon 5009a Operations Manual for more information on the use of these commands.
Note that as of this date, not all commands in the Operations Manual are available. As these commands
become available, we will notify you and you will be able to download the updated *.bin files. You can
also use the 5000term.exe terminal program to load the *latest*.bin files.
For the latest 5009a Downloads: https://www.valontechnology.com/5009users/5009.htm
Above all, if you have trouble or need help just contact us.
Stuart Rumley
650-369-0575
stuart@valontechnology.com
Valon Technology 5009a Quick Start Guide
1
06/30/2022
Advertisement
Table of Contents

Related Manuals for Valon 5009a


Summary of Contents for Valon 5009a
- Page 1 Connect it and you should see two blue LEDs illuminating through the label just below the Source 1 and Source 2 label markings. Your 5009a will now be set to 2440MHz on Source 1 and 2480MHz on Source 2.
- Page 2 5009a Hints and Kinks – Power Supplies Occasionally, we get a trouble call from a new 5009a user who says that the 5009a will not lock on frequency after power up. Usually it’s just one of the RF Sources that won’t lock. After doing to some investigation the problem almost always is caused by the power supply.
Need help?
Do you have a question about the 5009a and is the answer not in the manual?
Questions and answers