
Summary of Contents for MAS Elektronik XORO HTC 29D Series
- Page 1 LCD TV with DVD, DVB, HDMI, USB, Card Reader, PVR Ready and Time-Shift HTC xx29D OPERATION MANUAL BEDIENUNGSANLEITUNG...
-
Page 3: Table Of Contents
Inhaltsangabe Sicherheitshinweise Elektronische Sicherheit ....................5 Hinweise Kompatibilität Disk, USB und Kartenleser................ 9 Recycling Informationen ....................9 Verpackungsinhalt ......................10 Merkmale ........................10 Montage des Standfuß....................11 Schnellstart ........................12 Anschlüsse Rückseite ........................13 Bedienelemente (Tasten) der rechten Seite ..............13 Vorderseite........................ - Page 4 Inhaltsangabe PVR Funktion Vorbereitung des USB Speichers .................. 26 PVR Dateisystem ......................26 Format des Speichers ....................26 Time-Shift einrichten ...................... 28 Wichtige Tasten und Funktionen..................29 Videotext ........................29 Rekorder Direkte Aufnahme ......................30 Aufnahmeprogrammierung durch EPG................30 Time-Shift........................31 Aufnahmeliste ........................
- Page 5 SICHERHEITSHINWEISE Das Dreieckszeichen mit Blitzsymbol verweist auf gefährliche Spannungen im Gerä- tegehäuse, die so hoch sein können, dass sie eine Gefahr von Stromschlägen bilden. Das Dreieckszeichen mit Ausrufungszeichen verweist auf wichtige Funktions- und Wartungshinweise (Reparatur) in der dem Gerät beigelegten Bedienungsanleitung. DIESES GERÄT ERFÜLLT DIE ANFORDERUNGEN DES PARAGRAFEN 15 DER FCC-VERORDNUNG.
- Page 6 SICHERHEITSHINWEISE Stromversorgung Fassen Sie das Gerät niemals mit feuchten oder nassen Händen an. Das Gerät kann nur mit der auf der Rückseite beschriebenen Voltzahl betrieben werden. Sollten Sie die Stromstärke nicht kennen, fragen Sie bitte einen Elektriker. Um eine Überlastung zu vermeiden, betreiben Sie nicht zu viele weitere Geräte an der glei- chen Steckdose.
- Page 7 SICHERHEITSHINWEISE Betrieb und Aufstellung Stellen Sie das Gerät nicht auf eine instabile Fläche. Das Gerät könnte beschädigt oder Per- sonen verletzt werden. Jegliche Befestigungen sollten nur nach den Herstellerinformationen angebracht werden oder von dem Hersteller bezogen werden. Dieses Gerät darf nicht in der Nähe von Feuchtigkeit und Wasser positioniert werden. Dieses Produkt sollte in einem TV-Regal mit Rollen vorsichtig bewegt werden.
- Page 8 HINWEISE Servicefall Führen Sie Reparaturen niemals selber durch, bitte überlassen Sie dies immer qualifiziertem Personal. Kontaktieren Sie den Reparaturdienst bei folgenden Fehlern: Wenn das Netzteil oder Netzkabel defekt ist. Wenn Gegenstände in das Gerät gefallen sind. Wenn das Gerät mit Flüssigkeiten in Berührung gekommen oder in das Gerät einge- drungen ist.
- Page 9 Das Materialwiederverwertungssymbol auf Kunststoffteilen bedeutet, dass sie recycling- fähig sind. Entsorgen Sie sie nicht mit dem normalen Hausmüll. Der Grüne Punkt Der Grüne Punkt auf Kartons bedeutet, dass die MAS Elektronik AG eine Abgabe an die Gesellschaft für Abfallvermeidung und Sekundärrohstoffgewinnung zahlt. HTC xx29D...
-
Page 10: Hinweise
HINWEISE Packungsinhalt Folgende Bestandteile sollte sich in der Verpackung befinden: • Xoro HTC HTC xx29D LCD-TV Fernsehgerät • Fernbedienung mit Batterien • Anleitung • Garantiekarte Falls eines dieser Teile fehlen sollte, wenden Sie sich schnellstmöglich an Ihren Händler. Bewahren Sie die Originalverpackung für den Fall auf, dass das Gerät an den Händler zurückge- schickt werden muss. - Page 11 MONTAGE DES STANDFUSSES Die TV Geräte werden ohne montierten Standfuß geliefert. Die Montage kann in vier Schritten einfach durchgeführt werden. Packen Sie das TV Gerät vorsichtig aus. Der Standfußhalter ist schon vormontiert. An der Unterseite enthält der Halter zwei Steckverbindungen. Diese dürfen während des Auspa- ckens nicht beschädigt werden.
-
Page 12: Schnellstart
Schnellstart 1. Montieren Sie den Standfuß gemäß der Beschreibung auf der vorherigen Seite. 2. Schließen Sie die Antenne bzw. Eingangsquelle am entsprechenden Eingang (z.B. HDMI, SCART ect.) auf der Rückseite des Geräts an. 3. Stecken Sie den kleinen, runden Stecker des Stromadapterkabels in den Stromeingang auf der Rückseite des Geräts. - Page 13 Anschlüsse Linke Seite Bezeichnung Funktionsbeschreibung HDMI HDMI Audio/Video Eingang USB Anschluss für PVR Ready Funktion RGB (PC IN) VGA-Signal vom Computer AUDIO (PC IN) Audio Eingang für VGA SCART EuroAV (SCART) Eingang VIDEO CVBS (FBAS) Video-Eingang Y Pb Pr Video-Komponenteneingang Audio-Signaleingang für AV z.B.
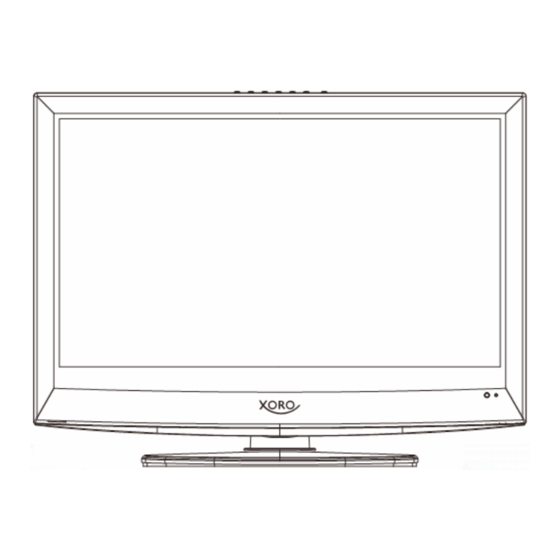
- Page 14 Bedienelemente Rechte Seite Auf der rechten unteren Seite befinden sich der Slot-In DVD-Player, der mit dem DVD-Player verbun- dene Kartenleser (ausschließlich HTC 1929D). Hinweis: Der DVD-Player hat ein Slot-In Laufwerk. Führen Sie die Disk richtig ein. Die bedruckte Seite zeigt immer nach hinten und die verspiegelte nach vorne.
-
Page 15: Fernbedienung
Fernbedienung Einlegen der Batterien in die Fernbedienung Um die Fernbedienung verwenden zu können, legen Sie die Batterien in das Batteriefach. Öffnen Sie das Batteriefach Legen Sie die mitgelieferten Batterien ein und achten Sie auf die richtige Ausrichtung der Polung. Schließen Sie das Batteriefach. Hinweise zu den Batterien Falsche Behandlung der Batterien kann dazu führen, dass Batteriesäure austritt. - Page 16 Fernbedienung HTC xx29D...
- Page 17 Fernbedienung Tasten der Fernbedienung: Tasten der Fernbedienung: ATV: Analoger TV Tuner ATV: Analoger TV Tuner DTV: Digitaler TV Tuner DVB-T: Digitaler TV Tuner DVD: DVD Player DVD: DVD Player Media: Rekorder (PVR Funktion) + Medien- Media: Rekorder (PVR Funktion) + Medien- Player Player An/Aus Schalter (STANDBY)
-
Page 18: Verbinden
VERBINDEN Stromverbindung Verbinden Sie das Stromkabel mit dem Stromstecker mit der Steckdose. An der Vorderseite leuchtet dann eine rote LED. Der Fernseher befindet sich nun im Stand-By Mo- dus. Drücken Sie entweder die POWER Taste auf der Fernbedienung oder auf der Oberseite des Gerätes. -
Page 19: Y Pb Pr
VERBINDEN Komponenten Videoeingang und Stereo Audioeingang Sie können ein weiteres Endgerät (welches einen YUV Video- ausgang besitzt) über den Komponenteneingang verbinden. Verbinden Sie das entsprechende Endgerät mit dem dreipoli- gen Videokabel mit dem „Y Pb Pr“ Eingang des Fernsehers. Achten Sie auf die Farbbelegung zwischen dem Endgerät und dem HTC xx29D, so dass z.B. -
Page 20: Vga (Pc-Rgb)
VERBINDEN Sie können den HTC xx29D auch als PC Monitor betreiben. Verbinden Sie Ihren Computer (PC) per VGA Kabel mit dem VGA Eingang des Fernsehers. Dieser ist mit RGB beschriftet. Drücken Sie die SOURCE Taste und wählen Sie im Auswahl- menü... -
Page 21: Erstinstallation
Erstinstallation Wenn Sie den HTC xx29D zum ersten Mal benutzen, dann startet der Installationsführer. Mit dieser Hilfe können Sie alle Programme - analog und digital - suchen. Der Suchlauf beinhaltet sowohl die analogen Frequenzen wie auch die Frequenzen des digitalen Free-to-Air DVB-T Programms. 1. -
Page 22: Quellenauswahl
Quellenauswahl Die einzelnen Quellen des Fernsehers können mit Hilfe der SOURCE Taste anwählen. Drücken Sie die SOURCE Taste auf der Fernbedienung oder die SOURCE Taste am oberen Bedienfeldes des Geräte, dann erscheint auf dem Bildschirm ein Fenster mit den unterschiedlichen Quellen. Die Optionen sind: DVB-T TV Tuner Analoger TV Tuner... -
Page 23: Dvb-T
DVB-T Wenn Sie das terrestrische digitale Fernsehen (DVB-T) nutzen möchten, dann müssen Sie den HTC Fernseher in den DVB-T Modus schalten. Drücken Sie dazu die SOURCE Taste, wählen Sie mit den ▲/▼ Tasten „DTV“ aus und bestätigen Sie die Auswahl mit der OK Taste. Wichtige Tasten und deren Funktionen Kanalliste Rufen Sie die Kanalliste durch das Drücken der CH.LIST Taste auf. - Page 24 DVB-T Wichtige Tasten und deren Funktionen Tele- / Videotext Videotext aktivieren Sie über die TEXT Taste. Der Videotext wird nun geladen. Mit den Zifferntasten können Sie gezielt bestimmte Seiten anwählen. In dem unteren Bereich des Tele-/Videotext Fenster werden vier farbliche Felder (Rot / Grün / Gelb / Blau) angezeigt.
-
Page 25: Videotext
DVB-T Wichtige Tasten und deren Funktionen Kurzinformationsanzeige Drücken Sie die OK Taste während des Live-Bildes, dann erscheint ein Popup-Fenster mit der TV Programmtitel, Datum, aktuelle Uhrzeit, Laufzeit der aktuellen Sendung, Auflösung der Sendung (z.B. 576i) und ob Videotext (Teletext) verfügbar ist. Auf der rechten Seite befindet sich ein Hinweis zu der nächsten Sendung. -
Page 26: Elektronischer Programmführer (Epg)
DVB-T Elektronischer Programmführer (EPG) Der Elektronische Programmführer (EPG) wird durch die EPG Taste gestartet. Es wird ein großes Popup-Fenster eingeblendet. Das EPG Fenster ist wie folgt aufgebaut: Oben Programmnummer (z.B. DTV 1) und Programmname (3Sat) Datum, Laufzeit der aktuellen Sendung und Programmtitel Mitte EPG Listenübersicht Unten... - Page 27 TV (Analog) Analoger TV Tuner Wenn Sie den analogen TV Tuner (z.B. Kabel) nutzen möchten, dann müssen Sie den HTC Fernse- her in den TV Modus schalten. Drücken Sie dazu die SOURCE Taste und wählen Sie mit den ▲/▼ Tasten „TV“ aus und bestätigen Sie die Auswahl mit der OK Taste. Mit der Erstinstallation wurden die analogen TV Sender schon gefunden.
-
Page 28: Vorbereitung Des Usb Speichers
Rekorder Vorbereitung des USB Speichers Der Rekorder arbeitet ausschließlich im DVB-T Modus. Bitte beachten folgenden Regeln: Schließen Sie einen USB Massenspeicher an dem USB Anschluss auf der linken Seite an. Während der Aufnahme entfernen Sie nicht die Stromverbindung des Fernsehers. Bereiten Sie den USB Speicher vor der Aufnahme vor. - Page 29 Rekorder Vorbereitung des USB Speichers Bestätigen Sie die Formatierung mit der OK Taste auf dem OK- Feld. Die Formatierung startet dann sofort. Der USB Speicher wird mit einem eigenen Dateisystem versehen. Wenn Sie sich den Speicher am PC anschauen, werden Sie feststellen, dass der Speicher voll ist und mit vielen kleinen Dateien belegt ist.
-
Page 30: Direkte Aufnahme
Rekorder Funktionen des Rekorders Um die Aufnahme– oder Time-Shift-Funktionen zu nutzen, schließen Sie einen USB Speicher an dem USB Anschluss an und bereiten Sie das Speichermedium vor. Wechseln Sie zu DVB-T. Direkte Aufnahme Drücken Sie die REC Taste während des Livebildes und die Aufnahme startet unmittelbar. Es wird für ca. -
Page 31: Time-Shift
Rekorder Funktionen des Rekorders Time-Shift Die Time-Shift Funktion ermöglicht die Aufnahme während des Livebildes zu pausieren oder den schnellen Rücklauf bzw. Vorlauf zu nutzen. Die Time-Shift Funktion wird durch die PAUSE Taste aktiviert. Das Time-Shift Fenster zeigt die abgelaufene Zeit währen der Time-Shift Funktion an (1) und die definierte Gesamtzeit der Time-Shift Funktion (2). - Page 32 Rekorder Funktionen des Rekorders Liste der aufgenommen Sendungen Wenn Sie schon Sendungen auf dem USB Speicher aufge- nommen haben, dann können Sie diese Liste mit der INDEX Taste aktivieren. Die Liste erscheint auf dem Bildschirm. Mit den Pfeiltasten ▲/▼ können Sie die einzelnen Aufnah- men auswählen.
-
Page 33: Bilder
Medienplayer — USB Mit dem Medienplayer können Sie über den USB Anschluss Bilder, Musik oder auch Filme auf dem Fernseher anzeigen und abspielen. Schließen Sie einen USB Speicher an dem USB Anschluss an, der Bilder, Musik oder Filme enthält. Drücken Sie die SOURCE Taste und wählen Sie die Option SPEICHER mit den Pfeiltasten ▲/▼ . Der Medienplayer startet. -
Page 34: Musik
Medienplayer — USB Musik Wählen Sie mit den Pfeiltasten ◄ oder ► die Opti- on Musik (MUSIC) und bestätigen Sie die Auswahl mit der OK Taste. Der Dateibrowser filtert nun den Inhalt des USB Speichers und nur die Bilder wer- den angezeigt. -
Page 35: Filme
Medienplayer — USB Filme Wählen Sie mit den Pfeiltasten ◄ oder ► die Opti- on Filme (MOVIE) und bestätigen Sie die Auswahl mit der OK Taste. Der Dateibrowser filtert nun den Inhalt des USB Speichers und nur die Filme wer- den angezeigt. - Page 36 Notizen Hier können Sie die Spezifikationen Ihrer Dateien notieren: Bilder: Musik: Filme: HTC xx29D...
-
Page 37: Lcd Einstellungen
LCD Einstellungen Drücken Sie die MENU Taste und Sie bekommen Zugang zu den unterschiedlichen LCD Einstellungen. Das nebenstehen- de Bild zeigt den prinzipiellen Aufbau. Die LCD Einstellungen sind Hauptkategorien „Zeit“, „Kanal“, „Lock“, „Optionen“, „Ton“ und „Bild“ unterteilt. Die Hauptkategorien werden auch durch ein dazugehörendes Symbol charakteri- siert. -
Page 38: Kanaleinstellungen
LCD Einstellungen Kanaleinstellungen Die Kanaleinstellungen enthalten die Optionen Automatische Suche, DTV Manuelle Suche, ATV Manuelle Suche, Programmbearbeitung. Automatischer Suchlauf Mit dieser Option können Sie den Suchlauf für analo- ges und digitales Fernsehen durchführen. Aktivieren Sie die Option mit ▼ Taste , so dass die Option mar- kiert ist. - Page 39 LCD Einstellungen Kanaleinstellungen ATV Manuelle Suche Mit der Pfeiltaste ► können Sie die manuelle ATV Suche starten. Die Unteroptionen sind: • Speichern zu Kanal (Storage TO) • Audiosystem (B/G für Westeuropa, I für England, D/K für Osteuropa, L oder LL für Teile Frankreichs) •...
- Page 40 LCD Einstellungen Kanaleinstellungen Die Programmbearbeitung enthält Optionen zum Sor- tieren und Überspringen von einzelnen TV Sendern, sowie die Definition von TV Sendern in der Favoriten- liste. Bewegen von TV Sender (Move) Mit dieser Option können Sie einzelne TV Sender eine neue Position in der Kanalliste zuweisen.
- Page 41 LCD Einstellungen Kanaleinstellungen Kanal umbenennen (Rename) —- Nur bei analogen TV Sendern möglich Mit dieser Option können Sie einzelne analoge TV Sender umbenennen und so einen neuen Namen zuweisen können. Die Vorgehensweise ist: Mit den ▲/▼ Tasten wählen Sie den entspre- chenden TV Sender aus.
-
Page 42: Bildeinstellungen
LCD Einstellungen Bildeinstellungen Die Bildeinstellungen enthalten die Optionen Bildmo- dus, Kontrast, Helligkeit, Farbe, Schärfe, Farbtempe- ratur, Seitenverhältnis und Rauschunterdrückung. Bildmodus Mit den Tasten ◄/► wird der Bildmodus und somit die Darstellung des Bildes eingestellt. Die voreinge- stellten Unteroptionen sind: • Dynamisch •... - Page 43 LCD Einstellungen Bildeinstellungen Seitenverhältnis (Aspect Ratio) Mit den Tasten ◄/► wird das Seitenverhältnis und somit die Darstellung des Bildes auf dem Bild- schirm eingestellt. Die Unteroptionen sind: • 16:9 — Das Bild wird immer als Vollbild dargestellt, unabhängig von dem vorgegebenen Sei- tenverhältnis •...
-
Page 44: Toneinstellungen
LCD Einstellungen Toneinstellungen Die Toneinstellungen enthalten Optionen für Sound- modus, Höhen, Bass, Balance, Auto Lautstärke und Surround. Soundmodus Mit den Tasten ◄/► wird der Soundmodus und somit die Tonausgabe eingestellt. Die voreingestellten Un- teroptionen sind: • Musik • Film • Sport •... -
Page 45: Zeiteinstellungen
LCD Einstellungen Zeiteinstellungen Die Zeiteinstellungen enthalten Optionen für Uhr/ Datum, automatische Ausschaltzeit, automatischen Anschaltzeit, Schaltuhr, automatischer Stand-By und die Zeitzone. Uhr/Datum (Clock) Wählen Sie mit der Pfeiltaste die Option an und drü- cken Sie die OK Taste zum Bearbeiten der Uhrzeit und des Datums. - Page 46 LCD Einstellungen Zeiteinstellungen Automatische Einschalzeit (On Time) Mit dieser Option können Sie den HTC Fernseher automatisch zu einer bestimmten Zeit einschalten lassen. Aktivieren Sie die Option mit der ► Taste und ein neues Popupfenster erscheint auf dem Bildschirm. Dort definieren Sie den Modus und die dazugehörende Uhrzeit.
-
Page 47: Optionen
LCD Einstellungen Optionen Das Optionsmenü enthält Spracheinstellungen, das Land und das Laden der Werkseinstellungen. Sprache (Language) Hier definieren Sie die OSD Sprache. Audiosprache (Audio Language) Hier definieren Sie im DVB-T Betrieb die aktive Sprache, bei mehrsprachigen TV Sender bzw. Sendungen. Untertitelsprache (Subtitle Language) Hier definieren Sie im DVB-T Betrieb die aktive Untertitelsprache, falls diese übertragen werden. - Page 48 LCD Einstellungen Sperren Menü Das LOCK Menü enthält diverse Einstellungen zum beschränkten Zugriff auf TV Programme oder zur Definition des Kindersicherungslevels. Die Unteroptio- nen sind Kanal sperren, Passwort ändern, Program- me blockieren und Kindersicherung. Sie können nur dann die Optionen ändern, wenn Sie das voreingestellte Passwort eingeben.
- Page 49 Problembehandlung Lesen Sie bitte die folgenden Informationen, um die mögliche Ursache zu einem Problem herauszu- finden, bevor Sie sich an den Kundendienst wenden. • Technischer Kundendienst von Xoro/MAS: Tel.:: 040/77 11 09 17 • Internet: www.xoro.de/support.htm Problem Lösung TV lässt sich nicht •...
- Page 50 Hinweise für den DVB-T Empfang Bildqualität Die Bildqualität bei DVB-T ist in den einzelnen Ländern unterschiedlich. Im wesentlichen wird die Qualität durch die verwendete Bitrate und den Sendeempfang beeinflusst. Die gesendete Bitrate wird von den einzelnen TV Stationen festgelegt und kann auch nur von diesen geändert werden.
-
Page 51: Dvd-Player / Kartenleser
DVD-Player / Kartenleser Drücken Sie die SOURCE Taste auf der Fernbedienung wählen Sie DVD, um den internen DVD-Player zu aktivieren. Nun hören Sie ein Geräusch des Laufwerkes, welches geöffnet wird. Das Lauf- werk (Slot-In Loader) befindet sich auf der rechten Seite des HTC xx29D. Legen Sie die Disc mit der bedruckten oder beschrifteten Seite nach hinten ein (achten Sie auf die Hinweise am Slot-in Loader), so dass Sie die verspiegelte Seite se- hen können. - Page 52 DVD-Player / Kartenleser Funktionen des DVD-Players Abspielen Drücken Sie die Wiedergabe-Taste, um die Disc abzuspielen. Pausieren der Wiedergabe Drücken Sie die PAUSE Taste und die Wiedergabe wird unterbrochen. Das Bild friert ein. Setzen Sie die Wiedergabe mit der Abspielen Taste (PLAY) fort. Stopp Mit der STOP Taste können Sie die Wiedergabe auf zwei Arten anhalten: Wenn Sie die STOP Taste einmal drücken, wird der Unterbrechungspunkt ge-...
- Page 53 DVD-Player / Kartenleser Funktionen des DVD-Players Menü Wenn Sie während der Wiedergabe einer DVD die Taste D.MENU drücken, kehren Sie zum Startme- nü der DVD zurück. Titel Wenn Sie während der Wiedergabe einer Video-DVD die Taste TITLE drücken, kehren Sie in das Titelmenü...
- Page 54 DVD-Player / Kartenleser Funktionen des DVD-Players Abschnitt A-B wiederholen Wiederholen der Wiedergabe eines bestimmten Disc-Abschnitts. Drücken Sie die Taste A-B am Anfangspunkt des gewünschten Abschnitts; es wird „REPEAT A- ” (Wiederholung A-) auf dem Bildschirm angezeigt. • Drücken Sie am Ende des gewünschten Abschnitts erneut die Taste A-B; es wird “REPEAT A- B”...
- Page 55 DVD-Player Einstellung SYSTEM SETUP Um das Einstellungsmenü des Players aufzurufen, drücken Sie die Taste D.SETUP. In diesem Menü können Sie Detaileinstellungen für das Gerät vornehmen. Markieren Sie mit den Richtungstasten die Funktionssymbole. Drücken Sie die Taste OK zum Bestätigen einer Auswahl. Systemeinstellungen (SYSTEM SETUP) Wählen Sie mit der Auf-/Abwärtstaste die entspre- chende Option aus.
- Page 56 DVD-Player Einstellung SYSTEM SETUP Kennwort (PASSWORD) Bewegen Sie den Cursor zum Eintrag PASSWORD (Kennwort), drücken Sie die Taste OK, und ge- ben Sie den Geheimcode „0 0 0 0“ (wenn dies der erste Gebrauch ist) ein. Nach der Bestätigung müssen Sie einen neuen Geheimcode eingeben und diesen mit OK bestätigen. Hinweis: Bitte merken Sie sich den neuen Geheimcode, da Sie die Kindersicherung ansonsten nicht mehr ändern können.
- Page 57 DVD-Player Einstellung Vorzugseinstellungen Die Vorzugseinstellungen enthalten einige grundlegende Parameter, wie OSD Sprache, Audio, Untertitel und Disk Menü. OSD Sprache Diese Einstellung definiert die Sprache des Setups und Meldungen des Players. Audio, Untertitel und Disk Menü Mit diesen Optionen legen Sie fest, mit welcher Sprache das Startmenü...
- Page 58 Problemlösung DVD-Player Sollte es Probleme mit Ihrem DVD-Player geben, prüfen Sie die folgende Liste, bevor Sie sich an den Kundendienst wenden. Technischer Kundendienst von Xoro/MAS: • Tel.: 040-77 11 09 17 • Internet: www.xoro.de/support.htm Symptom Prüfen und Maßnahme • Keine Disc eingelegt. Legen Sie eine Disc ein. •...
-
Page 59: Spezifikationen
Spezifikationen HTC 1529D HTC 1929D Bildschirmgröße 39,6 cm (15,6 Zoll) 47 cm (18,5 Zoll) Auflösung in Pixel 1366 x 768 1366 x 768 Seitenverhältnis 16:9 16:9 Helligkeit 250 cd/m 250 cd/m Kontrast 500:1 1000:1 Reaktionszeit 5 ms 5 ms Blickwinkel 160°... -
Page 60: Glossar
GLOSSAR 5.1 Kanal / AC-3 5.1-Mehrkanalcodierung bedeutet, dass sowohl fünf Kanäle mit voller Bandbreite (Links, Center, Rechts, Surround links, Surround rechts) als auch ein Tieftonkanal vorhanden sind (für diesen steht das ".1" er sorgt für das dröhnende Bassgrollen, das Sie auch in einem gut ausgestatteten Kinosaal hören und spüren). - Page 61 GLOSSAR Die DVD (Digital Versatile Disc) kam 1995 auf den Markt und ist ein Datenträger mit grosser Spei- cherkapazität. Eine gewöhnliche CD-ROM, die einen Speicherplatz von 650 MB aufweist, wird durch den Speicherplatz der DVD von bis zu 9 GB in den Schatten gestellt. Gerade bei der Wiedergabe von Videoformaten spielt die Speicherkapazität eine große Rolle.
- Page 62 HTC xx29D...
- Page 63 HTC xx29D...
- Page 66 Table of Contents Safety information Safety informations ....................5 Notes Compatibility of Discs, USB and Card Reader ............9 Recycling ....................... 9 In the box ......................10 Features....................... 10 Mounting the Stand ..................... 11 Quick Start Guide......................12 Connectors Rear connection panel ..................13 Right Side......................
- Page 67 Contents Recorder Preparation of the USB Storage ................28 Check PVR File System..................28 Format........................29 Time-Shift Size..................... 29 Recording a program ................... 30 Recording in Stand-By mode ................30 Schedule Recording by EPG ................30 Time-Shift Function....................31 Playback of recorded program................32 LCD Settings General ........................
-
Page 68: Safety Informations
Safety Information The lightning flash with an arrowhead symbol within an equilateral triangle is intended to alert the user of the presence of uninsulated "dangerous voltage" within the product's enclosure that may be of sufficient magni- tude to constitute a risk of electric shock to persons. The exclamation point within an equilateral triangle is intended to alert the user of the presence of important operating and maintenance (servicing) instructions in the literature accompanying the appliance. - Page 69 Safety Information Power Supply Never touch the plug with wet hands. If you want to pull the plug out of the plug socket, always pull directly on the plug. Never pull on the cable as it could tear. Make sure that the power cable is not bent, caught or run over and that it does not come into contact with heat sources.
- Page 70 Safety Information Operation and Position During playback, the disc rotates very fast. Do not open or do not move the player during playback. Otherwise the disc can be damaged. Do not connect accessories on the player which are not defined by the manufacture. Do not place this product on an unstable cart, stand, tripod, bracket, or table.
- Page 71 Notes Defect Servicing - Do not attempt to service this product yourself as opening or removing covers may expose you to dangerous voltage or other hazards. Refer all servicing to qualified ser- vice personnel. Damage Requiring Service - Unplug this product from the wall outlet and refer servicing to qualified service personnel under the following conditions: When the power-supply cord or plug is damaged.
- Page 72 The material recycling symbol on the plastic parts denotes that they are recyclable. Dis- pose them not with the normal household waste. Green Dot The “Grüne Punkt” denotes that the MAS Elektronik AG pays a duty to the “Gesellschaft für Abfallvermeidung und Sekundärrohstoffgewinnung“. HTC xx29D...
-
Page 73: In The Box
Notes In the box Following accessories should be in the box: • HTC xx29D LCD-TV • Remote Control with Battery • Manual • Warranty card If any of the accessories are missing, then contact your dealer as soon as possible. Keep all the origi- nal packaging in case you need to return the set to the dealer. -
Page 74: Mounting The Stand
Mounting the Stand Place the TV set on soft cloth or cushion with face down. Mount the stand in the support at the bottom of the TV set according to the angle illustrated Screw the stand in the direction illustrated into the place (Note: It sounds click when screwing the stand, it’s normal). -
Page 75: Quickstart Guide
Quickstart Guide 1. Mount the stand in order to the description on the previous page. 2. Connect the aerial or input source to the appropriate input socket at the rear of the set. 3. Connect the small round plug on the power adaptor cable to the power input socket at the rear of the set. -
Page 76: Rear Connection Panel
Connectors Rear Connection Panel Name Function Description USB port for PVR function HDMI HDMI input RGB (PC IN) VGA signal of computer input AUDIO (PC IN) Audio Input for VGA SCART Euro AV (Audio/Video) input CVBS CVBS video input Audio signal input for YPbPr, CVBS and S-Video L &... -
Page 77: Front Side
Control Elements Buttons on the right side On the right side are the Slot-In DVD-Loader and the Card Reader (only HTC 1929D) for SD, MMC and MS media card. Notes: The DVD player has a slot-in drive. Insert the disc correctly. The printed page always shows backward and the mirrored shows forward. -
Page 78: Operation Range
Remote Control Insert battery into the remote control Insert the batteries in the remote control: Open the cover. Insert the batteries. Make sure to match - and +. Close the cover Notes on batteries: Improper use may cause battery leakage and corrosion. Please follow the instructions below: •... - Page 79 Remote Control HTC xx29D...
- Page 80 Remote Control Buttons of the remote control: Buttons of the remote control: ATV: Analogue TV Tuner ATV: Analogue TV Tuner DTV: Digital TV Tuner DVB-T: Digital TV Tuner DVD: DVD Player DVD: DVD Player Media: Recorder (PVR function) + Media-Player Media: Recorder (PVR function) + Media- Player STAND-BY button...
-
Page 81: Hdmi
Connection Power connection Connect the power cable with the wall mounted power outlet. On the front side you can see a red LED light. The TV set is now in Stand-By mode. By pressing the POWER button on the remote control or on the top side of the device the red LED changes to a green light. - Page 82 Connection Component Y Pb Pr Video– and Stereo Audio input If you uses more than one multimedia terminals and the SCART, HDMI and S-Video connection are used, than you connect the next device by the audio/video component input (Y Pb Pr). Please connect the wire of an 3-pin component cable with the YPbPr input of the HTC TV set and the multi- media device.
-
Page 83: Vga
Connection You can use the HTC TV set as a PC monitor by using the VGA inter- face. Please connect a VGA cable with the VGA input of the HTC TV set and with the PC. With this kind of connection only video signals are transmitted. For listening sound on the TV you should establish also a sound connec- tion. -
Page 84: First Time Installation
First Time Installation When you start the HTC 2228D TV set the first time and choose TV or DTV, than appears the instal- lation guide on the screen. With this guide you can search analogue and digital TV channels. The search routine includes the frequencies of the analogue and digital broadcaster. -
Page 85: Sources
Sources The single sources and inputs of the HTC2228D TV set can be choose by pressing the SOURCE button on the remote control or the TV/AV on the top side of the TV set. A popup window appears on the screen. The sources are: DVB-T TV Tuner Analogue TV Tuner SCART... -
Page 86: Important Buttons And There Functions
DVB-T If you want to uses the terrestrial digital TV (DVB-T), than you need to change the source into DTV. Press the SOURCE button and navigate to DTV with the ▲/▼ button. Confirm the selection DTV by pressing the OK button. Important buttons and there functions Channel List Press the CH.LIST button on the remote control and you gets the provided and receives TV broad-... -
Page 87: Important Buttons And There Functions
DVB-T Important buttons and there functions TV / Radio Press TV/R button to switch between TV and Radio station. Tele- / Videotext Press TEXT button to view the videotext information of the current TV program. With the numeric buttons you can select special videotext pages. On the bottom side of the videotext window you can find four colored fields (Red, Yellow, Green, Blue). - Page 88 DVB-T Important buttons and there functions Quick-Information Press the OK button during the live picture and a popup window appears on the screen. The informa- tion in the window are TV program title, current date, current time, duration of the actual TV program, resolution of the transmission (for example 576i) and if videotext is available.
- Page 89 DVB-T The electronic program guide (EPG) can be activated by pressing the EPG button as well and the EPG window appears on the screen. The EPG window is organizes in three sections: Current TV channel number (e.g. DTV 1) and TV broadcast station name Date, duration time of the current TV program and the TV program title Middle EPG overview by list...
- Page 90 If you want to uses the analogue TV Tuner (Cat TV), than you need to change the source into TV. Press the SOURCE button and navigate to TV with the ▲/▼ button. Confirm the selection ATV by pressing the OK button. Channel List Press the CH.LIST button on the remote control and you gets the provided and receives TV broad- cast stations.
-
Page 91: Check Pvr File System
Recorder The recorder works only in DVB-T mode. You can record only DVB-T broadcast. Please pay attention to following rules: Connect USB storage to the USB port on the left side. Prepare the USB storage by the TV set before starting recording Do not disconnect the power during recording. -
Page 92: Format
Recorder Format Press the ▲▼ button to select Format and press the ► or OK button to prompt a sub-menu which occurs only when the USB device is plugged in for the frst time, as shown: • The item PVR File System Size is high- lighted and press the ◄►... -
Page 93: Recording A Program
Recorder Recording program After you setup the settings on the PVR File System menu, you can record a DTV program on the external USB device. Select the desired program then press the REC button on the remote control to start recording and the progress bar will be displayed. During recording, the progress bar will fade out in 10 seconds. -
Page 94: Time-Shift Function
Recorder Time Shift Function This function allows you to pause and fast forward/rewind normal Live DTV viewing at any time without missing any of the live broadcast, provide that a USB storage device is connected. During viewing a DTV program, press the PAUSE button on the remote control to pause live TV. A progress bar is displayed on the screen: •... - Page 95 Recorder Playing recorded program You can play the selected program in the recorded list. Press the INDEX button on the remote control to enter the Recorded List. Press the INDEX button repeatedly to list the files by named Program, Channel or Time. Press the ▲▼...
-
Page 96: Lcd Settings
LCD Settings Press the MENU button and you gets access to the different LCD settings. The beside picture shows the different catego- ries “Time”, “Channel”, “Lock”, “Options”, “Sound” and “Picture” which characterizes with symbols. The following description shows a list of each categories. Time Clock, Time,... -
Page 97: Channel Setting
LCD Settings Channel setting The channel settings includes the options for Auto Search (Auto Tuning), DTV manual Search, ATV manual Search and Programme Edit. Auto search (Auto Tuning) With this setting you can search the TV broadcast station for analogue and digital TV programs. Press the ▼... - Page 98 LCD Settings Channel setting ATV Manual Search (ATV Manual Tuning) Press the ▼ button and navigate to the option “ATV manual Tuning“. The search starts when you press the ► button. The options are: • Storage To • System (B/G for West Europe, I for UK, D/K for East- ern Europe and France, L or LL for part of France) •...
- Page 99 LCD Settings Channel setting The option “Programme Edit” includes settings for Moving and sorting, Skip and define Favourites. Move a TV channel This option is responsible for sorting the TV channel, so that you can define your personal view of the TV channel list.
- Page 100 LCD Settings Channel setting Rename a TV Channel (only by analogue TV chan- nel possible) With this option you can rename single analogue TV channel and define a new label. With the ▲/▼ buttons you can choose the TV channel, which shall be skipped. Press the GREEN button and beside the cho- sen TV channel you can see now green sym- bol.
-
Page 101: Picture Setting
LCD Settings Picture setting The picture settings includes option for “Picture Mode”, “Contrast”, “Brightness”, “Colour”, “Sharpness”, “Hue”, “Colour Temperature”, “Aspect Ratio”, “Noise Reduction” and “Screen”. Picture Mode With the ◄ or ► buttons you can choose the picture mode. The live picture changes to the preset settings. The presets are: •... - Page 102 LCD Settings Picture setting Aspect Ratio With the ◄ or ► buttons you can select the aspect ratio and changes the view on the screen. The options are: • 16:9 - The picture is every time in full screen mode, independent from the supported aspect ratio.
-
Page 103: Sound Setting
LCD Settings Sound setting The sound settings includes options for “Sound Mode”, “Treble”, “Bass”, “Balance”, “Auto Volume” and “Surround”. Sound Mode With the ◄ or ► buttons you can select the sound mode. The preset options are: • Music • Movie •... -
Page 104: Time Setting
LCD Settings Time setting The Time settings includes the options for “Clock”, “Off Time”, “On Time”, “Sleep Timer”, “Auto Stand-By” and “Time Zone”. Clock Choose the clock setting with the ▼ button and start to change the clock by pressing the OK button. An additional popup window appears on the screen. - Page 105 LCD Settings Time setting On Time of the HTC TV set With this option you can program the TV set for automatically switch on. Start the option by pressing the ► button and a new popup window appears on the screen. There you can define each setting to program the on time.
-
Page 106: Options
LCD Settings Option The Option Settings includes the “Language”, “Audio language”, Subtitle language”, “Country” and the “Restore Setting”. You can change each setting by using the ◄ or ► buttons. Language Here you can select the language for the OSD. Audio language This option is important in DVB-T mode and you can select the audio language. -
Page 107: Lock Setting
LCD Settings Lock setting The LOCK settings includes the option for “Lock Channel”, “Set Password”, “Block Program” and the “Parental Guidance”. Before you can change the settings, you have to in- sert the preset password if you enter into the menu. The password is “0 0 0 0”... -
Page 108: Troubleshooting
LCD Troubleshooting Check the following guide for the possible cause of a problem before contacting service. Technical Support of Xoro/MAS: • Tel.: 040/77 11 09 17 • Internet: www.xoro.de/support.htm Problem Solution TV won’t switch on • Check the mains cable is connected properly to both the mains supply and the mains adapter •... - Page 109 DVB-T Information Picture Quality Die picture quality by DVB-T depends on the different areas and the different conditions. Some pa- rameters are important for the picture quality, the bit rates, the resolution and the reception of the transmitted DVB-T signals. Bit rate The bit rates is fixed by the TV broadcaster and can be different between each TV program.
-
Page 110: Dvd Player / Usb / Card Reader
DVD-Player / USB / Card Reader Press the SOURCE button on the remote control and choose DVD for using the internal DVD Player. The DVD Slot-In loader opens and produces now some noise. The Slot-In loader is on the left side of the HTC xx29D. Place the disc with the printed side to the rear into the loader and push very slightly to the right side. - Page 111 DVD-Player / USB / Card Reader Function Play Press PLAY button to play the disc. Pause Press PAUSE button to pause (still picture). Press PLAY button to continue the playback of the content. Stop Press STOP button to stop in two modes: •...
- Page 112 DVD-Player / USB / Card Reader Function DVD Menu While playing a DVD, press the D.MENU button return to the DVD disc menu. Numeric Buttons Numerical key pad (Random Program access) To direct access a DVD chapter or a CD track, input the desired DVD chapter or CD track number using the numerical key pad.
- Page 113 DVD Player Setup Press the D.SETUP button to enter the player's setup menu. Setup menu is a facility for the owner to adjust the detail setting of the player. For the detail of Setup menu see "SET UP MENU" of this instruction manual.
-
Page 114: System Setup
DVD Player Setup System setup RATING DVD video discs equipped with the parental lock function are rated according to their content. The contents allowed by a parental lock level and the way a DVD video disc can be controlled may vary from disc to disc. - Page 115 DVD Player Setup Audio setup Dynamic To optimize the dynamic sound output high volume out- puts are softened, enabling you to watch your favourite movie without disturbing others. The levels for dynamic selection: Full, 7/8, 3/4, 5/8, 1/2, 3/8, 1/4, 1/8 and Off.
-
Page 116: Troubleshooting Dvd / Usb / Card Reader
Troubleshooting DVD Our custom service will help you. Did you already read the Troubleshooting pages? Technical custom service of Xoro/MAS: • Phone: +49 40 77 11 09 17 • Internet: www.xoro.de/support.htm Symptom Check and Action • No disc, load a disc. •... -
Page 117: Specifications
Specifications HTC 1529D HTC 1929D Screen Size 39.6 cm (15.6 inch) 47 cm (18.5 Inch) Resolution 1366 x 768 1366 x 768 Aspect Ratio 16:9 16:9 Brightness 250 cd/m 250 cd/m Contrast 500:1 1000:1 Reaction Time 5 ms 5 ms Viewing Angle 160 °... - Page 118 HTC xx29D...
- Page 122 XORO by MAS Elektronik AG Pollhornbogen 19 21107 Hamburg Deutschland Tel: + 49(040) 77 11 09 17 Fax: + 49(040) 76 73 33 15 xoro@mas.de www.xoro.de...
Need help?
Do you have a question about the XORO HTC 29D Series and is the answer not in the manual?
Questions and answers