
Subscribe to Our Youtube Channel
Summary of Contents for VISIONAUTE RAILDOME FREEMOTION 8
- Page 1 INSTALLATION MANUAL RAILDOME FREEMOTION 8 w w w . r a i l d o m e . c o m 09/02/2023...
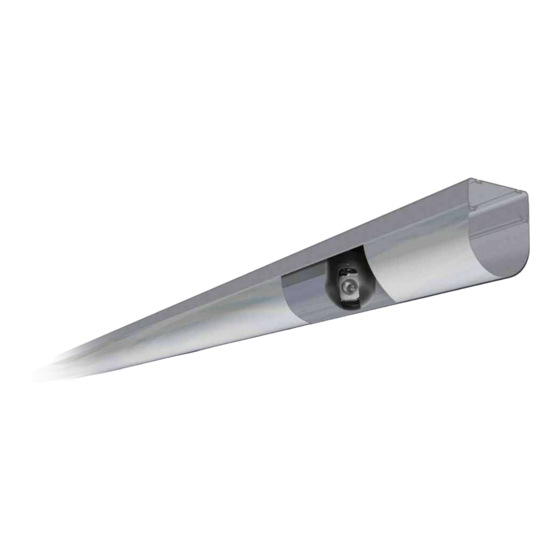
- Page 3 DESCRIPTION OF RAILDOME COMPONENTS Rail end-cap Mirror-finish cover + gloves Aluminium rail extrusions in 3 m sections Ref. : VZC-EB6 Ref. : VZC-RAIL3 Ref. : VZC-CPT3 Connecting fishplate U attachment bracket Power rail Ref. : VZC-ECLIS6 Ref. : VZC-RAE Ref. : VZC-SUPU Hardware Electrical junction clip Clip...
- Page 4 DESCRIPTION OF ELEMENTS COMPONENTS RAILDOME Elements weights The camera slider Camera slider : 8.00 kg ELECTRONIC CARD FRONT Rail bar (3 m) : 14.90 kg ENGINE MANAGEMENT RECEPTION OF DATAS HIGH DEFINITION DOME ZOOM X20 Extremity bumper Rail Stop BATTERY TRANSMITTER EMISSION RADIO BACK...
- Page 5 GENERAL INSTALLATION DIAGRAM Connection to the outside environment The Raildome is connected with: - A 220V 2 amp power supply - A cable RJ45 Power Plate Main rail Ref. RA-ALIMD Ref. VZC-RAIL3 Extremity bumper Rail Start BACK Power rail Positioners Extremity bumper FRONT Power supply...
- Page 6 TOOLS AND SUPPLIES NEEDED FOR INSTALLATION LIST OF TOOLS REQUIRED FOR INSTALLATION: Recommended equipment - Metal hole saws : 20 mm ..............IP, HD-SDI, WIFI TESTER : - Spanners and sockets: Ref : VZ-TESTFIP - 2x10 spanners (for the threaded rods) ........- 2x13 spanners (for the threaded rods) ........
-
Page 7: Table Of Contents
RAILDOME INSTALLATION PROCEDURE Installation steps : Phase 1 - On ground Preparation 1- Lay out all of the rail sections on the ground 2- Drill the rail for installation of the glands p.10 3- Clean the rail p.10 4- Stick the Velcro rough side (hook) to the rail p.11 5- Position the connection fishplates and the U attachment brackets in the rail section channels... -
Page 8: Phase 1 - On Ground Preparation
PHASE I - ON GROUND PREPARATION... -
Page 9: 1- Lay Out All Of The Rail Sections On The Ground
1. LAY OUT ALL OF THE RAIL SECTIONS ON THE GROUND. Phase I - 1/5 To start the installation, lay out all of the rail sections on the ground. Ensure that the truck slides properly in the rail. If necessary, very lightly sand the area shown below. For reference during the installation, we label the two Raildome ends : “Extremity bumper Rail Start Power supply”... -
Page 10: 2- Drill The Rail For Installation Of The Glands
2. 2. DRILL THE RAIL FOR INSTALLATION OF THE GLANDS Phase I - 2/5 The use of glands for electrical cable crossings requires you to drill two holes 20 to 40 millimetres from the end of the rail on the side 1. Top view 4 0 m m 3 8m m... - Page 11 4. STICK THE VELCRO ROUGH SIDE (HOOK) TO THE RAIL Phase I - 3/5 Capotage miroir A one-way mirror panel is positioned along the rail to hide the optical system. It will be called «mirror cover». It is fixed with Velcro strips positioned on the edge of the rail sections. Carefully wipe the surface of the rail where the Velcro strips will be attached with a soft cloth.
- Page 12 5. POSITION THE JUNCTION FISHPLATES AND THE U ATTACHMENT Phase I - 4/5 BRACKETS IN THE RAIL SECTION CHANNELS Rail channels Connection fishplates (Ref. VZC-ECLIS6) Four channels are used to Install the pack (hex connect the rail profiles with heads + M6 washers) at two types of elements: the each connection inside connection fishplates and the...
- Page 13 6. POSITION THE JUNCTION FISHPLATES AND THE U ATTACHMENT Phase I - 5/5 BRACKETS IN THE RAIL SECTION CHANNELS For the standard attachment version, we supply : One U bracket for attachment and two fishplates (for the 2 upper channels) for each connection. Two fishplates (for the 2 upper channels) for each connection with the corresponding hardware.
-
Page 14: Phase 2- Rail Assembly
PHASE II - Rail assembly... - Page 15 1. ATTACH THE RAIL SECTIONS TO THE CEILING USING Phase II - 1/11 THE U MOUNTING BRACKETS AND THE CONNECTION FISHPLATES. Alignment of rail profiles Assemble the sections by tightening the connection fishplates. INCORRECT ALIGNMENT When tightening the fishplates, make sure the rail is perfectly aligned.
-
Page 16: 2- Attaching The Electrical Power Rails To Rail Profiles
2. ATTACHING THE ELECTRICAL POWER RAILS TO RAIL PROFILES Phase II - 2/11 The electrical power supply rails of Raildome are installed Fastening of the retaining clips for the electrical power rail under the main rails using a clip (ref. VFM-CLIP). The shape of the clip allows it to be inserted in the lower channel of Spanner Main Rail... - Page 17 2. ATTACHING THE ELECTRICAL POWER RAILS TO RAIL PROFILES Phase II - 2/11 An electrical connection clip (Ref. VFM-CJR) must be added between each rail connection to link them together using a multi-grips. . The rails will be powered along their entire length and will allow to recharge the Raildome. Multi-grips After the installation of each power rail, use a multimeter to check that there is no electrical continuity between the conductor bar and the rail.
-
Page 18: 3- Install The Extremity Bumper Rail Stop
3. INSTALL THE EXTREMITY BUMPER RAIL STOP Phase II - 3/11 Composition of Extremity bumper Rail Stop The base «Extremity bumper Rail Stop» is composed of an aluminum support on which is glued a foam on the carriage side to dampen in case of shock of the chartiot. -
Page 19: 4- Installation Of Magnetic Positioners
4. INSTALLATION OF MAGNETIC POSITIONERS Phase II - 4/11 Magnetic sensors placed each side the rail. They indicate to the slider when it must stop. These positioners are screwed on the supply rails. The first one is placed at 85 cm from the edge of the main rail by piercing the supply rails (see position below). -
Page 20: 5- Install The Raildome Components Into The Rail
5. INSTALL THE RAILDOME COMPONENTS INTO THE RAIL Phase II - 5/11 Before placing the camera slider into the rail is important to plug in the battery. This allows the two drivers of the slider to return automatically to their positions to FRONT prevent damage. -
Page 21: 6- Install The Extremity Bumper Rail Start Power Supply
6. INSTALL THE EXTREMITY BUMPER RAIL START POWER SUPPLY Phase II - 6/11 Composition of Extremity bumper Rail Start Power supply The base «Extremity bumper Rail Start Power supply» Protective foam is composed by a router to connect the RJ45 cable, and an aluminum support. -
Page 22: 7- Install The Feed Plate
7. INSTALL THE FEED PLATE Phase II - 7/11 The feed plate is to be placed above the main rail «Extremity bumper Rail Start Power supply» next to the U-shaped mounting bracket. It is fixed by means of screws and T-nuts which are inserted in the upper channels of the main rail and which will lock automatically when tightened. -
Page 23: 8- Connect Power Rail
8. CONNECT POWER RAIL Phase II - 8/11 The connection of the supply rails is done using the electrical connection clips (VFM-CJR) joined to the supply plate (Ref. RA-ALIMD). All you need to do is Feed Plate clip them to each of the power supply rails as shown in the photos below. WARNING : to make sure the polarity is correct Multi-grips To insert the electrical junction clip, you will... -
Page 24: 9- Check That The Slider's Battery Is Recharging
9. CHECK THAT THE SLIDER’S BATTERY IS RECHARGING Phase II - 9/11 Recharging the Raildome battery only occurs when the Camera slider truck is no longer moving. Ref. RA-CHA8 When the Raildome is inactive, two conductors controlled by an electromagnet come to the plate to allow the battery to be recharged. - Page 25 10. STICK THE VELCRO’S LOOP SIDE TO THE MIRROR-FINISH SHEETS Phase II - 10/11 TO BE DONE AT THE END OF THE INSTALLATION Placement du Velcro femelle sur le capotage Lay out the mirror-finish cover sheets on a clean surface to avoid scratching them.
- Page 26 11. ATTACH THE MIRROR COVER TO THE RAIL Phase II - 11/11 ATTACH THE MIRROR COVER (REF. VZC-CPT3) Start at one end of the rail and attach one side of the cover with Velcro. Unroll the entire roll of cover on one side of the rail Once the cover is attached to one side of the rail, stand in the center opposite the cover strip you just attached From the center,...
-
Page 27: Phase 3- Settings
PHASE III - SETTINGS... -
Page 28: 1- How To Use The Remote Control
HOW TO USE THE REMOTE CONTROL Only operates on camera numbers 1 to 4 and saving pre- positions 1 to 10. Each movement command is active as long as the key is held down. The remote control works with a 9V battery (slot on the back - battery supplied). -
Page 29: 2- Dome Setup
DOME SETUP ACCESS THE WEB INTERFACE LAUNCH Access the dome’s web interface by entering its IP Configure the dome in your supervision software. Use the «Focus address in your web browser. +» & «Focus -» keys to move the dome in the rail. To connect, the identifiers and passwords are : - Login : admin - Password : Freemotion8... - Page 30 w w w.vision au te- a dv. com w w w.rai ld o me. com Factory : Parc du Tumulus - 12130 PIERREFICHE T. : + 33 (0)5 65 70 49 79 - Fax. : + 33 (0)5 65 47 40 17 Showroom : 110 rue Théodor Mathieu - La Gineste - 12 000 RODEZ FRANCE...
Need help?
Do you have a question about the RAILDOME FREEMOTION 8 and is the answer not in the manual?
Questions and answers