Table of Contents
Advertisement
Operator's Manual
WARNING
READ AND UNDERSTAND THE OPERATOR'S MANUAL COMPLETELY BEFORE USING
THIS ATTACHMENT. ASSEMBLE, TEST AND USE ONLY IN ACCORDANCE WITH THE
OWNER'S MANUAL INSTRUCTIONS.
20195 South Diamond Lake Road, STE 100
Rogers, MN 55374
800.966.8442
www.jrcoinc.com
Tine Rake Dethatcher
p/n 8239.JRC
1
Advertisement
Table of Contents

Summary of Contents for Jrco Tine Rake Dethatcher
- Page 1 Operator’s Manual Tine Rake Dethatcher WARNING READ AND UNDERSTAND THE OPERATOR’S MANUAL COMPLETELY BEFORE USING THIS ATTACHMENT. ASSEMBLE, TEST AND USE ONLY IN ACCORDANCE WITH THE OWNER’S MANUAL INSTRUCTIONS. p/n 8239.JRC 20195 South Diamond Lake Road, STE 100 Rogers, MN 55374 800.966.8442...
-
Page 2: Table Of Contents
6.2 ... Operator Safety ................................11 6.3 ... Operation .................................... 12 Storage Instructions ............................. 13 7.1 ... Storing Your Tine Rake Dethatcher ........................13 Removing Rake ............................... 13 8.1 ... Removing Your Tine Rake Dethatcher ........................13 Field Use Set-up and Instructions ........................13 Specifications ................................ -
Page 3: Introduction
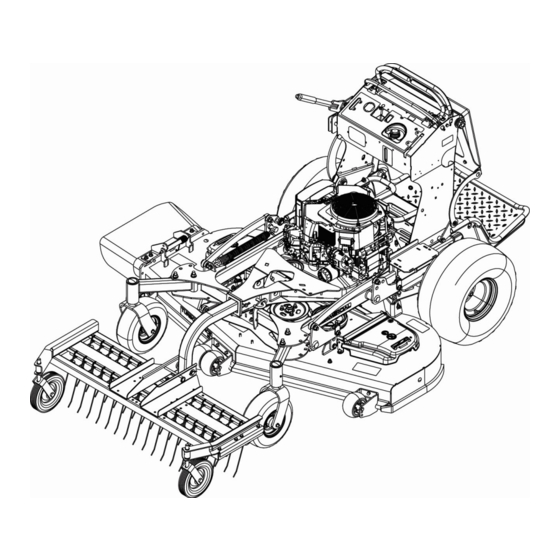
JRCO front-mount dethatchers are available in a 46 width for the Toro Multi Force standup mower with the 2” hydraulic lifting receiver. The Tine Rake Dethatcher is the ultimate spring clean-up tool. Use the rake for the first mowing of the spring to remove thatch, embedded leaves and debris. The patented tines lift thatch without damaging healthy turfgrass and at the same time comb matted grass giving the lawn a clean, hand-raked appearance. -
Page 4: Model Identification
Refer to the image above for location of your serial number plate: 1.6 Further Assistance Your dealer and all of us at JRCO want you to be pleased with your attachment. Should you require further assistance or have questions regarding your attachment, please contact your local dealer where you purchased your attachment. -
Page 5: Assembly And Set-Up
Operator’s Manual Tine Rake Dethatcher 2 Assembly and Set-up 2.1 Packing List 1. Deck assembly 35 tines for 46” and 47 for 7. Mount Side Plate (Left) 60” 8. Lift Tube, 2” Square 2. Yoke/Wheel brace (left) 9. Hitch Pin 3. -
Page 6: Parts Breakdown
Operator’s Manual Tine Rake Dethatcher 2.2 Parts Breakdown 20195 South Diamond Lake Road, STE 100 Rogers, MN 55374 800.966.8442 www.jrcoinc.com... -
Page 7: Tools Required
Open or Box End Wrench: ½”, & ¾” 2.4 Power Unit Requirements The Tine Rake Dethatcher is designed to be attached to a JRCO Mount on the 52” or 60” Toro Multi-force stand- up mower with the hydraulic lift 2” receiver hitch. -
Page 8: Unpacking Your Attachment
Wear safety Glasses Your Tine Rake Dethatcher will ship in 1 box. Carefully set the box on a flat working area. Carefully unbox the attachment and verify that all fasteners and components are included. (see packaging list on page 5) 2.6 Torque Requirements... -
Page 9: Side Plate And Lift Tube Attachment
Operator’s Manual Tine Rake Dethatcher 3.3 Side plate and Lift Tube attachment 1. Attach Left Side plate to dethatcher in the holes shown, using four 5/16 x ¾” serrated flange nuts and bolts. 2. Apply a light coat of dry lube (silicone spray or eq) to the pivot pin. -
Page 10: Adjustments
Operator’s Manual Tine Rake Dethatcher 3. Secure with 5/8 hitch pin and hairpin cotter. 4. Insert 3/8 x 5” clevis pin in hole in between side plates. Secure with circle cotter. This pin will be used later, when folding the dethatcher for transport. -
Page 11: Operation Instructions
For added Tine Rake Dethatcher stability and to prevent loss of control when using Tine Rake Dethatcher: Rake up and down the face of slopes – never across the face of any slope. Do drive at reduced speeds on uneven ground and when turning corners. -
Page 12: Operation
CAUTION Use the Tine Rake Dethatcher for its intended purposes only. Never use it to carry, push, pull or drag any object other than its intended purpose. Misuse can lead to damage of the attachment. -
Page 13: Storage Instructions
OFF and remove key before mounting the attachment. 9 Field Use Set-up and Instructions 1. Ensure top of Tine Rake Dethatcher deck is approximately 9 ½” inches above solid ground and level. 2. Tine should not be touching or scraping the hard surface. -
Page 14: Maintenance Instructions
Check all bolts and nuts after using for several hours to ensure they are secure. Replace any worn, damaged or missing safety labels. The parts on your JRCO Tine Rake Dethatcher have been designed specifically for your attachment and should be replaced with genuine parts from your local JRCO Dealer. Do not alter the equipment in any way. - Page 15 Any misuse, abuse, alteration or improper installation or operations will void warranty. Determining whether a part is to be replaced or repaired is the sole decision of Jrco. Jrco will not provide for replacement of complete products due to defective parts. Any labor costs incurred due to replacement or repair of items is the responsibility of the buyer and not covered under warranty.
- Page 16 20195 South Diamond Lake Road, Suite 100 • Rogers, MN 55374 Toll-Free: 800-966-8442 • Website: jrcoinc.com • Email: info@jrcoinc.com Register Warranty Online at WWW.jrcoinc.com For products purchased on or after January 1, 2018...
Need help?
Do you have a question about the Tine Rake Dethatcher and is the answer not in the manual?
Questions and answers