Advertisement
Package Contents
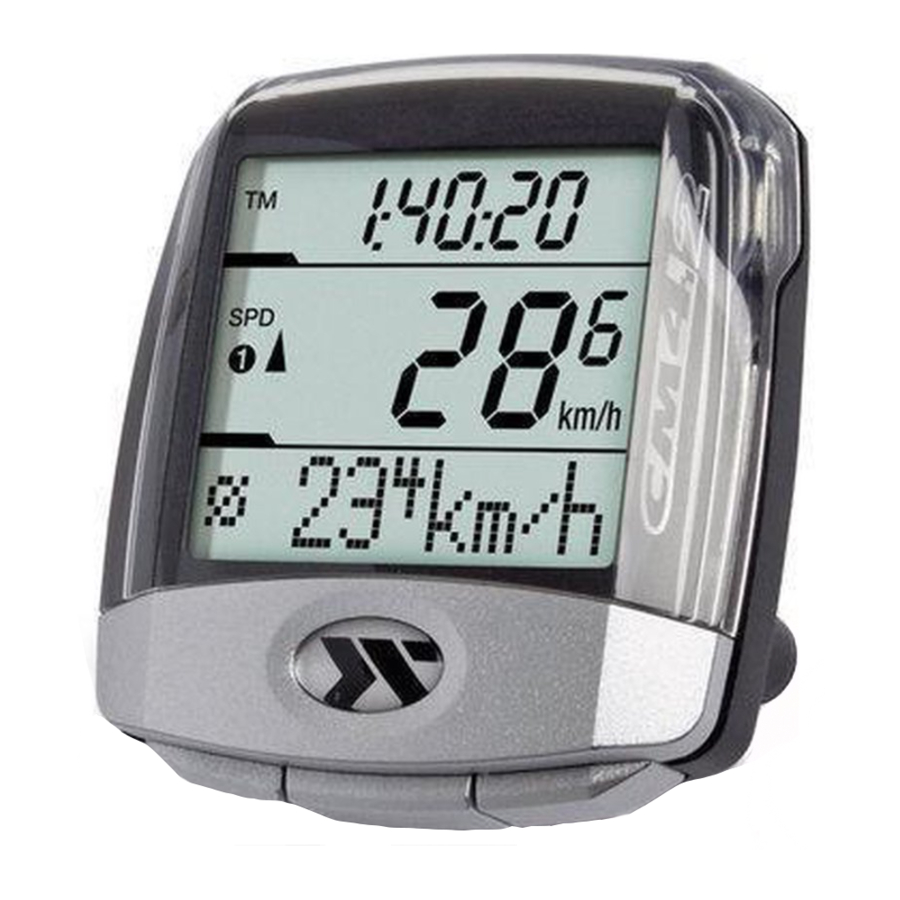
- CICLOMASTER CM 4.2
- battery type CR 2032
- battery cap
- handlebar bracket
- transmitter
- cable ties for mounting
- spoke magnet
Mounting
The handlebar bracket can be mounted on the handlebar and also on the stem.

Mounting is possible on handlebar (Position A-1) or stem (Position A-2).
For using it on the stem, change bracket mounting orientation from Position A to Position B.

Remove the protective tape.
Place the handle bar and fasten it with the cable ties.

Mount the transmitter with cable ties on the fork (max. distance to the handlebar bracket max. 60 cm; best mounting on the right side, handlebar bracket and transmitter should be on the same side).

Fix the magnet on a spoke so that it will face the mark on the transmitter. Adjust the magnet position and fine tune the sensor if necessary (distance between transmitter and magnet max. 3 mm).

Rotate the CM 4.2 to 45 degree left and install it into the bracket. Then rotate it 45 degrees right to lock it. To unlock, rotate 45 degrees to the left.

Mounting of optional cadence-set
(separately available)
Mount the handlebar as described above on the handlebar or on the stem.
Place the sensor on the cable on the left chain-brace in height of the crank with help of cable-ties so that it is still loose enough to be lined up. Mount the cadence-magnet (with help of a cable tie) on the inside of the crank. The distance between magnet and sensor should be max. 3 mm.
The magnets must point directly to the mark on the sensor. Now switch on the cadence measuring in the setting mode of the CM 4.2 (see chap. 2.1). Turn crank a few times to check if the mounting is correct. Now tighten the cable-ties.
Putting on the heart rate transmission belt

whoever carries out sport should have a general medical check up on his/her general state of health - especially beginners, persons older than 35 years of age and anyone who has suffered from illnesses or injuries in the past. It is recommended that a doctor be consulted in any case in the presence of risk factors, such as smoking, high blood pressure, high cholesterol values, diabetes, lack of exercise and excess weight.
Pacemaker wearers should consult their doctor before using any heart rate measurement device!
The transmitter belt is hung in the elastic chest belt and fastened around the upper body. The transmitter (plastic part with the Ciclo-logo) should lie over the middle of the upper stomach, immediately below the breastbone, so that the logo on the transmitter is legible (viewed from the front) (see illustration). The electrodes in the belt, to the right and left of the transmitter, must be in contact with the skin.
Pull the belt tight so that it cannot slip and constant contact with the body is guaranteed during movement.
If the CM 4.2 fails to display any heart rate, it probably means that there is no contact between the skin and the electrodes. Moistening the electrodes and the underlying skin often helps. Best results are obtained if electrode gel is used (available from pharmacies).
Measurement of the heart rate is only possible if the transmitter belt is fitted correctly and the CM 4.2 is within the transmitter's reception range (max. 60 cm).
Preparation
Inserting the battery
Insert battery type CR2032 with plus-pole facing up. Close battery cap with a coin, being sure not to over tighten. After inserting the battery the display will show normal mode.
(If nothing or incomprehensible signs appear in the display, press the AC-button on the rear of the computer with help of a ballpoint pen or a similar object. Attention: this will delete all values and setting).
Settings
Enter setting mode by pressing middle button for 3 seconds. Display shows 'SET BIKE1'.
To quit setting mode press again middle button for 3 seconds in any setting.
(To change the display to german language, press left button short, display shows ‚LANGUAGE'. Press middle button to choose this function and then switch between 'English' and 'Deutsch' with right button. To store press left button and then get back to setting mode with short pressing of right button).
Though CM 4.2 can show german and english words, this manual shows both possible displays.
The different setting modes can be shown by pressing right or left button, by pressing middle button the shown setting mode is chosen.
Possible setting modes:
SET BIKE1
SET CLOCK
SET HR
SET MISC
EXIT
LANGUAGE
Each setting mode can have different setting possibilities.
The following is valid for these settings: the blinking value can be changed with the right button, the value is stored by shortly pressing the left button and the next value blinks or the next value appears on the display.
For a better reading in the following chapters the setting modes are fat printed and the settings fat and italic.
SET BIKE1
Adjustment of bike-specific values, e.g. total distance, circumference, unit and more for bike 1.
Choose with middle button.
To do these settings for bike 2, press right and left button short simultaneously in normal mode. CM 4.2 switches to bike 2, then enter again setting mode (display then shows SET BIKE2/SET RAD2).
DAY DST
Adjustment of the daily distance
Default: 000.00 km
Range: 000,00 to 999,99 km or m
Set with right and left button, store with left button.
Here the daily distance can be adjusted, e.g. the point of starting a tour, when using a printed tour-guide.
(This setting doesn't change the total distance. There only really ridden kilometres are counted).
TOT DST
Adjustment of the total distance
Default: 0000 km
Range: 0 to 99999 km or m.
Set with right and left button, store with left button. Here the total distance can be adjusted.
Wheel
Adjustment of circumference
Default: 2080 mm
Range: 0000-3999 mm
Set with right and left button, store with left button.
Here the circumference can be adjusted.
The circumference of the wheel can be taken from the chart or be measured by yourself.
| Tire size | Circumference | |
| 40-559 | 26 x 1,5 | 2026 mm |
| 44-559 | 26 x 1,6 | 2051 mm |
| 47-559 | 26 x 1,75 | 2070 mm |
| 50-559 | 26 x 1,9 | 2026 mm |
| 54-559 | 26 x 2,00 | 2089 mm |
| 57-559 | 26 x 2,125 | 2114 mm |
| 37-590 | 26 x 1 3/8 | 2133 mm |
| 32-620 | 27 x 1 1/4 | 2199 mm |
| 40-622 | 28 x 1,5 | 2224 mm |
| 47-622 | 28 x 1,75 | 2268 mm |
| 40-635 | 28 x 1 1/2 | 2265 mm |
| 37-622 | 28 x 1 3/8 | 2205 mm |
| 20-622 | 700 x 20C | 2114 mm |
| 23-622 | 700 x 23C | 2133 mm |
| 25-622 | 700 x 25C | 2146 mm |
| 28-622 | 700 x 28C | 2149 mm |
| 32-622 | 700 x 32C | 2174 mm |
Measuring the circumference of the wheel (for a more precise setting):
Put a marking at the front-tire and on the ground (e.g. with chalk). Ride straight ahead exactly one turn of a tire (for a very exact measurement, check the pressure of the tire before getting on your bike) and mark this position on the ground. Now measure the exact circumference of the wheel between the two markings at the ground (in mm).
Unit km bzw
Adjustment of the measuring unit (kilometres or miles)
Default: km
Set with right button, store with left button
Here you can choose whether the display should show kilometres (km/h) or miles (m/h).
CAD OFF
Switch cadence on/off (ON/AN – OFF/AUS)
Default: OFF/AUS
Set with right button, store with left button
Here you can switch on/off the cadence measuring. To use this function you need the optional cadence-set (available at your local dealer).
SET CLOCK
Adjustment of clock, date and clocktime-format.
Choose with middle button
Time
Adjustment of clock
Range: 00:00 to 23:59 or 12:00 to 11:59 A/P
Set with right and left button, store with left button
Here you can set the current clocktime. First you set the hours, then the minutes.
Year
Adjustment of the year
Default: 2007
Range: 2007 to 2099
Set with right button, store with left button Here you can set the current year.
Month
Adjustment of the month
Default: 01
Range: 01 to 12
Set with right button, store with left button Here you can set the current month.
Day
Adjustment of the day
Default: 01
Range: 01 to 31
Set with right button, store with left button Here you can set the current day.
Clock
Adjustment of the clock format
Default: 24
Set with right button, store with left button
Here you can select between 24- or 12-hour format (AM/PM).
SET HR
Adjustments for the optional heart rate measurement. To use this function you need the optional heart rate-set (available at your local dealer).
HR OFF/ON
Switch heart rate on/off (ON/AN – OFF/AUS)
Default: OFF/AUS
Set with right button, store with left button
Here you can switch on/off the heart rate measuring.
Fitness
Adjustment of the fitness level.
Default: 3
Set with right button, store with left button.
Range 1-4, corresponding to the following levels:
- poor fitness
- average fitness
- good fitness
- high fitness
Here you set your personal fitness level, necessary for the CICLOInZone-calculation.
Sex
Set with right button, store with left button.
Change between m = male and f = female.
The sex is needed for the CICLOInZone-calculation and the calorie consumption.
Weight
Range: 20 to 220 kg
Set with right and left button, store with left button
The weight is needed for the CICLOInZone-calculation and the calorie consumption.
Birthdate
Adjust with right and left button, store with left button
Default: 1960
Range: 1920 to 2006
The year of birth is necessary for the CICLOInZone-calculation.
InZone
Here you can start the CICLOInZone-calculation by short pressing of right and left button simultaneously (see also chap. 4 for CICLOInZone).
In order to ignore the calculation, just press short left button.
In order to obtain an exact calculation of ones personal CICLOInZone it is necessary to insert the personal data relative to fitness-level, sex, weight and birthdate.
In order to calculate the CICLOInZone position the chest belt correctly, take up a rest position (remain seated and relaxed) and start the CICLOInZone calculation by short pressing of right and left button simultaneously.
The CM 4.2 will then start to time 5 minutes. During this time, stay seated, relaxed and calm, as the CM 4.2 will measure the minimum heart rate reached during this period (heart rate at rest) and will store this value for the subsequent calculation.
After the 5 minutes the lower value of the calculated personal CICLOInZone appears in the display.
Lower HR
A lower heart rate limit can be set here or (after CICLOInZonecalculation) the calculated value is shown.
When the current heart rate is lower than this value, the CM 4.2 shows an arrow (  ) as an optical alarm.
Range: 0 to 220 bpm
Adjust with right and left button, store with left button
Upper HR
An upper heart rate limit can be set here or (after CICLOInZonecalculation) the calculated value is shown.
When the current heart rate is higher than this value, the CM 4.2 shows an arrow (  ) as an optical alarm.
Range: 0 to 240 bpm
Adjust with right and left button, store with left button
Max HR
Shows the maximum heart rate, calculated with CICLOInZone.
Range: 0 to 240 bpm
Adjust with right and left button, store with left button
SET MISC
Here you can switch on the powerdown-mode or make a reset (delete all values).
Choose with middle button
Powerdown
Switch on the powerdown-mode (e.g. before changing of the battery, to save the values).
To switch it on, press right and left button short simultaneously, display fades out and CM 4.2 is in powerdown-mode. By short pressing of any button, CM 4.2 starts again and shows normal mode.
Reset
Here you can delete all values (including the total values).For this press right and left button short simultaneously, display shows 'reset' and then normal mode.
If you only want to delete the day values, press right and left button for three seconds in normal mode.
Functions
The CM 4.2 has an automatic start/stop when on the handlebar bracket.
That means, 4 sec. after the first wheel turn the display shows normal mode and the current speed.
1 minute after the last wheel turn (and without a button is pressed) the display changes to an "energy save" mode. During this mode, only the time is displayed.
If the wheel turns or a button is pushed, the computer will resume normal functions.
The optional heart rate measuring works also without speed signal: when CM 4.2 is in normal mode (by pressing any button or auto-start), the heart rate receiver is automatically switched on.
And as long as a heart rate is shown in the display, there is no automatically switching to sleep mode.
To change from bike 1 to bike 2 (and back) press right and left button short simultaneously (in the left part of the display the 1 changes to 2 and back).
To reset all day values, press right and left button for three seconds.
The CM 4.2 has a three-lined display. In the middle part always the current speed is shown, with a small 1 or 2 left beside, that shows whether the current values are valid for bike 1 or bike 2.
To advance the functions of the upper display, press right button, to advance the functions of the lower display press left button.
Always short pressing of the middle button shows the subfunctions of the function in the lower display.
Functions in the upper display:
TM – Daily ride-time

Heartrate – if switched on

DST – Daily distance

Time

(Explanation of these functions see ‚functions in the lower display')
Function in the middle display:
SPD – current speed
Inidcates the current speed in km/h or m/h.
Range: 0 to 199,9 km/h or m/h
An arrow on the left side of the display indicates, whether the current speed is faster (arrow up) or slower (arrow down) than the current average speed.
Functions in the lower display:
DST - daily distance

Indicates the distance ridden up to now in kilometres or miles..
Range: 0 to 999,99 km or mi
TOT - Total distance

Sub-function of function daily distance
Indicates the total distance ridden up to now in kilometres or miles (since last reset or battery change).
Range: 0 to 99999 km or mi
∑ TOT - sum of total distance of bike 1 and bike 2

Sub-function of function daily distance
Indicates the sum of the total distance ridden up to now in kilometres or miles (since last reset or battery change) of bike 1 and bike 2.
Range: 0 to 199999 km or mi
Ø - average speed

Indicates the current average speed in km/h or mi/h.
Range: 0 to 199,9 km/h or m/h (the decimal place is highranking)
MAX - maximum speed

Sub-function of function average speed
Indicates the highest speed ridden up to now in km/h or mi/h.
Range: 0 to 199,9 km/h or m/h (the decimal place is highranking)
Time

Indicates the current time.
Range: 00:00:00 to 23:59:59 or 12:00:00 to 11:59:59 AM/PM
Date

Sub-function of function time
Indicates the current date (dd.mm.yy).
TM - daily ride time

Indicates the current daily ride time. Range: 0 to 9:59:59 h
TOT - total ride-time

Sub-function of function daily ride time
Indicates the total ride time (since last reset or battery change).
Range: 0 to 999:59 h
∑ TOT - sum of total ride time of bike 1 and bike 2

Sub-function of function daily ride time
Indicates the sum of the total ride time (since last reset or battery change) of bike 1 and bike 2.
Range: 0 to 999:59 h
The following function only appears, if switched on in the setting mode (for the measuring of the cadence you need the separately available cadence set).
CAD - cadence

Indicates the current cadence (rpm = rounds per minute)
Range: 0 to 250 rpm
Ø - average cadence

Sub-function of function cadence Indicates the average cadence.
Range: 0 to 250 rpm
MAX - maximum cadence

Sub-function of function cadence
Indicates the maximum reached cadence.
Range: 0 to 250 rpm
The following functions (heart rate and calorie consumption) only appear, if heart rate is switched on in the setting mode (for the measuring of heart rate you need the separately available heart rate-set).
HR - heart rate

Indicates the current heart rate (bpm = beats per minute)
Range: 0 to 250 bpm
On the right side of the lower display an arrow shows, whether the current heart rate is below (  ), within (
  ) or above (
  ) the set heart rate limits.
Ø- average heart rate

Sub-function of heart rate function
Indicates the average heart rate (since last reset). Range: 0 to 240 bpm
MAX - maximum heart rate

Sub-function of heart rate function
Indicates the maximum heart rate reached (since last reset).
Range: 0 to 240 bpm
Training time below the lower limit set for heart rate

Sub-function of the heart rate measurement function.
Displays the training time during which heart rate dropped below the lower limit set. (since last reset).
Range: 0 to 9:59:59 h
Training time within the limits set for heart rate

Sub-function of the heart rate function.
Indicates the training time during which heart rate was within the limits set (since last reset). Range: 0 to 9:59:59 h
Training time above the upper limit set for heart rate

Sub-function of heart rate function.
Indicates the training time during which heart rate exceeded the upper limit set (since last reset). Range: 0 to 9:59:59 h
kCal - Calorie consumption

Indicates the current calorie consumption (since last reset).
Range: 0 to 99999 kCal
TOT - total calorie consumption

Sub-function of calorie consumption function
Indicates the total calorie consumption (since last reset or battery change)
Range: 0 to 99999 kCal
CICLOInZone - Philosophy and Application
CICLOInZone® is a solution for the very best personalisation of your training routine.
It is possible to calculate the optimum training threshold with the CICLOInZone® function on the basis of your personal data and your pulse rate when at rest.
CICLOInZone® is the ideal solution for personalised cardio training applied to any sport, from jogging and cross-country running to road and indoor cycling.
Improve your fitness? – Lose weight? – Train whilst always taking your health into consideration? Everyone will find the correct aim to follow in their training. But how do you train to achieve those aims in the most efficient possible manner? How do you find the right intensity of effort during the training? CICLOInZone® is the optimum training ZONE for effort, resistance and weight loss.
What does CICLOInZone® do?
It calculates the optimum training zone for effort, resistance and weight loss.
The values vary from person to person and they offer a valid training support – always staying between 70% and 85% of the maximum heart rate.
(+/- 5% of tolerance, taking into consideration the actual heart rate when at rest and the level of training).
The question of burning fat is seen in the "correct" light with CICLOInZone® – on the basis of the personal data collected.
Battery change
CM 4.2: Open battery cap with a coin (unscrew to the left). Insert battery type CR2032 (please use battery with smooth minuspole) with plus-pole facing up. Close battery cap, being sure not to over tighten. After inserting the battery the display will show normal mode.
If nothing or incomprehensible signs appear in the display, press the AC-button on the rear of the computer with help of a ballpoint pen or a similar object. Attention: this will delete all values and setting.
(Battery change in the optional chest belt works in the same way.)
Transmitter: Open battery cap at the top of the transmitter with a coin (unscrew to the left), remove old battery and insert new 12 V battery, type 23A (with pluspole facing up). Close battery cap, being sure not to over tighten.
Please do not throw away battery in your normal garbage.
Trouble shooting
Faulty or no display
- check to see if battery is installed properly or replace battery (Attention: removing battery will clear all settings and values in the CM 4.2)
- press AC-button on the rear of the computer
Speed not displayed
- check to see if wheel-sensor is mounted properly
- check the position of the spoke magnet (max. 3 mm distance to wheel-sensor)
- make sure CM 4.2 is mounted in bracket correctly
- check wheel circumference
Speed to high or to low
- check wheel circumference
- check to see if you are using miles or kilometers
No heart rate displayed or values displayed are incorrect or unstable
- proof whether heart rate is switched on in setting mode
- Check transmitter belt (battery)
- Skin too dry or cold
- Distance between CM 4.2 and transmitter belt is too great (max. 60 cm)
Cadence is not dispalyed or value incorrect or unstable
- Check whether switched on in setting mode
- Check sensor and magnet for correct installation

Documents / ResourcesDownload manual
Here you can download full pdf version of manual, it may contain additional safety instructions, warranty information, FCC rules, etc.
Download Ciclosport CicloMaster CM 4.2 - Bicycle Computer Manual
Advertisement


Need help?
Do you have a question about the CicloMaster CM 4.2 and is the answer not in the manual?
Questions and answers