Advertisement
DURApulse GS20A Option Card Quick-Start Guide
Option Card Installation
For the GS20A-BPS or GS20A-CM-ENETIP option card, install it by following the steps below for either a GS20 series drive, or the steps on page
xx for a GS20X series drive.
Installing an Option Card in a GS20 Drive
NOTE: Ensure all control board and power cables are terminated before installing the option card. Once the option card is installed, there is no
access to the control or power terminals.
1) Switch off the power supply.
2) Open the front cover of the drive.
3) Remove the plug terminal cover from the drive control board. A small screwdriver can be used to pry the cover from the plug.
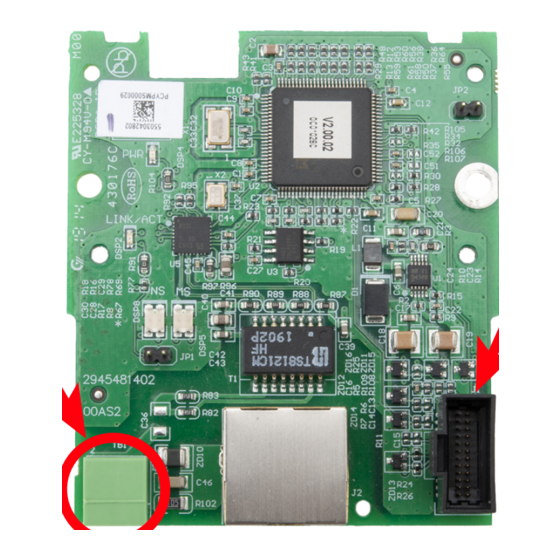
4) For the GS20A-BPS, locate the removeable green terminal blocks on the option card and remove them. For the GS20A-CM-ENETIP, the removeable green terminal blocks
are packaged separately in the box.
GS20A-BPS
5) The option cards must be grounded before wiring. A ground terminal wire is included with the option cards. The A side of the ground terminal connects to the PE on the
drive as indicated by the red circles below. The B side of the ground terminal connects to the green removeable terminal block labeled PE on the option card. Connect
the wire then plug the terminal block back into the option card. Note, for B frames, snip the "A" ring of the ground terminal wire to fit the connector around the ground
screw.
Ground Terminal Wire
A
B
GS20_Option_QSP_1edRevA 12/30/2020
Option Card Cable-Drive
Connection Port
GS20A-CM-ENETIP
Option Card
Cable Connection
Port
Frame A–C
6) Plug each end of the control board connector cable included with the option card into the appropriate slot on the card and the drive. Apply enough pressure to ensure
the connector is properly locked in place.
7) Line up the two large clips of the option card fixed fitting as shown below, then press the fixed fitting into the slots. Route the control board connector cable towards the
bottom of the drive.
Option Card
Cable Connection
Port
8) Line up the three positioning pins with the option card as shown below, then press the option card into the fixed fitting until the clips snap into place.
9) Fasten the screw to fix the option card firmly in place and torque approximately 4-6 kg-cm (3.5-5.2 in-lb)(0.39-0.59 N·m).
Frame D–F
D, E frames
F frame
10) Replace the GS20 drive front cover.
Torque:
4-6 kg-cm
[3.5-5.2 in-lb.]
[0.39-0.59 N•m]
DURApulse GS20A Option Card Quick-Start Guide – 1st EdRevA 12/30/2020
Locked
Unlocked
Page 1
Advertisement
Table of Contents

Summary of Contents for DURAPULSE GS20A
- Page 1 6) Plug each end of the control board connector cable included with the option card into the appropriate slot on the card and the drive. Apply enough pressure to ensure the connector is properly locked in place. For the GS20A-BPS or GS20A-CM-ENETIP option card, install it by following the steps below for either a GS20 series drive, or the steps on page xx for a GS20X series drive.
- Page 2 9) Plug each end of the control board connector cable included with the option card into the appropriate slot on the card and the drive. The core of the cable should be positioned below the option card and control card slot. 10) Close the GS20X drive front cover. DURApulse GS20A Option Card Quick-Start Guide – 1st EdRevA 12/30/2020 Page 2 GS20_Option_QSP_1edRevA 12/30/2020...
Need help?
Do you have a question about the GS20A and is the answer not in the manual?
Questions and answers