
Related Manuals for CNC Workshop MINIATURE scenery Steel Worm


Summary of Contents for CNC Workshop MINIATURE scenery Steel Worm
- Page 2 The exclusive copyright on the model designs are the property of CNC Workshop Ltd. © Copyright CNC Workshop Ltd., 2006. All rights reserved. Made in Australia...
- Page 3 This bit is kinda involved, and may be a little frustrating. Take your time, It should work out. The crater surface is lightly joined into a single piece, so remove it from the board carefully. Apply glue to the top ring (a) and outer edge (b).
- Page 4 Gently push the surface into position while applying a bit of superglue between the joints and cracks. (Squeeze the glue into the cracks and let it flow between the parts) Do this a small section at a time, allow it to dry, then proceed around the circle until complete.
- Page 5 NOTE that throughout con- struction there are small holes in the centre of many of the round parts. You can use these to assist with alignment by inserting toothpicks or similar.
- Page 9 Now would be a good time to start painting your model if you have not already done so. Painting the scales before attach- ing them is also highly recom- mended.
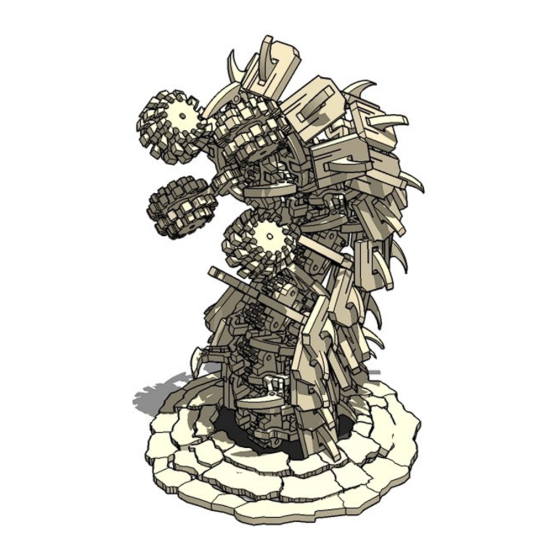
- Page 11 Scales. This is the repetitive bit. You’ll need about 40 of these. (I used 39) Starting at the second most bottom rib, glue the first layer in place as shown. Splay them slightly outwards.
- Page 12 The scales will get very crowded at the back. I left the centre scale of the second row to allow space.
- Page 13 The final two rows are different. Make ten of these.
- Page 14 I’ve flared out the top row to give her a bit of a frill. You could glue the closed up if you like.
- Page 15 Glue the “teeth” in at your de- sired angle.
Need help?
Do you have a question about the MINIATURE scenery Steel Worm and is the answer not in the manual?
Questions and answers