Advertisement

The dash cam is not intended for use as a surveillance, security or time-lapse camera system.
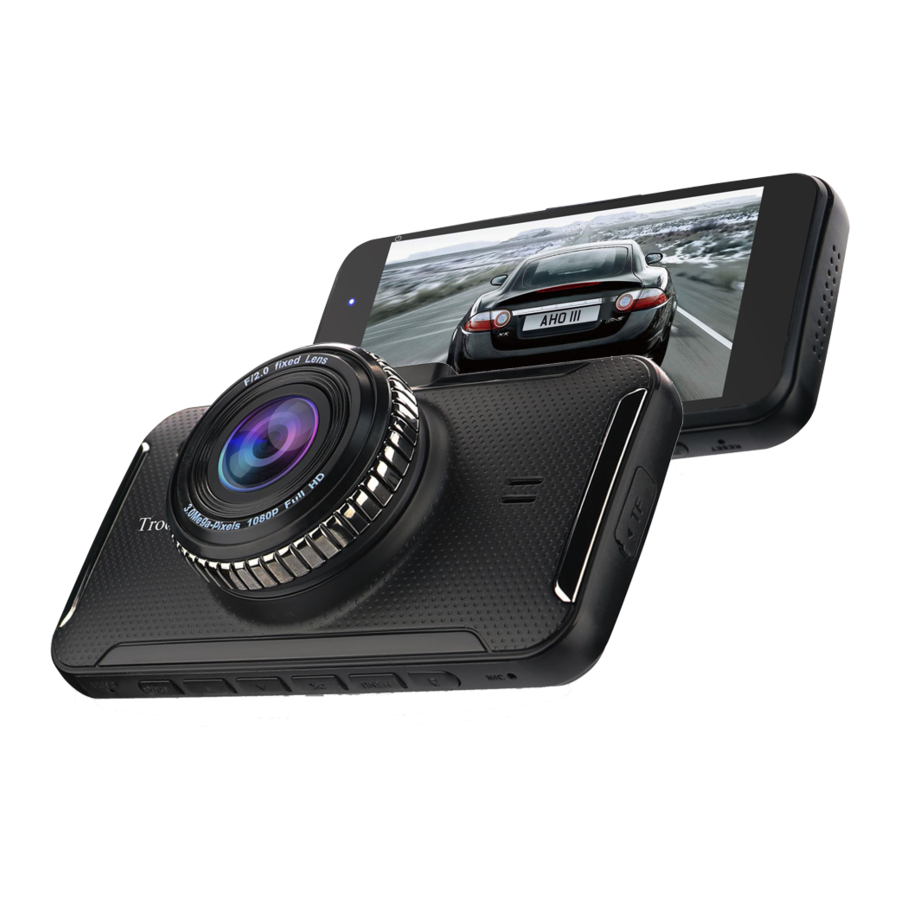
PARTS INCLUDED

FEATURES
- Private Tooling with Exclusive & Attractive Appearance.
- Full HD 1080P for high Definition Video Recording.
- Big Camera Lens(Diameter 1'' ) for HD Video and Photo.
- 170 Ultra-wide-Angle Camera provides multi-lane coverage.
- High Quality Image Sensor & fill-in light for outstanding night video clarity.
- Big IPS Screen 4'' for clear HD displaying and Clarify.
- Dual Recording from Front & Back, Rearview camera assist parking reversing.
- WDR function for HD video Clarity.
- Gravity sensing, Motion detection, Parking monitor, License plate watermark.
- 12-24V /5V (1.5A) Car adapter with charging cable.
- Works with Micro TF card 32GB(max128GB).
- Suction cup mount swivels for optimal position.
- Hands-free auto ON/OFF(turns ON/OFF with the vehicle).
- Seamless loop Recording, Photo Taking, Replaying fuctions.
- Video File Format: MOV.
TECHNICAL PARAMETERS
| Video Resolution | 1080FHD, 1080P, 720P, WVGA, VGA |
| Storage compression | H.264 |
| Video Format | MOV |
| Picture Format | JPG |
| Lens | HD CMOS image sensor |
| DDR3 | 1GB |
| LCD Size | 4.0 inches |
| LCD Resolution | 800*480 |
| G-SENSOR | 380B |
| Working Power | 4W |
| SD Card (TF) | 4GB, 8GB, 16GB, 32GB, ...,128GB(max) |
| Voltage | DC 5V(1.5A) |
| Work Temperature | -4°F~149°F(-20℃~65℃ ) |
| Storage Temperature | -13°F~167°F(-25℃~75℃ ) |
| Air Pressure | 960Mbar~1040Mbar |
| Battery | 200mAh/3.7V lithium polymer battery |
BUTTON DEFINITION

| NO. | Button/Point | Definition & Operating Instructions |
| 1 | MODE | Switch between Recording / Camera / Playback; When date/time setting, press 0.5s to move the light bar to next choice; In recording press 0.5s to lock video file. |
| 2 | DOWN | In menu options, downward function; In standby or recording state, record audio on/off. |
| 3 | UP | In menu options, upward function; In standby or recording state, picture in picture switch function. |
| 4 | OK | Recording / camera / playback / confirmation key; In recording mode, press 0.5s to start recording, press again to stop recording. In camera mode, press 0.5s to taking photo; In menu mode, it's Enter(confirm)Key. |
| 5 | MENU | In standby mode, press 0.5s enter/exit setup menu; short press (0.5s) twice to next menu-setup page; long press(3 seconds) turn on/off fill-in light. |
| 6 | LOCK | lock the video file, to avoid being covered by loop recording. |
| 7 | ON/OFF KEY Screen Saving | Press 3s can ON/OFF the machine; press 0.5s can sleep/wake the screen. |
| A | RESET | Resetting Key, System restart. Reset button is only used to restore factory settings, when crashed or abnormal situation. |
| B | MIC | Microphone |
| C | USB port | For providing power supply. connecting a PC to transfer data; or power connector. |
| D | Holder Port | |
| E | AV IN HOLE | plug the rearview camera. |
| F | TF card slot | TF memory card slot, please install in correct direction. |
| G | Power/work | The indictor light will on when energized or working. |
| H | Screen | 4.0'' HD IPS Screen. |
| I | heat dissipation | |
| J | Fill-in light | You can choose to turn on in dark circumstance. |
| K | Camera Lens | |
| L | Speaker | Voice broadcast |
| M | Bracket | |
| N | Rear view camera | If there is reversing in any state, reverse image will show on the screen. |
INSTALLATION
- Power off car engine;
- Insert the right TF card in the card slot;
![]()
- Install and fix DVR on the front windshield;

- Connect the dark red wire of camera with reversing light. Inserting car charger machine will automatically start recording, if there is reversing in any state, reverse image will show on the screen. After reversing, it will return to recording mode automatically.
![]()
- Insert the adapter with charging cable in the car cigarette lighter hole;
- Insert the usb end of the charging cable in the DVR usb port. Then route and hide the cable;
- Swivel camera lens for optimal position;
- Start car engine, format TF card, then check if DVR installation is correct.


If correct, dash cam (DVR) indicator light will work, and will enter recording automatically, recording indicator light will start.
MOUNTING
INSTALLING THE DASH CAM
- Insert the hook of suction mount into the top slot of the 4M58 as shown (A).
- Select an area of the windshield directly above the dash board(make sure not obstructing driving view), then clean the area thoroughly.
- With the suction lever in the released position (B) press the suction cup against the windshield (C).Press the suction lever toward the suction cup to lock the mount in position (D).
- To adjust the angle of the 4M58, loosen the collar on the ball joint, adjust the angle, then retighten in the desired position (E).
CAMERA ADJUSTMENT
The DVR camera records in one direction. To record the view in front of the vehicle. the camera should face to the front windshield.
Optional: To record the view inside of the vehicle, the camera should face the rear window.
Sometimes should adjust camera lens direction to avoid direct sun glare.
MOUNTING REAR VIEW CAMERA
First, you need to make a hole in the rear of the car, pass the wire of the rear view camera through this hole, and then connect the red wire on the rear view camera to the reversing light cable on the car, and connect the black wire to the DVR. Finally, use the provided screws to fix the rearview camera in place and adjust the angle(This step may require the help of a local auto repair shop)
POWERING THE DEVICE
Plug the included Adapter into your vehicle's Lighter socket.
Connect the adapter to the 4M58.
The red wire is connected to positive pole of the reversing light cable.
The black wire is connected to negative pole of the reversing light cable.
You need to make a hole in the rear of the car, (B) pass the wire of the rear view camera through this hole(A), and then connect the red wire and black wire on the rear view camera to the reversing light cable on the car, and connect the black wire to the DVR. Finally, use the provided screws to fix the rearview camera in place and adjust the angle(B)
(This step may require the help of a local auto repair shop)
FUNCTION
Automatic Record Function
Start car engine, dvr will start and record automatically. The charging light will work, and the recording icon will flash on the screen. When power off car engine, DVR will save the video file in TF card and power off automatically following the car power off, the blue light stops flashing.
NOTICE: Have to choose the loop record time (1' 2' 3' 5' 10'), please prefer 1' or 3', mustn't choose OFF;
Manual Record Function
In standby mode and formatting TF card inside, short press (0.5s) [OK] key to enter recording. The charging light will work, and the recording icon wil flash on the screen. While recording, short press [OK] key to stop.
Taking Photo
In camera mode, short press [OK] key for 0.5s to take photo.
Gravity Sensor
Built-in G-sensor can be activated and lock the key video (from 10 seconds before accident to 3 munites after the accident) if collision happens.
One-click lock function
The machine has One-click lock function, it can lock the reserved files that need to be retained without being recycled. In recording mode, short press (0.5 Seconds) [menu], the recorder will lock the image in the first 10 seconds and then 1/3/5 minutes.
Date/Time Setting
Press [MENU] key to enter Date / Time setting, short press [UP] / [DOWN] to setup the right data, press [OK] key to confirm. press[MODE] key move the light bar to the next item.
NOTICE: In order to get effectively recording date and time for prove, please set the correct time before using the machine.
Playback Files
Press [MODE] key to switch to playback mode on the boot state. Short press (0.5 Seconds) "Up"/ "Down"can find the files. Short press(0.5 Seconds) "OK" button to play.
Parking Monitoring
Under parking monitoring function, in shutdown status, if there is a slight len, the video recorder will switch on automatically. It will record for 20 seconds and then shut down if it's in the flame out state(time can be set up in the setting menu)
Motion Detection
When machine turns on but In standby mode, if Motion detection is on, and the lens senses a moving object, the machine enters the recording mode. When the camera does not sense the moving object for 5 seconds, the system stops recording. If you need to exit the Motion detection mode, set "off" in the [Menu].
DAY/NIGHT mode
The user must select day or night mode for best performance. The 4M58 DVR cannot switch between day and night automatically. Long press (3 seconds) the [MENU] button or select LIGHT SET menu to switch on or off.
Download file
If connecting dash camera to a computer through a USB data cable, the display will show two options (mass storage /pc camera) (remember that you need to insert a format memory card (TF card).Then the dash camera can be used as MEMORY or PC CAMERA on your choice.
Rearview Camera
Rearview camera is optional. If with rearview camera, the dash camera will have dual record (Front & Rearview). Besides rear image recording function, the back camera can used as rearview system for reversing. Rearview camera is connected with [AV IN].
Languages
English / traditional Chinese / simplified Chinese / Japanese /French / German / Italian / Portuguese / Russian / Spanish / Thai
SETTING MENU
MENU DEFINITION
Turn on dash camera and stop recording, press Menu key to enter setting menu.
Press DOWN/UP key to select those suitable option, finally press OK button to confirm the operation. When all settings are complete, continue to press MENU key to exit the setting interface.
| Menu Choice | Explantion | Available options (Item with drawing line is Default) |
| Resolution | To set video's resolution | 1080FHD, 1080P, WVGA,720P, VGA |
| Loop recording | To set video's looping time | 1', 2', 3'(minute), 5', 10', off. if you choose OFF, the card won't be cyclic covering automatically. |
| WDR | To adjust the light automatically | ON, OFF. Suggest opening full-time. |
| Exposure Compensation | To fill light when underexposed or dim screen. | +0.0, -1/3, -2/3, -1.0, -4/3, -5/3, -2.0, +2.0, +5/3, +4/3, +1.0, +2/3, +1/3 |
| Motion Detection | To detect moving objects and record automatically in standby mode | On, Off |
| Audio Recording | To turn on/off the Audio recording | On, Off |
| Date Stamp | To watermark videos date | On, Off |
| G-sensor | The video of collision will never be overwritten | High, Middle, Low, Off |
| Parking monitor | On, Off. | |
| Rear Camera Mirroring | On, Off. | |
| Date / Time | Setting: In standby mode, press the Menu key twice to enter the setting interface. select "Date/time" and press OK key to set date/time. Press UP key / DOWN key to adjust the numbers then press OK button to confirm. Press MODE button to move the light bar to next choice. Finally press OK key to exit Date/Time setting to the upper menu. | |
| Auto power off | Off , 3 minutes, 5 minutes, 10 minutes | |
| Beep Sound | On, Off. | |
| Language settings | multi-language support | 12 Languages: English, Spanish, Russian, French, German, Chinese... |
| Light source frequency | 50Hz , 60Hz. | |
| Screen Saver | screen timing off | 1'(1 minute), 3', 5',Off. |
| Fill-in Light | Off, on | |
| License plate number set | Customizing for Chinese License plate number | |
| Format | delete all the data of card | Must format for first use |
| Default Setting | Restore factory settings | When not knowing what has changed, restore the default settings. |
| Version | Displays the software version number and release schedule. | |
HOME SCREEN
All dash cameras have factory default setting. User can check all functions.
If need modification for his/her preferrence, the default setting can be modified.
Please refer to "Button Definition" & "Menu Definition" as above.

![]() Recording standby icon, indicates the recording mode;
Recording standby icon, indicates the recording mode;
![]() Red flashing indicates the device is recording.
Red flashing indicates the device is recording.
![]() Camera icon, indicates the photographing mode;
Camera icon, indicates the photographing mode;
![]() Playback icon, indicates the playback mode.
Playback icon, indicates the playback mode.- 01:32:30 Red Font indicates the current time-imaging segment time;
01:32:30 Yellow fond show the remaining recording time of TF card; After inserting the memory card, in standby mode, it will show the remaining recording time in yellow font. ![]() Loop recording segment time icon, indicating there are there 3 minutes for recording time.
Loop recording segment time icon, indicating there are there 3 minutes for recording time.![]() Indicate the current select resolution is 1080FHD; D1 means connecting one rearview camera for dual recording.
Indicate the current select resolution is 1080FHD; D1 means connecting one rearview camera for dual recording.- Small picture in the big one means there is a rearview camera is connected for dual recording.
![]()
![]() Motion detection icon, when it showing in the right of the screen, it indicates the motion is activated.
Motion detection icon, when it showing in the right of the screen, it indicates the motion is activated.![]() Battery level icon: indicates the current battery level.
Battery level icon: indicates the current battery level.![]() Micro SD card icon: indicates Micro SD card in the card slot.
Micro SD card icon: indicates Micro SD card in the card slot.![]() Wide-Dynamic icon, when the icon showing on the screen, it indicates the function is activated. we advise open this icon always.
Wide-Dynamic icon, when the icon showing on the screen, it indicates the function is activated. we advise open this icon always.![]() Audio Recording;
Audio Recording;
![]() Mute Recording.
Mute Recording.![]() Licence plate watermark function is used, and current car licence number is
Licence plate watermark function is used, and current car licence number is ![]() .
.![]() Time icon, indicates the current standard time; please initial setting before using it.
Time icon, indicates the current standard time; please initial setting before using it.![]() Date display, shows the current standard data, please initial setup before using it;
Date display, shows the current standard data, please initial setup before using it;![]() Parking Monitoring icon: indicates the parking guard function is activated;
Parking Monitoring icon: indicates the parking guard function is activated;![]() Fill-in light open icon.
Fill-in light open icon.![]() Lock icon means current video file is locked.
Lock icon means current video file is locked.
 Recording standby icon, indicates the recording mode;
 Red flashing indicates the device is recording.
  Camera icon, indicates the photographing mode;
  Playback icon, indicates the playback mode.
 Loop recording segment time icon, indicating there are there 3 minutes for recording time.
 Indicate the current select resolution is 1080FHD; D1 means connecting one rearview camera for dual recording.
 Motion detection icon, when it showing in the right of the screen, it indicates the motion is activated.
 Battery level icon: indicates the current battery level.
 Micro SD card icon: indicates Micro SD card in the card slot.
 Wide-Dynamic icon, when the icon showing on the screen, it indicates the function is activated. we advise open this icon always.
 Audio Recording;
  Mute Recording.
 Licence plate watermark function is used, and current car licence number is
  Time icon, indicates the current standard time; please initial setting before using it.
 Date display, shows the current standard data, please initial setup before using it;
 Parking Monitoring icon: indicates the parking guard function is activated;
 Fill-in light open icon.
 Lock icon means current video file is locked.
Note:
If no TF card installed in DVR, the home screen will prompt you that a memory card is not installed.
If a previously used SD card is formatted, all previous data will be deleted.
Please don't remove or insert a memory card in boot state, to avoid damaging the memory card.
FAQ
If troubleshooting occurs under normal operation, please refer to the following solutions.
Can't record or take photos
Solution: Please check whether the TF card has enough space, whether it is locked or not, or the card may be broken.
Automatically stops when recording
Solutions: Because HD video file is big, please use the high-speed TF card compatible with SDHC, Please use C10 or above high-speed TF card.
"File error" prompts when replay images and video
Solutions: Error occurred while TF card stored data, resulting in incomplete file. Please use the "format" function of the camera to reformat the TF card.
The image was foggy
Solutions: Please check whether the lens has dirt or finger print. Before shooting, wipe the lens with lens paper.
Horizontal stripe interference in the image
Solutions: This is due to the setting of the wrong "light source frequency", depending on the local power supply frequency, set to "50Hz" or "60Hz".
Crash machine
- Reset the machine with a sharp object (such as a paperclip, pins, etc...) inserting in the RESET hole.
- This situation occurs mostly when over-current protection fo the machine. So you'd avoid the machine in a car parked in the sun's exposure for long time.
- Reformat the TF card in the machine.
Fuzzy video
- Please use the lens cloth swab dipped in alcohol or scouring oil, to wipe clean the lens. Try to avoid touching the lens, and please keep auto glass clean.
- Check the lens on the machine whether the protective film is removed.
Fuzzy pictures
Fix the machine on the suction cup bracket, camera shooting can achieve the best results. But the machine itself is not a professional digital camera. Its main use is video record.
WARRANTY
Warranty is 1 year counting from buying date (not include periodical consumable part). if the product failure under normal operation, We will provide free replacement or repair during the period of warranty. We reserve the right to change new products or other equivalent products. We will not be responsible for the damage(such as traffic accident) which doesn't cause from our products themselves.
All failure products should be sent to us or our authorized repair center, attached with detail description of defect and show original purchase invoice.
Documents / ResourcesDownload manual
Here you can download full pdf version of manual, it may contain additional safety instructions, warranty information, FCC rules, etc.
Advertisement

Need help?
Do you have a question about the 4M58 and is the answer not in the manual?
Questions and answers