Advertisement
Computer and accessories

- Computer
- Mounting shoe
- Fixed shoe
- Sponge sticker
- Fixed rings
- Connection bar
- Bridge bar
- Magnet cover
- Lock bar
- Ties
Installation of mounting shoe

The mounting shoe and fixed shoe is already installed and with sponge sticker.
You can intalled them by four different ways.
This is The 1st way:

The 2nd way:

The 3rd way:

The 4th way:

FUNCTIONS
- SPD - CURRENT SPEED
- ODO - ODOMETER(0-9999km/m)
- DST - TRIP DISTANCE
- MAX - MAXIMUM SPEED
- AVS - AVERAGE SPEED
- TTM - TOTAL TRIP TIME
- TM - TRIP TIME
- RAT - RIDING ALL TIME
- CLK - CLOCK (12H/24H)
- SW - STOPWATCH
- Th - TEMPERATURE
- TM UP - TRIP TIME UP
- TM DN - TRIP TIME DOWN
- TRIP UP - TRIP DISTANCE UP
- TRIP DN - TRIP DISTANCE DOWN
- COMPARATOR
- SETTING SPEED SCALE(km/h, m/h)
![]() MAINTENANCE ALERT
MAINTENANCE ALERT![]() MACHINE OIL REMAINDER
MACHINE OIL REMAINDER![]() LOW BATTERY INDICATOR
LOW BATTERY INDICATOR- SETTING TYRE CIRCUMFERENCE
 LOW BATTERY INDICATOR
- SETTING THE LAST VALUE OF ODOMETER.
- FREEZE FRAME MEMORY
- SIGNAL INTERFERENCE-RESISTANCE
- AUTO BACK LIGHT
- EVER-BRIGHTENING BACK LIGHT
- SMART BACK LIGHT
- SLEEP MODE
- WIRELESS WAKE UP
COMPUTER & PARTS

- Computer
- CR2032 Battery
- Magnet
- Mounting
- Shoe Sensor
- Ties

Remove the battery cover out of the bottom of the computer by using a flat blade screwdriver, install one CR2032 battery with the positive (+) pole facing the battery cover and close the cover.
INSTALLATION
 (Slide the mounting shoe to the computer until they attached to each other firmly.)
Attach the computer to the handlebar by the ties. Spin the front wheel to check for proper installation. Adjust the position of sensor and magnet if there is no or weak reaction from the computer screen.

COMPONENT ILLUSTRATIONS

(Attach the sensor to the front fork, using the pad to make it fixed firmly.)
Attach the sensor to the front fork by the ties, the computer and the sensor should be installed on the same side of the fork, and the distance between them should be less than 60cm. the arrow sign on the sensor should point to the magnet Install the magnet as shows in the figure. Adjust the sensor and magnet to make sure the distance between them is 3 mm.

(put the ties through the slots under he button to fix the wired control to the handlebar.)
Attach the wired control to the handlebar. Adjust it to the most most convenient position for use.
INSTRUCTION
MODE INSTRUCTION
When battery is put in the computer, the display is in DST mode. It has three modes of this computer, DST, TRIP UP / DOWN and INQUIRY MODE. Each press of the MODE button switches into one of three MODEs. The DST MODE is the default one.

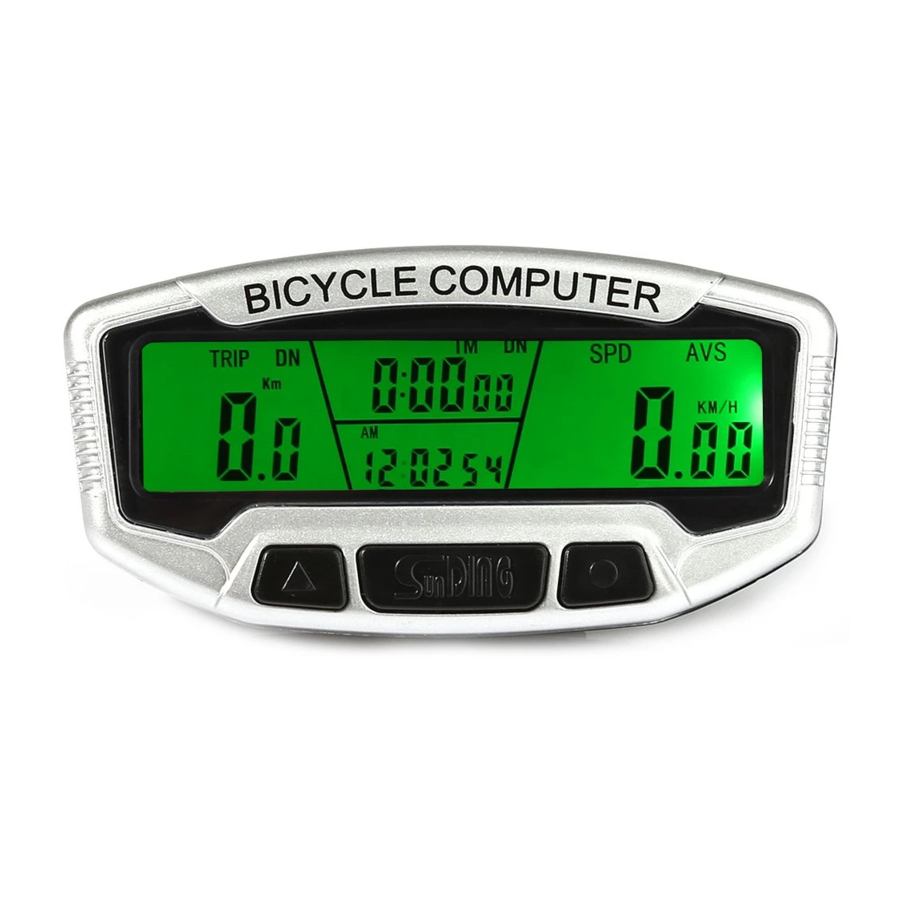
MAIN UNIT


MALFUNCTIONS AND REASONS
- No speedometer
- Improper magnet / sensor alignment.
-
Inaccurate value is indicated
-
Improper input, such as wheel circumference.
-
-
Slow display response
-
Temperature exceeds operating limits (0°C~55°C).
-
-
Weak display
-
Poor battery or dead battery.
-
-
Displays irregular figures
-
Take battery out and reinstall it after 10seconds.
-
COMPUTER SETTINGS
TEMPERATURE SETTING (°C / °F)
In INQUIRY MODE, press the SET button for 3 seconds to go to DATA SETTING MODE, press UP button to choose C or F, press SET button to confirm and enter into CLOCK SETTING MODE.
")
12/24 CLOCK SETTING
Press UP button to switch 12/24 hour mode. press the SET button to confirm and enter to HOUR setting, when figure indicates HOUR and start flashing, press the UP button to adjust the figure to the proper one, each press makes one number plus. Then press the SET button to set MINUTE, SECOND SETTING MODE and adjust them by pressing UP button as well. When this setting is over, press SET button to enter into WHEEL SIZE SETTING MODE.

WHEEL SIZE SETTING & CHART
When in WHEEL SIZE SETTING MODE, the default wheel circumference setting is 2080mm, Choose correct wheel circumference figure as the chart below. Press UP button to change each figure properly, press SET button to confirm and jump to next figure. (Range: 0~9999mm). When this setting is over, press SET button to enter into (KH/H) / (M/H) SETTING MODE.
| TIRE SIZE | CIRC | TIRE SIZE | CIRC | TIRE SIZE | CIRC |
| 700CX38mm | 2180 | 650CX23mm | 1944 | 26"x1.75" | 2023 |
| 700CX35mm | 2168 | 650CX20mm | 1938 | 26"X1.5 0" | 2010 |
| 700Cx32mm | 2155 | 27"x2.10" | 2148 | 26"X1.25" | 1950 |
| 700Cx30mm | 2146 | 27"x1.95" | 2090 | 24"x1.75" | 1916 |
| 700Cx28mm | 2136 | 27"x1.50" | 2079 | 20"x1.50" | 1490 |
| 700Cx25mm | 2105 | 26"x3.00" | 2170 | 18"X2.0" | 1340 |
| 700Cx23mm | 2096 | 26"x2.35" | 2083 | 16"X1.50" | 1185 |
| 700Cx20mm | 2086 | 26"x2.10" | 2068 | 14"X1.50" | 1020 |
| 700CxTubular | 2130 | 26"X1.95" | 2050 | 12"X1.75" | 935 |
(KM/H) / (M/H) SETTING
When in (KM/H) / (M/H) SETTING MODE, press the UP button to switch KM/H or M/H mode, press SET button to confirm and enter into ODOMETER SETTING MODE.
 / (M/H) SETTING")
ODOMETER SETTING
When in ODOMETER SETTING MODE, Press UP button to adjust the flashing. ODO figure. Press SET button to jump to next number and set them as the same way. The default number is 0000 (range: 0~9999kms/miles). When this setting is over, press SET button to enter into RAT SETTING MODE.

RAT SETTING
When in RAT SETTING MODE, press UP button to adjust press SET button to jump to next figure. The default number is. The defalut number is 00:00:00 (range: 0~9999Hrs). When this setting is over, press SET button to enter into DISPLAY MODE, then press MODE to enter into TM UP & TRIP UP SETTING MODE.

TM UP & TRIP UP SETTING
When in TM UP & TRIP UP SETTING MODE, press and hold SET button for three seconds to SET the figure of TM UP & TRIP UP. Press UP button to adjust, press SET to jump to next figure. The TM UP default number is 00:00:00(range: 0~99:59:59Hrs). The TRIP UP default number is 000.0(range: 0~999.9kms/miles). Press SET button to finish this setting and back to TM UP & TRIP UP SETTING MODE. Press SET button to enter into TM DOWM &TRIP DOWN SETTING MODE.

TM DOWM & TRIP DOWN SETTING
When in TM DOWM &TRIP DOWN SETTING MODE, press and hold SET button for three seconds to SET the figure of TM DOWM &TRIP DOWN.
Press UP button to adjust, press SET to jump to next figure. The TM DOWM default number is 00:00:00(range: 0~99:59:59Hrs). The TRIP DOWN default number is 000.0(range: 0~999.9kms/miles). Press SET button to finish this setting and back to TM DOWM &TRIP DOWN SETTING MODE.

ONE SINGLE TRIP DATA RESET
In any mode, press and hold UP button for 3seconds, then all the data of this single trip riding will be reset to zero except CLK ODO and RAT.
FUNCTIONS
SPD
When the wheel is cicrling, the current speed data is showing all the time on the screen, its ranges is: 0~99.9km/(m/h), and it is accurate to +/- 0.1km/h(m/h).
SPD COMPARATOR
During riding, ![]() or
or ![]() will dispaly on the screen,
will dispaly on the screen,  indicates the speed is higher than average speed.
  indicates the current speed is lower than average speed.
ODO
The total distance record from the beginning zero to the current. its mileage ranges: 0.001~99999km(m). The display will automatically turn to zero if the value is out of the range.
DST
The distance of one single trip. Its range is: 0~9999km(m), The display will automatically turn to zero if the value is out of the range.
MAX SPD
The maximum speed of one single trip.
AVS
The average speed of one single trip.
TM
The trip time is how long one single trip riding lasts.
TTM
The total trip time record from the beginning zero to the current. Its range is: 0~99:59:59, The display will automatically turn to zero if the value is out of the range.
RAT
Riding time record in total from the beginning zero to the current. its range is 0~9999 Hr.
STOPWATCH
In DST or ODO mode, press SET button to enter into STOPWATCH MODE. Start stopwatch with UP button, press UP button again to freeze, press one more UP button to start the stopwatch again. Clean the stopwatch data by pressing SET button.
TH
The current outdoor temperature. its ranges is: -20~70(°C) / -4~158(°F).
AUTO WAKE UP
It can automatically wake up and enter the work.
SLEEP MODE
If the computer is free for over 300 seconds, the computer will automatically enter into Sleep mode and hide all data but CLK. It will turn back to the previous mode with all the data when start circling or press any botton.
OVER-SPEED REMINDER
When the SPD is over 20KM/H, the SPD will be flashinguntil the SPD is less than 20KM/H.
MAINTENANCE ALERT
When the ODO is over 300KM,  will be flashing, press both UP and MODE button at the same time to clear the reminder.
CARE REMINDER
When the ODO is over 300KM, the  will be flashing, press both UP SET and MODE button at the same time to clear the reminder.

FREEZE FRAME MEMORY
Press the UP button in any mode except STOPWATCH mode to enter into Freeze Frame memory mode, DST, TTM, SPD data will be freezed and the figures start flashing
WIRED REMOTE CONTROL (SD-558A)
The wired remote control button is attached the mounting shoe, it is able to replace the MODE button.
TRIP UP
Trip count up.
TRIP DN
Trip count down.
TM UP
Time count up.
TM DN
Time count down.
AUTO BACK LIGHT & EVER-BRIGHENING BACK LIGHT
It can sense automatically the light intensity around the computer. It will be ON when there is insufficient light. press any button to turn on the back light. It will be OFF automatically when there is sufficient light. Press the MODE button for 5 seconds, the back light will keep brightening, press it for another 5 seconds, the back light will be OFF. Ever-brightening back light will be OFF when it enter SLEEP MODE.

Documents / Resources
References
Download manual
Here you can download full pdf version of manual, it may contain additional safety instructions, warranty information, FCC rules, etc.
Advertisement

Need help?
Do you have a question about the SD-558C and is the answer not in the manual?
Questions and answers