Table of Contents
Advertisement
Quick Links
Advertisement
Table of Contents

Related Manuals for Teac WAP-V6000


Summary of Contents for Teac WAP-V6000
- Page 1 WAP-V6000 INSTRUCTION MANUAL...
-
Page 2: Copyright Notices
Portions of this product’s software are available under the Mozilla Public License 1.1 (MPL 1.1). Any modification or contribution to such portions of this software are available in Source Code form under the terms of the Mozilla Public License 1.1 via the internet under TEAC’s website as mentioned above. -
Page 3: Table Of Contents
HDD Installation, Configuration and File Management....18 Hard Disk Drive Installation.................18 WAP-V6000 HDD Format Wizard...............20 Copy files from USB Storage Device to WAP-V6000 (Local HDD) ....21 Copy/Delete files from computer to WAP-V6000 (Local Hard Disk) ....23 Samba Server function..................23 Network Protocols to Play Media............25 UPnP Mediaserver installation on computer............25... - Page 4 Viewing Photo Information ..................38 Photo Viewing Effect ..................38 Viewing Photos While Music is Playing (BackGround Music)......40 View Photo in Thumbnails Mode.................43 Video........................44 Supported Video Formats...................44 To play video.......................45 Control Video Playback ..................47 Video Viewing Effects ..................48 Subtitles and Languages/Audio-Tracks...............49 Video Resume Playing ..................50 DVD Menu Navigation..................52 Web Browser..................53 To open the Web Browser...................53...
-
Page 5: Dear User
About This Manual The TEAC media systems WAP-V6000 User Manual gives you a step-by-step explanation of how to install WAP-V6000 Media Player. Use this information to set up and configure WAP-V6000. This manual is provided in PDF format on the Installation CD-ROM. -
Page 6: Safety Information
-- We do recommend, always to update for the latest firmware! -- TEAC is always active to offer you the best possible features for your WAP-V6000! -
Page 7: Controls And Connectors
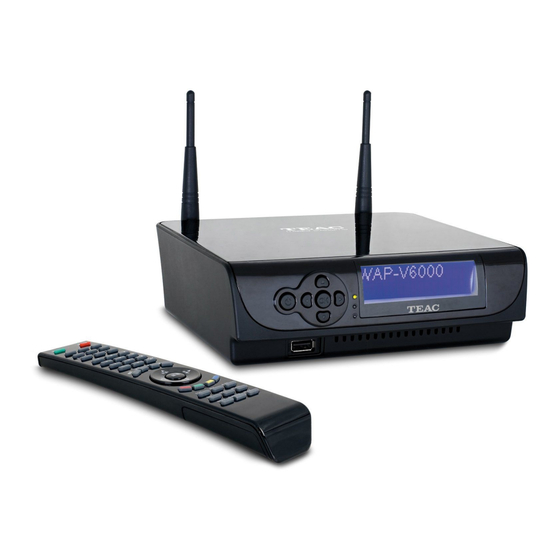
Controls and connectors Main unit front view 1 = Standby Button 4 = LC-Display 2 = Navigation Buttons 5 = USB Host 3 = Indication LEDs: Power/Standby, HDD, Network Main unit rear view 1 = Wlan Antenna 1 7 = S/PDIF Optical Digital Output 2 = Composite Video Output 8 = HDMI Output 3 = Audio Output Right Channel... -
Page 8: Infrared (Ir) Remote Control
Infrared (IR) Remote Control 1 = STANDBY / ON 2 = Video OUTPUT selection 3 = Number keys 4 = PREVious / NEXT track 5 = Navigation keys 6 = Function selection 7 = Playback options 8 = Main menu HOME button 9 = SETUP 10 = Audio MUTE button 11 = Volume control... -
Page 9: Table Of Remote Control Buttons
Table of remote control buttons Button FUNCTION DESCRIPTION POWER Turn On/Off “WAP-V6000”. HOME Hotkey to return to Main Menu. MUTE Mute audio output. OUTPUT Switch the video output type COPY Copy USB content into local HDD MENU Go to the Menu of DVD films. -
Page 10: Remote Control Battery Installation
2. Enter the highlight item. REWIND Fast backward the media file with speed 2x, 4x, 8x… FORWARD Fast forward the media file with speed 2x, 4x, 8x… Select different subtitles and languages when playing video SUB & LANG file. VOLUME+/- Increase/Decrease the volume. -
Page 11: Installation
Installation Following descriptions explain how to install the WAP-V6000 with basic setup. Install your WAP-V6000 in this order: 1. Connect WAP-V6000 2. Set Up WAP-V6000 3. Install software on your computer from Installation CD 4. Configure your Twonkymedia Server to work with the WAP-V6000 Connections Make sure you have the appropriate cables for connecting. -
Page 12: Start-Up
WAP-V6000 and the TV are in the same mode. If not, please cycle through the OUTPUT key on the remote control, wait few seconds during each cycle to establish... - Page 13 Note: When you cycle through the “Output” Key, the WAP-V6000 will tell you which mode you are at. Above is an example of cycling to “HDMI” mode. Please press “OK” if HDMI mode is what you want to select. It will switch to the original mode automatically if idle for 15 seconds.
-
Page 14: Setup Menu
1. Select Network Wizard from set up main menu to start setup wizard 2. Select “Wired” and follow the on screen instructions. Note: If you connect to a network using DHCP, WAP-V6000 automatically detects your network. If you don’t connect using DHCP, go back to set up main menu and select Network Set Up. -
Page 15: Wireless Network Setup
Wireless Network Setup Attention: WAP-V6000 supports present wlan standards 802.11b, 11g and 11n. A wireless connection of 802.11b or 802.11g standard can work well if you want to play music or view photos. For demanding video streaming, especially when streaming HD contents, a wired Lan or high performance 802.11n Wlan connection between... - Page 16 9. Follow the onscreen instructions to complete the setting. Note: With each network, there are signal strength indicators in 3 colors; red, yellow and green. It is recommended to play high-bit-rate video only when the signal turns into green or to re-adjust the two antennas of WAP-V6000 accordingly.
-
Page 17: Advanced Network Setup
Advanced Network Setup Connect WAP-V6000 to computer directly This item gives you a description on how to connect the WAP-V6000 directly to your computer instead of getting involved in the local area network. Wired Network 1. Connect the LAN cable to the LAN port of both WAP-V6000 and the computer. -
Page 18: Hdd Installation, Configuration And File Management
HDD Installation, Configuration and File Management Hard Disk Drive Installation WAP-V6000 supports 3.5” SATA HDD as internal storage. By installing the HDD inside, you can copy and delete media files via computer to local HDD and record streams to HDD. - Page 19 7. Connect the SATA data cable from HDD to the WAP-V6000 board. 8. Connect the HDD power cable from HDD to the WAP-V6000 board. 9. Re-install the bottom tray to the top cover of the WAP-V6000 by its 4 original screws.
-
Page 20: Wap-V6000 Hdd Format Wizard
5. The Main Menu automatically appears after format is finished. ATTENTION: WAP-V6000 supports Samba Server (copying files from computer) with hard disks formatted by WAP-V6000 HDD format wizard. If you skip HDD format wizard, the samba server will be disabled. -
Page 21: Copy Files From Usb Storage Device To Wap-V6000 (Local Hdd)
This file format can not be recognized by Windows system originally. Note: By default, WAP-V6000 will check the format of the HDD if the HDD was initialized by WAP-V6000 with EXT3 format. The data in the HDD, which is not with EXT3 file system, may still be able to be played by WAP-V6000. - Page 22 4. The WAP-V6000 will ensure you whether you want to copy, press “Yes” if you want to move on. Note: The WAP-V6000 only support USB hosts copy to local HDD, you are not able to delete files copied to HDD by using this feature.
-
Page 23: Copy/Delete Files From Computer To Wap-V6000 (Local Hard Disk)
4. The default WAP-V6000 Local HDD location is “MShome”, double click it and you will see the WAP-V6000 (ShareHDD) icon. 5. Double click the WAP-V6000 (ShareHDD) icon, a login menu pops up. 6. Input the default user name and password. By default, WAP-V6000 is using “admin” for user name and password. - Page 24 7. After login is successful. Now you can copy/delete media files between your computer to WAP-V6000 local HDD by using your computer mouse. Note: please go to “System Setup“ “Harddisk Share Setup“ for setup options on SMB server.
-
Page 25: Network Protocols To Play Media
NFS and by SMB protocol. NFS protocol The NFS protocol allows the WAP-V6000 to access media files on NAS (Network Attached Storage) without the using of other UPnP server. 1. Select and enter “iMedia” from the Main Page. - Page 26 2. Select “My Media” and enter “Add New Entry”. Edit Dialogue will pop up. 3. Key in the nickname (for example “nfs”) and the URL of your target source. The url link must be in following arrangement. nfs://ip/export_directory (for example, nfs//192.168.2.112/mnt/hd_a2) The 192.168.2.112 is the IP address of the NAS you want to approach, and...
- Page 27 the mnt/hd_a2 is the sub folder name of your target source. 4. After the URL is saved, go back to the menu of “My Media”, and you will find the protocol at “My Media” list. 5. Enter into the menu, and select the files you want to play. In this case, you don’t need to put in any username or password.
-
Page 28: Samba Client Protocol
Samba Client Protocol The Samba Client allows the WAP-V6000 to access media files from samba shares on computers on the network. Go to Setup -> System Setup -> Other Settings -> Network Option -> Samba Client to turn on this option. - Page 29 2. All available sources will be shown on the same menu list layer (including local HDD, USB storage, UPnP Server and folders at local area network (those you can find through your Windows computer at the path of “My neighborhood”) Local HDD UPnP server Samba client...
- Page 30 4. When access the NAS through Samba client, if there is request to key in user name and password, the dialogue will pop out. Key in User name and Password to login NAS. 5. After input of username and password, you can get into your target source and select the media files you want to play.
-
Page 31: Play Multimedia Files
Play Multimedia Files Music Supported Music Formats Format File Extension AAC+ AAC, MP4, M4A AAC-LC AAC, MP4, M4A AC3 / Dolby Digital 5.1 Down mixing AC3 Pass through DTS Pass through LPCM WAV, PCM MP3 (ID3 tag supported) MP3Pro OGG Vorbis WMA, ASF WMA Lossless WMA, ASF... -
Page 32: To Play Music
To Play Music 1. Select “My Media” from Main Menu to enter server list, or press MUSIC hotkey on remote control. . 2. All available file sources will be listed on the My Media list, including files stored at Twonkymedia server in your computer, at USB flash stick, at USB external Hard disk drive, local hard disk drive or at other UPnP servers. - Page 33 4. If you select Twonkymedia server, the music files will organize by “Album”, “Artist”, or “Genre” etc., automatically for your convenience; or you can select “All Music” to see all music files. You may also select “Files” to view the music files that organized in several subfolders as on your computer. 5.
- Page 34 ID3 tags. These pictures do not appear if you open the audiofile by other applications or WAP-V6000. If you want to have the cover pictures available for your WAP-V6000 and also for your portable audio devices, simply import the cover pictures into the ID3 tags.
- Page 35 Skip to Next or Previous File: Press “Next” or “Down” buttons to skip to next music file. Press “PREV” or “UP” buttons to skip to previous music file. Fast Forward: Press “>>(FF)” button to fast forward the music file. Press several times to switch the speed.
-
Page 36: Photos
Photos Supported Photo Format Format File Extension EXIF SUPPORT JPEG, JPEG, JPE, TIFF, TIF JPEG JPEG, JPG JPEG2000 JPG, JPEG, JPE TIFF TIFF, TIFF Windows Media Photo WDP, HDP To view photos 1. Select “My Media” from Main Menu to enter server list, or press “PHOTO” hotkey on remote control. - Page 37 If you select “Twonkymedia server”, you may select “Files” to view the image files that organized in several subfolders as on your computer, or select “All Photos” to see all shared image files. Please use “Up” and “Down” buttons on the remote control to navigate those folders, and select the option by press OK or “Right”...
-
Page 38: Playing A Photo Slideshow
Note: icon stands for a folder; icon stands for a file. Playing a Photo Slideshow To start playing a photo slideshow (all photos in one folder), you need to press OK Button twice(!!) on the remote to enable this function. 1. - Page 39 2. When the image screen is larger than TV screen, press “Zoom” again and press “directions” buttons to move the image. 3. Press “Zoom” button and press “Right” button to shrink the image Rotate: Press “Rotate” button while viewing the photo to enable rotate function.
-
Page 40: Viewing Photos While Music Is Playing (Background Music)
Viewing Photos While Music is Playing (BackGround Music) The WAP-V6000 is capable of displaying photos and playing background music simultaneously. Follow below steps to add music to “BGM” (Back Ground Music) list. 1. Enter music files list 2. Use “Up” and “Down” buttons on the remote control to navigate music files, and press “BGM”... - Page 41 Add music to BGM list. Music added successfully 5. To play BGM files, please select “BGM PLAY”button on “BGM” tool bar; to stop playing BGM, please select “BGM PAUSE” button. 6. To remove music files from BGM list, please select “delete” icon on the file you want to remove.
- Page 42 8. After BGM setting is complete, you can go to “Photo” folder to view photo, and press “BGM” hotkey to evoke the BGM function.
-
Page 43: View Photo In Thumbnails Mode
View Photo in Thumbnails Mode You can view thumnails of several photos at a time. To enable the thumbnail mode, please do the following: 1. Go to “Setup Main Menu”. 2. Select “Other Settings”. 3. Choose “Thumnail” on “Photo Display Setup” Menu. 4. -
Page 44: Video
Video Supported Video Formats Format File Extension DivX 3 AVI, DivX DivX 4 AVI, DivX DivX 5 HD AVI, DivX DiVX 5 SD AVI, DivX DivX 6 HD AVI, DivX DivX 6 SD AVI, DivX H. 264 AVC MPEG4 part 10 (HD) MPG, MP4, MOV, AVI H. -
Page 45: To Play Video
2. All available file sources will be listed on the server list, including files stored at TEAC media systems media server in your computer, at USB flash stick, at USB external Hard disk drive, local hard disk drive or at other UPnP servers. - Page 46 4. If you select “TEAC media systems DMS”, you may select “My Folder” to view the video files that organized in several subfolders as on your computer, or select “All Videos” to see all shared video files. Please use “Up” and “Down” buttons on the remote control to navigate those folders, and select the option by press “OK”...
-
Page 47: Control Video Playback
Control Video Playback Volume Control: Press “Vol+” or “Vol-” buttons to control the volume Mute: Press “Mute” button to mute or un-mute the video. Pause and Play: Press OK button while video is playing you can pause the music by pressing OK button again can resume the music Skip to Next or Previous File Press “Next”... -
Page 48: Video Viewing Effects
Slow backward Press “Slow” button and press “Left” button to slow backward the video file. Press “Left” button several times to switch the speed. Viewing Video Information Press “Info” button to get video information. Video Viewing Effects Zoom in and Zoom Out: While video is playing, press ZOOM button to enable zoom in/ zoom out function. -
Page 49: Subtitles And Languages/Audio-Tracks
Repeat and Repeat All You can turn on the repeat function to continuously play individual video or video within a folder. Press “Repeat” button once to repeat playing current video file. Press “Repeat” button twice to repeat all video files in current folder. Press “Repeat”... -
Page 50: Video Resume Playing
Video Resume Playing The WAP-V6000 supports resume video playing to the previous point where the video is interrupted. The device needs to keep powered on to enable this function. The default setting is that it will ask you everytime whether you want to resume the playing when you are back to the interrupted file. - Page 51 “Other Settings” and set “Play Next Video” to disable the function. Search Video The WAP-V6000 provides two options to seek the video frame. One is to seek by percentage of total file length; and the other is to seek by time.
-
Page 52: Dvd Menu Navigation
DVD Menu Navigation The WAP-V6000 support viewing DVD files as you are playing a DVD menu. Follow below steps to enable DVD menu navigation feature. 1. When you select a DVD file, choose the item with disk icon and press OK 2. -
Page 53: Web Browser
Web Browser To open the Web Browser Wherever you stay in the user interface, press ‘Home’ button on the remote control to return to the main menu as shown below. Select the icon which shows ‘Web Browser’ and press ‘ok’. The homepage of the web browser will be displayed, then you can surf the web using the remote control or keyboard and mouse. -
Page 54: Tool Bar Of The Browser
Tool bar of the browser Opening a web page Press ‘File’ → ’Move page’ → Enter the web address you like to go. Tab function Tabs can be opened and switched when you like to look at different web pages more efficiently. - Page 55 Previous, Next and Home Pages Press ‘History’ → ’ Back’ or ‘Forward’ or ‘Home’. View of the pages The web page being loaded can be stopped or reloaded by choosing the icon from ‘View’. Text size can be changed, and the whole page can be zoom in or out for more convenient view by the users.
- Page 56 Bookmark function Bookmarks can be added, loaded and deleted by using ‘Bookmark’...
-
Page 57: Internet Media
Internet Media Play Internet Radio - Live 365™ Live365™ is an Internet radio service that provides unlimited on-demand access to thousands of radio stations. The audio is streamed directly over the Internet. Follow below steps to access the radio stations: 1. - Page 58 4. Select a catalog you prefer from list, or select “All Broadcasts” to browse all radio stations. 5. Select a radio station from list, and press “OK”, “Play”, or “Left” button to play it. Note: stands for a web radio station. Live365- Playing...
-
Page 59: Play Internet Radio - My Radio
Play Internet Radio - My Radio 1. Make sure your network setting is correct and be able to access internet 2. Select “iMedia” from main menu or press “iMedia” button on the remote control. 3. Select “My Media” and press “OK” button on remote control. 4. -
Page 60: Play Internet Video - My Video
7. Select “Add New Station” or “Add New Folder” to configure a new radio station or Folder; then enter related information of this new radio station or Folder. Play Internet Video - My Video 1. Make sure your network setting is correct and be able to access internet 2. - Page 61 4. Select “My Video” and press “OK” to enter. 5. There are also some internet video stations listed as default; you can select one of the stations from the list and play it. Note: stands for a web video station. You can press the Zoom key on the remote, and zoon in/out icon will show up.
-
Page 62: Viewing Youtube Content
7. Select “iMedia” from main menu or press “iMedia” button on the remote control. 8. Select “Youtube” and press “OK” button on remote control. WAP-V6000 lists the Youtube content in 7 categories, Choose the item you will view and press “OK”. Note: The Youtube content on WAP-V6000 is streamed from www.youtube.com... -
Page 63: Add/Delete The Internet Radio/Tv Station Lists
Add/Delete the Internet Radio/TV Station Lists You can manage the iMedia list at the WAP-V6000 onscreen menu. 1. Go into the “Favorites”. 2. Press the MENU key on the remote control. The Menu list will pop up. You can now add. modify, delete and backup your list iMedia list. -
Page 64: Bittorrent Downloader
BitTorrent Downloader The model WAP-V6000 incorporates the BitTorrent download function. Make sure the local 3.5” HDD is already installed before enabling this feature. (Please refer to HDD Installation as mentioned in this operation manual). Enabling the BitTorrent Function After the HDD is installed, follow below steps to start the download. - Page 65 1. Go to “iMedia” and select “BitTorrent” Have your .torrent seed file ready at USB storage or local HDD. Insert your USB storage to the WAP-V6000, Enter into “BitTorrent”. 2. Select “Add New Torrent” and press “OK” 3. Enter into the location where the .torrent file to be selected is stored.
- Page 66 4. Select the torrent files and press “OK” . 5. New downloading activity will appear on the menu. Make sure that WAP-V6000 is connected to Internet, to keep Bit Torrent active.
- Page 67 The downloaded files will be stored in the path: MyMedia\HDD Disk 1\bt, please refer to the following screenshots.
-
Page 68: Bittorrent Management
BitTorrent Management The BitTorrent Control Menu offers you the ability to start, stop, set priority and remove the files. You can press MENU key on the remote control to enter the control menu. 1. Use Navigation key to select the torrent files you want to manage. 2. -
Page 69: Removing Completed Download Files
Removing Completed Download Files If the files have been downloaded completely, there may be some other data along with the main torrent files. You can highlight the files and press “OK” to view all the data contents. 1. Highlight the download completed files To view all the data contents press OK. -
Page 70: Firmware Upgrade And Reset To Default
2. Make sure you want to do so, then press “OK” button to restore system to default settings. ATTENTION: Restoring WAP-V6000 to its default settings will erase the network set up and media sever configuration. You will need to set up WAP-V6000 again to run on your network and to access media files. -
Page 71: Miscellaneous Settings
Miscellaneous Settings The user interface language and other settings in your WAP-V6000 are configured in the “System Setup” of the “Setup Main Menu”. Please select the item that you want to configure and press OK button or “Right” button on remote control to enter the related sub-page. - Page 72 Language Here you can chose your preferred user interface language. Language Table Item Name Settings Action English/German/French/Italian/Spanish/ Language Portugese/Turkish/Netherlandish/ Select Serbian/Hewbrew/Traditonal Chinese TV Mode Setup This provides you a menu to change the TV mode setting, including the Video output, TV system and aspect ratio.
- Page 73 TV Mode Setup Table Item Name Settings Action Video Output P-SCAN YPbPr/ S-Video/ HDMI Select NTSC/480p/720p60/1080i60/ TV System Select 1080p24/1080p60 Aspect Ratio 4:3 PS/ 16:9/ 4:3 LB Select Note: For some video film which is with 24 frames per second, you may see poor quality on the display.
- Page 74 Video Setup The Video Setup provides you settings to enhance the video quality to best match with other sources on your screen. Video Setup Table Item Name Settings Action Brightness 0 ~ 32 Adjust Contrast 0 ~ 32 Adjust 0 ~ 32 Adjust Saturation 0 ~ 32...
- Page 75 Switch Hard Disk Share Setup If you have installed a Hard Disk Drive into your WAP-V6000, you can see the “Hard Disk Share Setup” here to configure your HDD Settings. You can rename the default Share Name, Group Name, User Name and Password by onscreen keyboard.
- Page 76 This can be disabled by selecting the option below. Note: Please remember if you have disabled this function, in case you need new formatting of the HDD, once you replaced the HDD in your WAP-V6000! LCD Settings Here, the contrast of the front LCD panel text display can be adjusted.
-
Page 77: Bit Torrent Setup
Bit Torrent Setup Go to Setup Bit Torrent Setup to configure the relevant items. The items to be configured are listed as follows: Enable Bit Torrent The Bit Torrent function can be turned off by this option. Max Upload Connection To limit a maximum number of bit torrends at a time to comply with the performance of your network or your internet connection. -
Page 78: Trouble Shooting
1. Make sure your TV is turned on and switched to the correct input. 2. Make sure WAP-V6000 is turned on and switched to the correct TV mode. 3. If the TV Mode that you are using is not the right one for your television, you may not be able to see the display on television. - Page 79 1. Verify that the TwonkyMedia Server software was installed on your computer. 2. Verify that WAP-V6000 and the computer running the software are on the same subnet and that they can communicate with each other. In most cases, this means that the first three fields of the two IP address should be the same.
- Page 80 Can not find Firmware Upgrade file in the USB device Please check if you put the latest firmware file under root directory of USB device, or WAP-V6000 system can not find it. Top cover can not be disassembled to install an HDD.
-
Page 81: Advice On Location, Care And Safety
● To connect your WAP-V6000 with power supply system, please make sure to have a socket close to your sound-system. ● If the WAP-V6000 is not in use for a longer period of time, be sure that the power source is disconnected from your system. - Page 82 down) or other environmental influences may reduce the capacity of the batteries. So use batteries within the limits of the specification only and take them out of the device, if it is not used for a longer period of time or run from wall outlet.
-
Page 83: Specifications
Specifications: ● Wireless AV Player with infrared (IR) remote control ● On/Standby, Volume and all control funktions driven by remote control ● Battery case for 2x AAA-Batteries ● LC-Display and navigation buttons on main unit for funktions control and audio playback without TV screen ●... -
Page 84: Ce - Declaration Of Conformity
EN 60950-1: 2001+A11 This statement is based on the test reports of an EMV - laboratory. All texts and illustrations were produced with greatest care. TEAC media systems cannot however accept any legal or other responsibility for any remaining incorrect information and its consequences.
Need help?
Do you have a question about the WAP-V6000 and is the answer not in the manual?
Questions and answers