Table of Contents
Advertisement
Quick Links
Advertisement
Table of Contents

Related Manuals for Fisher-Price POWER WHEELS HHP26


Summary of Contents for Fisher-Price POWER WHEELS HHP26
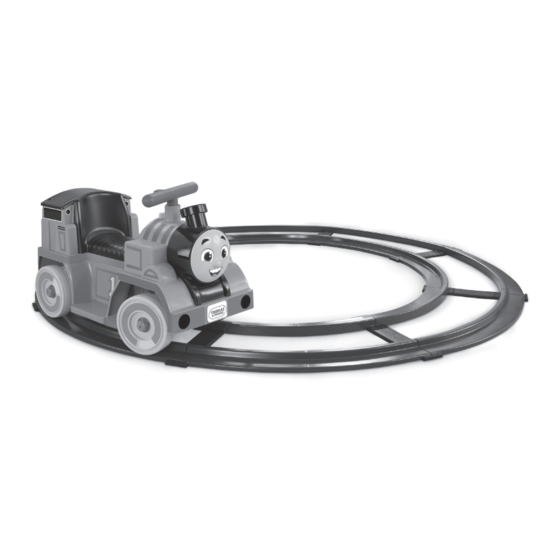
- Page 1 HHP26 OWNER’S MANUAL GUIDE DE L’UTILISATEUR...
-
Page 2: Table Of Contents
INDEX SOMMAIRE BEFORE YOU BEGIN • AVANT DE COMMENCER ..............3 CHARGING • CHARGEMENT ....................... 9 PARTS • PIÈCES .......................... 12 ASSEMBLY • ASSEMBLAGE .......................14 DECORATION • DÉCORATION ....................21 6V BATTERY INSTALLATION • INSTALLATION DE LA BATTERIE DE 6 V ......23 SAFE DRIVING RULES •... -
Page 3: Before You Begin Avant De Commencer
BEFORE YOU BEGIN AVANT DE COMMENCER Read this manual carefully for important safety information and operating instructions before using your vehicle. Keep these instructions and your original sales receipt for future reference, as they contain important information. Product features may vary from the images. Lire attentivement le présent guide pour obtenir des renseignements importants sur la sécurité... - Page 4 Requires 1 - 6V, 2.4 Ah, Nickel Metal Hydride (NiMH) battery (included). Requires 1 - 5V, 1A USB adapter for charging (included). The adapter is not a toy. Fonctionne avec 1 batterie à hydrure métallique de nickel (NiMH) de 6 V et 2,4 Ah (fournie). Fonctionne avec 1 adaptateur USB de 5 V et 1 A pour la recharge (fourni).
- Page 5 We maintain an independently owned and operated Authorized Service Center network in the United States and Canada. These authorized service centers will repair or replace parts under warranty at no extra charge, and can perform non- warranty repairs for a minimal charge. To find the authorized service center near you, please visit us online at powerwheels.com or call 1-800-348-0751.
- Page 6 WARNING To prevent injury. • Do not make direct contact between battery terminals, as this can cause an explosion or fire. • Only adults should charge batteries. • Battery can fall out and injure a child if vehicle tips over. Always use battery retainer.
- Page 7 AVERTISSEMENT Pour prévenir les blessures : • Ne pas mettre les bornes de la batterie en contact direct car cela pourrait provoquer une explosion ou un incendie. • La batterie ne doit être chargée que par un adulte. • La batterie peut tomber et blesser un enfant si le véhicule bascule. Toujours utiliser le dispositif de retenue de la batterie.
- Page 8 WARNING AVERTISSEMENT Prevent injuries and deaths • Direct adult supervision required. • Never ride at night. • Keep children within safe riding areas. These areas must be: - away from swimming pools and other bodies of water to prevent drownings. - generally level to prevent tipovers.
-
Page 9: Charging • Chargement
CHARGING CHARGEMENT • Charge the battery for at least 6 hours after • Après chaque utilisation, charger la batterie each use of the vehicle. durant au moins 6 heures. • This battery is smart and cannot be overcharged. • Cette batterie est intelligente et ne peut pas •... - Page 10 Loosen the screws located on the back end of the seat. Lift the seat from the vehicle. Desserrer les vis situées à l’arrière du siège. Soulever le siège pour le retirer du véhicule. You may charge the battery without disconnecting it or removing it from the vehicle. If you wish to do this, skip step 2 below.
- Page 11 Blinking Green LED Solid Green LED No Light Voyant à DEL vert clignotant Voyant à DEL vert continu Voyant éteint • Do not open the battery. • Ne pas ouvrir la batterie. • Only use the power adapter and USB charging •...
-
Page 12: Parts Pièces
PARTS PIÈCES... - Page 13 1,1 cm Washer - Front Axles Rondelle de 1,1 cm - Essieux avant Identify all parts before assembly and save all Ne pas jeter l’emballage avant d’avoir terminé packaging material until assembly is complete l’assemblage pour s’assurer qu’aucune to ensure that no parts are discarded. pièce n’est jetée par erreur.
-
Page 14: Assembly Assemblage
ASSEMBLY ASSEMBLAGE Turn the vehicle over and locate the sound box. Loosen the screws in the bracket with a Phillips screwdriver. Remove the bracket with sound box. Tourner le véhicule à l’envers et localiser le boîtier sonore. Desserrer les vis situées sur le support avec un tournevis cruciforme, puis retirer le support avec le boîtier sonore. - Page 15 Fit the steering column and the handlebar connector on the handlebar assembly down through the large hole in the vehicle. Insérer la colonne de direction et le connecteur du guidon dans la grande ouverture du véhicule. Turn the vehicle over so that it rests on the handlebar.
- Page 16 Fit the lock nut (rounded side up) on to the end of the steering column. Tighten the lock nut firmly using the closed end of the assembly tool. Fixer l’écrou de sécurité (côté arrondi vers le haut) sur l’extrémité de la colonne de direction.
- Page 17 Turn the vehicle upright. Pull the handlebar up to be sure the steering column is secure. If you can remove the steering column, you have not assembled the steering column correctly. Please refer back to Assembly steps 3-6. Remettre le véhicule à l’endroit. Tirer sur le guidon pour s’assurer que la colonne de direction est solidement fixée.
- Page 18 Tighten the screws in the back end of the seat. IMPORTANT! Always remember to replace and tighten the screws in the seat to prevent children from accessing the battery. Serrer les vis à l’arrière du siège. IMPORTANT! Ne pas oublier de remettre les vis et s’assurer qu’elles sont serrées en tout temps pour que les enfants n’accèdent pas...
- Page 19 “Snap” an inner and outer rail onto a rail tie, as shown. Repeat this procedure until all the rails are assembled to the rail ties. Hint: For best performance, we suggest assembling the track on a flat surface. Enclencher une section de piste intérieure et extérieure sur le raccord de piste, comme illustré.
- Page 20 Battery Safety Information Conseils de sécurité sur les piles In exceptional circumstances, batteries may leak Lors de circonstances exceptionnelles, des fluids that can cause a chemical burn injury or substances liquides peuvent s’écouler des ruin your product. To avoid battery leakage: piles et provoquer des brûlures chimiques ou endommager le produit.
-
Page 21: Decoration Décoration
DECORATION DÉCORATION For best results, avoid repositioning a label once it has been applied to the vehicle. Pour de meilleurs résultats, éviter d’apposer un autocollant plus d’une fois sur le véhicule. -
Page 23: Battery Installation Installation De La Batterie De 6 V
6V BATTERY INSTALLATION INSTALLATION DE LA BATTERIE DE 6 V Loosen the screws located on the back end of the seat. Lift the seat from the vehicle. Desserrer les vis situées à l’arrière du siège. Soulever le siège pour le retirer du véhicule. - Page 24 Fit the Power Wheels® 6 volt (2.4 Amp/Hr) battery inside the battery compartment with the wires facing towards the rear of the vehicle. Installer la batterie Power Wheels de 6 V (2,4 A/h) dans le compartiment de la batterie de façon que les fils soient orientés vers l’arrière du véhicule.
- Page 25 Plug the battery connector into the motor connector. Hint: If the battery connector will not plug into the motor connector, turn it over and try again! Do not force the battery connector into the motor connector. Brancher le connecteur de la batterie sur le connecteur du moteur.
- Page 26 Tighten the screws in the back end of the seat. IMPORTANT! Always remember to replace and tighten the screws in the seat to prevent children from accessing the battery. Serrer les vis à l’arrière du siège. IMPORTANT! Ne pas oublier de remettre les vis et s’assurer qu’elles sont serrées en tout temps pour que les enfants n’accèdent pas...
-
Page 27: Safe Driving Rules Règles Pour Une Conduite En Toute Sécurité
SAFE DRIVING RULES RÈGLES POUR UNE CONDUITE EN TOUTE SÉCURITÉ Avant de laisser un enfant utiliser ce véhicule, un adulte doit s’assurer que la zone de conduite est adéquate et que le niveau d’habileté de conduite de l’enfant ne pose aucun risque. Apprendre à... -
Page 28: Vehicle Operation Fonctionnement Du Véhicule
VEHICLE OPERATION CARE ENTRETIEN FONCTIONNEMENT BATTERY CARE • Do not allow the battery to run down DU VÉHICULE completely before charging. • Charge the battery before storing the vehicle, and at least once every 6 months, even if the vehicle has not been used. •... -
Page 29: Battery Disposal Mise Au Rebut De La Batterie
BATTERY DISPOSAL MISE AU REBUT DE LA BATTERIE Ni-MH Ni-MH • Recycle or dispose of the battery in an environmentally sound manner. • Do not dispose of a battery in a fire. The battery may explode or leak. • La batterie doit être recyclée ou jetée de façon écologique. -
Page 30: Warranty • Garantie
6 or 12 volt battery included workmanship. The six month limited warranty by Fisher-Price with the original purchase of the applies only to the 6 or 12 volt battery included vehicle. During the warranty period, the with the original purchase of the vehicle. -
Page 31: Information • Renseignements
INFORMATION RENSEIGNEMENTS FCC STATEMENT (UNITED STATES ONLY) • Réorienter ou déplacer l’antenne réceptrice. This equipment has been tested and found to • Augmenter l’espace entre l’appareil et le récepteur. comply with the limits for a Class B digital device, • Brancher l’appareil à une prise de courant différente pursuant to Part 15 of the FCC rules. - Page 32 CANADA Mattel Canada Inc., 6155 Freemont Blvd., Mississauga, Ontario L5R 3W2. 1-800-432-5437 UNITED STATES 1-800-432-5437. Fisher-Price, Inc., 636 Girard Avenue, East Aurora, NY 14052. GREAT BRITAIN Mattel U.K. Limited, The Porter Building, 1 Brunel Way, Slough SL1 1FQ, UK. www.service.mattel.com/uk.
Need help?
Do you have a question about the POWER WHEELS HHP26 and is the answer not in the manual?
Questions and answers