Advertisement
Quick Links
Owner's Manual & Safety Instructions
Save This Manual
operating, inspection, maintenance and cleaning procedures. Write the product's serial number in the
back of the manual (or month and year of purchase if product has no number). Keep this manual and the
receipt in a safe and dry place for future reference.
Using an engine indoors
CAN KILL YOU IN MINUTES.
Engine exhaust contains carbon monoxide.
This is a poison you cannot see or smell.
NEVER use inside
a home or garage,
EVEN IF doors and
windows are open.
Email our technical support at: productsupport@harborfreight.com
When unpacking, make sure that the product is intact
and undamaged. If any parts are missing or broken,
please call 1-888-866-5797 as soon as possible.
Copyright
©
2022 by Harbor Freight Tools
No portion of this manual or any artwork contained herein may be reproduced in
any shape or form without the express written consent of Harbor Freight Tools.
Diagrams within this manual may not be drawn proportionally. Due to continuing
improvements, actual product may differ slightly from the product described herein.
Tools required for assembly and service may not be included.
Keep this manual for the safety warnings and precautions, assembly,
Only use OUTSIDE
and far away from
windows, doors,
and vents.
Visit our website at: http://www.harborfreight.com
®
. All rights reserved.
Read this material before using this product.
Failure to do so can result in serious injury.
SAVE THIS MANUAL.
22i
Advertisement

Subscribe to Our Youtube Channel
Summary of Contents for Central Machinery 70167
- Page 1 Owner’s Manual & Safety Instructions Save This Manual Keep this manual for the safety warnings and precautions, assembly, operating, inspection, maintenance and cleaning procedures. Write the product’s serial number in the back of the manual (or month and year of purchase if product has no number). Keep this manual and the receipt in a safe and dry place for future reference.
-
Page 2: Table Of Contents
Table of Contents Safety ............2 Maintenance ..........12 Specifications ..........6 Parts Lists and Diagrams ......18 Setup ............6 Warranties ..........23 Operation ............ 8 WARNING SYMBOLS AND DEFINITIONS This is the safety alert symbol. It is used to alert you to potential personal injury hazards. - Page 3 Operation precautions 12. Industrial applications must CARBON MONOXIDE HAZARD follow OSHA requirements. Using an engine indoors CAN KILL YOU IN MINUTES. 13. Do not leave the equipment unattended Engine exhaust contains carbon when it is running. Turn off the monoxide. This is a poison you cannot see or smell. equipment (and remove safety keys, if available) before leaving the work area.
- Page 4 Operation precautions (cont.) 26. Use the equipment, accessories, etc., in Vibration Hazard: accordance with these instructions and in the This tool vibrates during use. Repeated or manner intended for the particular type of long-term exposure to vibration may cause equipment, taking into account the working temporary or permanent physical injury, conditions and the work to be performed.
- Page 5 Maintenance precautions 1. Before service, maintenance, or cleaning: 6. Have the equipment serviced by a qualified repair person using only identical replacement a. Turn the engine switch to its “OFF” position. parts. This will ensure that the safety of the b.
-
Page 6: Specifications
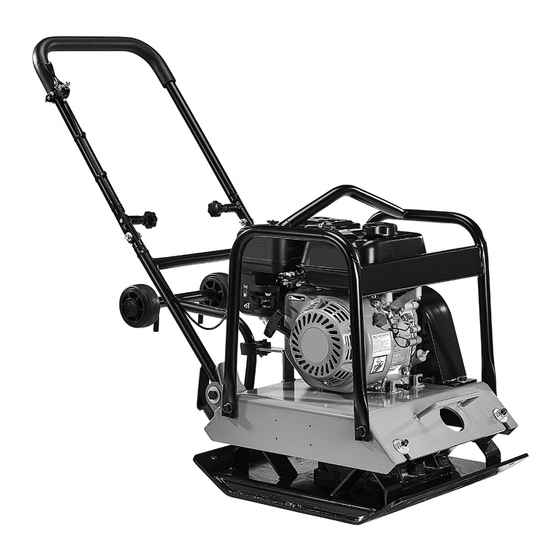
Specifications Impact Force 3600 lb. Max Speed 5500 Vibrations per Minute Travel Speed 65 ft/min Compact Depth 13″ Plate Size 17-5/8″ x 21-1/2″ Engine Type 212cc (7 HP) Tank Size 3/4 Gallon Wheel Size 5″ Weight 205 lb Note: Additional specifications found in the TECHNICAL ENGINE SPECIFICATIONS chart in this manual. The emission control system for this Vibrator’s At high altitudes, the engine’s carburetor, Engine is warranted for standards set by the U.S. - Page 7 Attaching the Wheel Kit Assembly 1. Loosen the Lock Nut (50) and Flat Gaskets (51), remove the Wheel Screw (49). 2. Align the wheel frame holes and support plate holes. Insert the Wheel Screw through all holes. 3. Add Flat Gasket (51) and tighten Lock Nut (50) to end of Wheel Screw.
-
Page 8: Operation
Operation Read the ENTIRE IMpORTANT SAFETY INFORMATION section at the beginning of this manual including all text under subheadings therein before set up or use of this product. Use of Wheels Note: Before use, tighten fuel cap if loose. 3. Rotate wheels down into in use position. 1. - Page 9 Starting the Engine Before Starting the Engine Before starting the engine: a. Follow the Set Up Instructions in the equipment manual to prepare the equipment. b. Inspect the equipment and engine. c. Fill the engine with the proper amount and type of both stabilizer-treated unleaded gasoline and oil.
- Page 10 5. Grip the Starter Handle of the Engine loosely and pull it slowly several times to allow the gasoline to flow into the Engine’s carburetor. Then pull the Starter Handle gently until resistance is felt. Allow Cable to retract fully and then pull it quickly.
- Page 11 Stopping the Engine To stop the engine in an emergency, turn the Engine Switch off. Under normal conditions, use the following procedure: Speed Control Lever 1. Slide the Throttle Line Assembly (14) to SLOW. 2. Turn the Engine Switch off. 3.
-
Page 12: Maintenance
Maintenance Technical Specifications Single Cylinder 4 10W-30 above 32° F Engine Type Type SAE stroke OHV 5W-30 at 32° F or below Engine Oil Bore x Stroke 65mm x 54mm Capacity 0.5 Quarts Displacement 212cc Type Torch & LG Spark Plug Compression Ratio 8.5:1 0.028 - 0.031″... - Page 13 Checking and Filling Fuel Engine Oil Change WARNING! TO pREVENT SERIOUS CAUTION! Oil is very hot during operation and can INJURY FROM FIRE: cause burns. Wait for engine to cool before changing oil. Fill the fuel tank in a well-ventilated area 1.
- Page 14 Air Filter Element Maintenance Spark plug Maintenance 1. Remove the Air Cleaner Cover and the air filter(s) and check for dirt. Clean as described below. Spark plug 2. Cleaning: • For paper filters: To prevent injury from dust and debris, wear ANSI-approved safety goggles, NIOSH-approved dust mask/respirator, and heavy-duty work gloves.
- Page 15 Belt Tension Adjustment 1. Turn off engine. 3. Slide the Engine (1), away from the Clutch Assembly (3), until the belts are properly tensioned. 2. Loosen, but do not remove, the four Nuts (19) that hold the Engine (1) to the Connecting Plates. 4.
- Page 16 Troubleshooting problem possible Causes probable Solutions Engine will not start FUEL RELATED: FUEL RELATED: 1. No fuel in tank or fuel valve closed. 1. Fill fuel tank with fresh 87+ octane stabilizer- treated unleaded gasoline and open fuel valve. Do not use gasoline with more than 10% ethanol (E15, E20, E85, etc.).
- Page 17 Troubleshooting (cont’d) problem possible Causes probable Solutions Engine misfires 1. Spark plug cap loose. 1. Check cap and wire connections. 2. Incorrect spark plug gap or 2. Re-gap or replace spark plug. damaged spark plug. 3. Defective spark plug cap. 3.
-
Page 18: Parts Lists And Diagrams
parts Lists and Diagrams pLEASE READ THE FOLLOWING CAREFULLY THE MANUFACTURER AND/OR DISTRIBUTOR HAS PROVIDED THE PARTS LIST AND ASSEMBLY DIAGRAM IN THIS MANUAL AS A REFERENCE TOOL ONLY. NEITHER THE MANUFACTURER OR DISTRIBUTOR MAKES ANY REPRESENTATION OR WARRANTY OF ANY KIND TO THE BUYER THAT HE OR SHE IS QUALIFIED TO MAKE ANY REPAIRS TO THE PRODUCT, OR THAT HE OR SHE IS QUALIFIED TO REPLACE ANY PARTS OF THE PRODUCT. - Page 19 Main Assembly Diagram ITEM 58694 For technical questions, please call 1-888-866-5797. Page 19...
- Page 20 parts List A - Engine (16) part Description part Description part Description Gasket, Cylinder Head 39A Ring Set, Oil 79A Gasket, The Second Cover Subassembly, 40A Camshaft Assy. Supply Air Valve Flange 41A Valve, Exhaust Cylinder Head 80A Valve, Muffler The 42A Valve, Intake Gasket, Cylinder Second Supply Air...
- Page 21 ITEM 58694 For technical questions, please call 1-888-866-5797. Page 21...
- Page 22 C90 Exciter parts List Diagram part Description part Description Case Cover(shut-off) Copper Gasket “O”Ring Oil Drainage Bolt Bearing Case Cover(Pulley) Vibrating Case Oil Seal Eccentric Shaft Pulley Spring Gasket Inner hex bolt Enlarged Flat Gasket Flat Gasket Inner hex bolt Page 22 For technical questions, please call 1-888-866-5797.
-
Page 23: Warranties
Warranties Emissions Control System Warranty Harbor Freight Tools (HFT) is pleased to explain the emissions control system warranty on your Small Off-Road Engine produced after January 1, [Model Year] (engine), in addition to the Retail Warranty above. HFT warrants that the emissions control system on your engine is designed, built, and equipped so that it conforms to the United States Environmental Protections Agency’s (EPA) emissions requirements in effect at the time of manufacture. - Page 24 Warranties Limited 90 Day Warranty (Retail) Harbor Freight Tools Co. makes every effort to assure that its products meet high quality and durability standards, and warrants to the original purchaser that this product is free from defects in materials and workmanship for the period of 90 days from the date of purchase.
Need help?
Do you have a question about the 70167 and is the answer not in the manual?
Questions and answers