Advertisement
Quick Links
USA office: Fontana
AUS office: Truganina
DEU office: FDS GmbH, Neuer Höltigbaum 36, 22143 Hamburg, Deutschland
If you're having difficulty, our friendly
customer team is always here to help.
GBR office: Ipswich
ITA office: Milano
POL office: Gdańsk
FRA office: Saint Vigor d'Ymonville
USA:cs.us@costway.com
POL:sklep@costway.com
AUS:cs.au@costway.com
DEU:cs.de@costway.com
GBR:cs.uk@costway.com
FRA:cs.fr@costway.com
I T A :cs.i t @costway.com
ESP:cs.es@costway.com
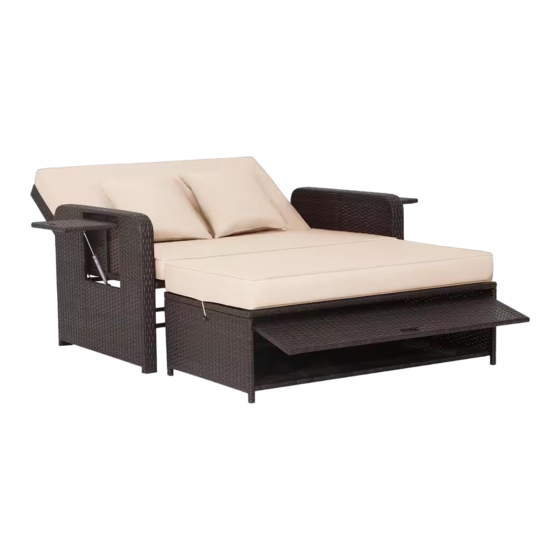
Rattan Daybed and Stool
Polyrattan Lounge Sofa
Canapé 2 Places en Rotin avec Repose-Pieds
Juego de Sofá y Reposapiés de Ratán
Lettino e Sgabello in Rattan
Rattanowa sofa z podnóżkiem
HW70644
THIS INSTRUCTION BOOKLET CONTAINS IMPORTANT SAFETY INFORMATION. PLEASE READ AND KEEP FOR FUTURE REFERENCE.
Advertisement

Related Manuals for Costway HW70644


Summary of Contents for Costway HW70644
- Page 1 USA:cs.us@costway.com POL:sklep@costway.com If you're having difficulty, our friendly AUS:cs.au@costway.com DEU:cs.de@costway.com customer team is always here to help. GBR:cs.uk@costway.com FRA:cs.fr@costway.com I T A :cs.i t @costway.com ESP:cs.es@costway.com THIS INSTRUCTION BOOKLET CONTAINS IMPORTANT SAFETY INFORMATION. PLEASE READ AND KEEP FOR FUTURE REFERENCE.
-
Page 2: Before You Start
Before You Start Avant de Commencer Please read all instructions carefully. Veuillez lire attentivement toutes les instructions. Retain instructions for future reference. Conservez les instructions pour vous y référer ultérieurement. Separate and count all parts and hardware. Vérifiez toutes les pièces et les accessoires. Read through each step carefully and follow the proper order. -
Page 3: Prima Di Iniziare
Bench/Bank/Banquette/Sofá/Panca/Sofa Prima di Iniziare Si prega di leggere attentamente tutte le istruzioni. Conservare le istruzioni per riferimento futuro. Separare e contare tutte le parti e gli accessori. Leggere attentamente ogni passo e seguire l'ordine corretto. Si consiglia, ove possibile, di assemblare tutti gli articoli vicino alla zona in cui verranno posti in uso, per evitare di spostare inutilmente il prodotto una volta assemblato. - Page 4 Notice Attention 1. Serrez à 50% avant de fixer toutes les vis, une clé Allen est 1. 50% Tighten before fixing all screws, Allen wrench is recommandée au lieu d'une perceuse électrique. recommended instead of an electric drill. 2. Placez le produit sur un sol plat pour l'ajuster et assurez-vous qu'il 2.
- Page 5 Part List/Teileliste/Liste des Pièces/ Avviso Lista de Piezas/Elenco Parti/Lista części 1. Serrare al 50% prima di fissare tutte le viti; si consiglia di utilizzare una chiave a brugola anziché un trapano elettrico. 2. Posizionare l'articolo su un terreno piano per la regolazione e assicurarsi che rimanga stabile.
- Page 6 Stool Shelf Frame/ Stool Seat Cushion/ Stool Seat Frame/ Bench Back side Frame/ Hockerregalrahmen/ Hocker-Sitzkissen/ Hocker-Sitzrahmen/ Bank-Rückseitenrahmen/ Cadre de Support pour Tabouret/ Coussin de Siège de Tabouret/ Cadre Siège du Tabouret/ Cadre Latéral du Dossier de Banquette/ Marco del estante del reposapiés/ Cojín del reposapiés/ Marco superior del reposapiés/ Marco trasero del sofá/...
- Page 7 Hardware List/Zubehörliste/ Liste des Accessoires/Lista de Accesorios/ Elenco Hardware/Lista akcesoriów M6x30 mm M6x35 mm M6x40 mm Ø6x16x1 mm Bolt/Bolzen/ Bolt/Bolzen/ Bolt/Bolzen/ Washers/ Boulon/Perno/ Boulon/Perno/ Boulon/Perno/ Unterlegscheibe/ Bullone/Śruba Bullone/Śruba Bullone/Śruba Rondelle/Arandela/ Rondelle/ Podkładka EN: (1 x Bench assembly) Connect Bench back frame (D) & Hip back frame (E) Hip back frame (F) with Bolts (1) &...
- Page 8 EN: Connect Arm Left frame (B) & Bench Seat frame (C) & Bench back side frame (G) with Bolts (2), (3) & Washers (4) DE: Verbinden Sie den linken Armrahmen (B) mit dem Sitzbankrahmen (C) und dem Bank-Rückseitenrahmen (G) mit den Schrauben (2), (3) und den Unterlegscheiben (4).
- Page 9 Part of step 1/ Teil von Schritt 1/ Partie de l'étape 1/ Parte del paso 1/ Parte del passo 1/ Zestaw z kroku 1 EN: Connect part from Step 3 & Arm Right Frame (A) with Bolts EN: Connect part from Step 2 & Part from Step 1 with Washers (2), (3) &...
- Page 10 EN: Put on Bench Seat cushion & back cushion (O) & Back Pillow (P) to complete Bench DE: Setzen Sie Sitzkissen & Rückenkissen (O) & Rückenkissen (P) auf die Bank, um die Bank zu vervollständigen. FR: Mettez le coussin du siège du banquette, le coussin du dossier (O) et le coussin du dossier (P) pour compléter le banquette.
- Page 11 EN: (1 x Stool assembly) Connect Stool seat frame (H) & Leg right frame (I) & Stool back side frame (L) with Bolts (2) & Washers (4) DE: (1 x Hocker-Baugruppe) Verbinden Sie den Hocker-Sitzrahmen (H) mit dem rechten Beinrahmen (I) und dem EN: Connect part from Step 6 &...
- Page 12 EN: Connect part from Step 7 & Stool Shelf frame (M) with Bolts EN: Connect part from Step 8 & Stool Front side frame (K) (2) & Washers (4) with Bolts (2) & Washers (4), (5) DE: Teil aus Schritt 7 mit dem Hockerregalrahmen (M) mit DE: Teil aus Schritt 8 mit Hocker-Vorderseitenrahmen (K) mit Schrauben (2) und Unterlegscheiben (4) verbinden.
- Page 13 EN: Put on Stool Seat Cushion (N) to complete Stool DE: Setzen Sie das Hocker-Sitzkissen (N) auf, um den Hocker zu vervollständigen. EN: Combination and Arrangement FR: Mettez le coussin du siège du tabouret (N) pour compléter DE: Kombination und Anordnung. le tabouret.
- Page 14 Return / Damage Claim Instructions DO NOT discard the box / original packaging. In case a return is required, the item must be returned in original box. Without this your return will not be accepted. Take a photo of the box markings. A photo of the markings (text) on the side of the box is required in case a part is needed for replacement.
- Page 15 Instructions De Retour / Réclamation De Dommages Istruzioni Per La Restituzione / Reclamo Per Danni NE PAS jeter la boîte/l'emballage d'origine. NON scartare la scatola / confezione originale. Dans le cas où un retour est requis, l'article doit être retourné dans sa boîte Nel caso in cui sia richiesto un reso, l'articolo deve essere restituito nella scatola d'origine.
Need help?
Do you have a question about the HW70644 and is the answer not in the manual?
Questions and answers
On page 09 :Connect part from Step
To connect the parts mentioned on page 09 of the Costway HW70644 manual:
1. Connect the bench back frame (D) and the hip back frames (E) and (F).
2. Use bolts (1) and washers (4) and (6) for the connection.
3. Ensure all parts are aligned properly before tightening.
4. Gradually tighten all screws using an Allen key.
This answer is automatically generated
I need all the screws / fasteners to put together patio set. I list them. May I purchase a new set?
How do you put Piece K onto step 7. The holes do not line up
I’m having trouble getting the washer on peg D and also in the hole. Connecting step 2 and 1 together.