Table of Contents
Advertisement
Available languages
Available languages
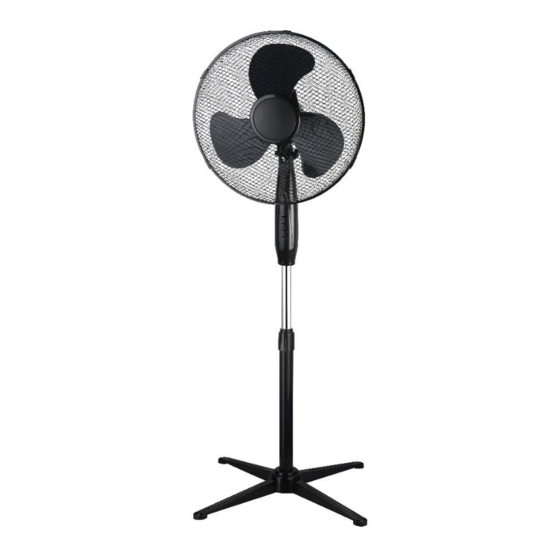
EXTRALINK BRYZA STANDING FAN 16" 40CM
Model: ESF-40D-BL
EN - USER MANUAL ----------------------------------------------------------------- 2
DE - BETRIEBSANLEITUNG --------------------------------------------------------- 6
PL - INSTRUKCJA OBSŁUGI ------------------------------------------------------- 10
ES - MANUAL DE INSTRUCCIONES --------------------------------------------- 14
IT - MANUALE ---------------------------------------------------------------------- 18
FR - INSTRUCTIONS D'UTILISATION ------------------------------------------- 22
CZ - NÁVOD K POUŽITÍ ------------------------------------------------------------ 24
TR - KULLANIM KILAVUZU --------------------------------------------------------28
1
Advertisement
Table of Contents

Subscribe to Our Youtube Channel
Summary of Contents for SmartLife EXTRALINK BRYZA ESF-40D-BL
- Page 1 EXTRALINK BRYZA STANDING FAN 16” 40CM Model: ESF-40D-BL EN - USER MANUAL ----------------------------------------------------------------- 2 DE - BETRIEBSANLEITUNG --------------------------------------------------------- 6 PL - INSTRUKCJA OBSŁUGI ------------------------------------------------------- 10 ES - MANUAL DE INSTRUCCIONES --------------------------------------------- 14 IT - MANUALE ---------------------------------------------------------------------- 18 FR - INSTRUCTIONS D'UTILISATION ------------------------------------------- 22 CZ - NÁVOD K POUŽITÍ...
- Page 2 EXTRALINK BRYZA STANDING FAN 16” 40CM Model: ESF-40D-BL USER MANUAL...
- Page 3 1. Installers and Users please note: These instructions should be read carefully and left with the user of the product for future reference. 2. Assembly 1. Loosen the screws on the base bars. Cross the two bars as shown and align with the flange. Secure with the four screws, and slider the base cover over the assembly.
- Page 4 3. Description of device components 1 – Blades Guard 6 – Clamp Screw 2 – Cover 7 – Height Adjustment 3 – Blades 8 – Lower Shaft 4 – Control Panel 9 – Base Cover 5 – Telescopic Shaff 10 – Base Bars...
-
Page 5: Operation
4. Operation - Plug the mains lead into mains socket. - If connecting via an extension lead, make sure that the lead is rated at 3 Amps or more, and that it is fully unwound. - Use the height adjustment knob (see diagram on page 3) to adjust the tube to the optimum height. - Page 6 EXTRALINK BRYZA STANDLÜFTER 16” 40CM Model: ESF-40D-BL BETRIEBSANLEITUNG...
-
Page 7: Informationen Für Benutzer
1. Informationen für Benutzer: Dieses Handbuch sollte sorgfältig gelesen und zum späteren Nachschlagen aufbewahrt werden. 2. Montage des Produkts 1. Lösen Sie die Schrauben an beiden Elementen des Sockels(10). Die beiden Teile kreuzen und ausrichten, den Ventilatorsockel(8) installieren und mit vier Schrauben befestigen. Schieben Sie die Sockelabdeckung auf(9). - Page 8 3. Beschreibung der Gerätekomponenten 1 – Abdeckung 6 – Feststellschraube 2 – Logoplakette 7 – Höhenverstellung 3 – Rotorblätter 8 – Untere Lüfterhalterung 4 – Bedienfeld 9 – Sockelabdeckung 5 – Höhenverstellbares Rohr 10 – Basis...
- Page 9 4. Hinweise zur Handhabung - Stecken Sie das Netzkabel in die Steckdose. - Wenn Sie das Gerät mit einem Verlängerungskabel anschließen, achten Sie darauf, dass das Kabel für mindestens 3 A ausgelegt ist und vollständig ausgezogen ist. - Verwenden Sie den Höheneinstellknopf (7), um das Rohr auf die optimale Höhe einzustellen. - Mit den Drucktastenschaltern stellen Sie die gewünschte Geschwindigkeit ein: niedrige Geschwindigkeit = 3000 m3/h Luftstrom mittlere Geschwindigkeit = 3300 m3/h Luftstrom...
-
Page 10: Instrukcja Obsługi
EXTRALINK BRYZA WENTYLATOR STOJĄCY 16” 40CM Model: ESF-40D-BL INSTRUKCJA OBSŁUGI... -
Page 11: Informacja Dla Użytkowników
1. Informacja dla użytkowników: Niniejszą instrukcję należy dokładnie przeczytać i pozostawić w celu wykorzystania jej w przyszłości. 2. Montaż produktu 1. Należy poluzować śruby na obu elementach podstawy(10). Skrzyżować oba elementy i wyrównać, zamontować podstawę wentylatora(8), zabezpieczyć czterema śrubami. Nasunąć pokrywę... - Page 12 3. Opis elementów urządzenia 1 – Osłona 6 – Śruba mocująca 2 – Plakietka z logo 7 – Regulacja wysokości 3 – Łopatki wirnika 8 – Dolny wspornik wentylatora 4 – Panel kontrolny 9 – Pokrywa podstawy 5 – Rura do regulacji wysokości 10 –...
- Page 13 4. Instrukcja obsługi - Podłączyć przewód zasilający do gniazda sieciowego. - W przypadku podłączania za pomocą przedłużacza należy upewnić się, że przewód ma dopuszczalne natężenie 3A lub więcej i że jest całkowicie rozwinięty. - Użyć pokrętła regulacji wysokości (7), aby ustawić rurę na optymalnej wysokości. - Za pomocą...
- Page 14 EXTRALINK BRYZA VENTILADOR DE PIE 16” 40CM Modelo: ESF-40D-BL MANUAL DE INSTRUCCIONE...
- Page 15 1 Información para los usuarios: Lea atentamente este manual y guárdelo para futuras consultas. 2. Montaje del producto 1. Afloje los tornillos de ambos elementos de la base(10). Cruce las dos piezas y alinee, instale la base del ventilador(8), asegure con cuatro tornillos. Deslice la tapa de la base(9). 2.
- Page 16 3. Descripción de los componentes del dispositivo 1 – Funda 6 – Tornillo de fijación 2 – Placa con logotipo 7 – Ajuste de la altura 3 – Palas del rotor 8 – Soporte inferior del ventilador 4 – Panel de control 9 –...
- Page 17 - Enchufa el cable de alimentación a la toma de corriente. - Si la conexión se realiza mediante un alargador, asegúrese de que el cable tiene una capacidad nominal de 3 A o más y de que está totalmente extendido. - Utilice el botón de ajuste de altura (7) para ajustar el tubo a la altura óptima.
- Page 18 EXTRALINK BRYZA VENTILATORE A STELO 16” 40CM Modello: ESF-40D-BL MANUALE...
- Page 19 1 Informazioni per gli utenti: Il presente manuale deve essere letto attentamente e conservato per future consultazioni. 2. Assemblaggio del prodotto 1.Allentare i bulloni su entrambi gli elementi della base(10). Incrociare i due pezzi e allinearli, installare la base del ventilatore(8), fissandola con quattro viti. Inserire il coperchio della base(9).
- Page 20 3. Descrizione dei componenti dell'apparecchiatura 1 - Scudo 6 - Bullone di fissaggio 2 - Targa con logo 7 - Regolazione dell'altezza 3 - Pale del rotore 8 - Supporto della ventola inferiore 4 - Pannello di controllo 9 - Coperchio della base 5 - Tubo di regolazione dell'altezza 10 - Base...
- Page 21 4. Gestione delle istruzioni - Collegare il cavo di alimentazione alla presa di corrente. - Se il collegamento avviene tramite una prolunga, accertarsi che il cavo abbia una portata di almeno 3A e che sia completamente esteso. - Utilizzare la manopola di regolazione dell'altezza (7) per impostare il tubo all'altezza ottimale. - Utilizzare gli interruttori a pulsante per impostare la velocità...
- Page 22 EXTRALINK BRYZA VENTILATEUR SUR PIEDS 16” 40CM Modèle: ESF-40D-BL MODE D’EMPLOI...
- Page 23 1. Informations pour les utilisateurs : Ce manuel doit être lu attentivement et laissé pour une utilisation future. 2. Assemblage du produit 1. Desserrez les boulons sur les deux éléments de la base(10). Croisez les deux éléments et alignez-les, montez la base du ventilateur(8), fixez avec quatre vis. Faites glisser le couvercle de base(9) vers l’intérieur.
- Page 24 3. Description des composants de l’appareil 1 – Protection 6 – Vis de montage 2 – Plaque avec logo 7 – Réglage hauteur 3 – Hélices 8 – Support de ventilateur inférieur 4 – Panneau de contrôle 9 – Couvercle de base 5 –...
- Page 25 4. Instructions - Branchez le cordon d’alimentation sur une prise de courant. - Lors de la connexion avec une rallonge, assurez-vous que le câble a un courant admissible de 3A ou plus et qu’il est complètement déroulé. - Utilisez le bouton de réglage de la hauteur (7) pour placer le tuyau à la hauteur optimale. - Utilisez des interrupteurs à...
-
Page 26: Návod K Použití
EXTRALINK BRYZA STOJANOVÝ VENTILÁTOR 16” 40CM Model: ESF-40D-BL NÁVOD K POUŽITÍ... - Page 27 1. Informace pro uživatele: Tuto příručku si pečlivě přečtěte a ponechte si ji pro budoucí použití. 2. Montáž výrobku 1. Povolte šrouby na obou prvcích základny(10). Oba díly překřižte a vyrovnejte, namontujte základnu ventilátoru(8) a zajistěte ji čtyřmi šrouby. Nasaďte kryt základny(9). 2.
- Page 28 3. Popis součástí zařízení 1 - Štít 6 - Upevňovací šroub 2 - Plaketa s logem 7 - Nastavení výšky 3 - Lopatky rotoru 8 - Spodní podpěra ventilátoru 4 - Ovládací panel 9 - Kryt základny 5 - Trubka pro nastavení výšky 10 - Základna...
- Page 29 4. Návod k obsluze - Zapojte napájecí kabel do síťové zásuvky. - Pokud se připojujete pomocí prodlužovacího kabelu, ujistěte se, že je kabel dimenzován na proud 3 A nebo více a že je zcela natažený. - Pomocí knoflíku pro nastavení výšky (7) nastavte trubku do optimální výšky. - Pomocí...
-
Page 30: Kullanim Kilavuzu
EXTRALINK BRYZA AYAKLI FAN 16” 40CM Model: ESF-40D-BL KULLANIM KILAVUZU... - Page 31 1. Kullanıcılar için bilgiler: Bu kılavuz dikkatle okunmalı ve ileride başvurmak üzere saklanmalıdır. 2. Ürün montajı 1. Tabanın her iki elemanındaki vidaları gevşetin(10). İki parçayı çaprazlayın ve hizalayın, fan tabanını(8) monte edin, dört vidayla sabitleyin. Taban kapağını kaydırın(9). 2. Fanın(6) üstündeki sıkıştırma vidasını gevşetin, ancak dışarı çekmeyin, ardından fan tertibatını...
- Page 32 3. Cihaz bileşenlerinin tanımı 1 - Koruyucu 6 - Sabitleme vidası 2 - Logo plaketi 7 - Yükseklik ayarı 3 - Kanatlar 8 – Alt fan desteği 4 - Kontrol paneli 9 – Taban kapağı 5 - Yükseklik ayar borusu 10 –...
-
Page 33: Güvenlik Yönergeleri
4. Kullanım kılavuzu - Güç kablosunu elektrik prizine takın. - Bir uzatma kablosu kullanarak bağlantı yapıyorsanız, kablonun 3A veya daha fazla güç için derecelendirildiğinden ve tamamen uzatıldığından emin olun. - Boruyu optimum yüksekliğe ayarlamak için yükseklik ayar düğmesini (7) kullanın. - Gerekli hızı...
Need help?
Do you have a question about the EXTRALINK BRYZA ESF-40D-BL and is the answer not in the manual?
Questions and answers
How to fix the base stick without holes to the x base