Advertisement
Quick Links
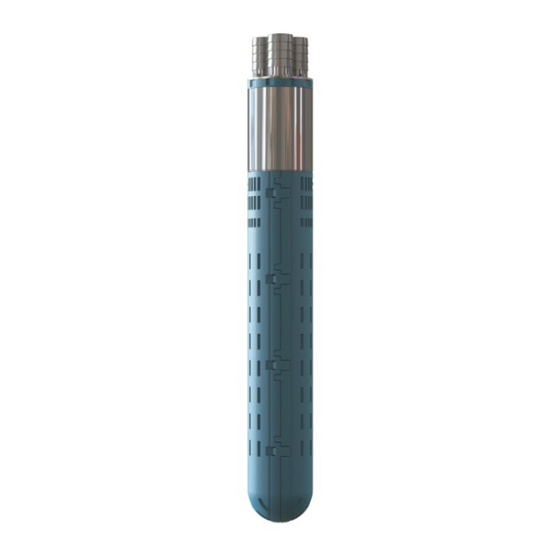
SLX-40
Installation Guide
This document explains how to install the SLX-40 to deliver water to a raised
tank located near to the well. Installation of the SLX-40 should take a certified
installer less than two hours once the tank stand and well are constructed.
For operating and troubleshooting help, please refer to the accompanying
"SLX-40 User Guide".
To register for the 5 year warranty or to get further support, including in
other languages such as:
- Français,
- Español,
- Português,
Visit www.impactpumps.com/support or scan this code:
Quick Start Installation Guide Summary
Packing List
Required Items Not Included With The SLX-40
Tools Needed For Installation
Installation Instructions
Page 2
Page 4
Page 7
Page 8
Page 10
Advertisement

Related Manuals for Impact Pumps SLX-40

Summary of Contents for Impact Pumps SLX-40
- Page 1 SLX-40 Installation Guide This document explains how to install the SLX-40 to deliver water to a raised tank located near to the well. Installation of the SLX-40 should take a certified installer less than two hours once the tank stand and well are constructed.
- Page 2 D 1½” Hose HDPE down-pipe Maximum Head HDPE riser-pipes Submersible-pump Water pumped down into the SLX-40 submersible-pump is returned up the riser pipes with extra water lifted from the well. SLX-40 Installation Guide SLX-40 Installation Guide...
-
Page 3: Packing List
Surface-pump outlet fittings Elbows and hose tail to connect to A (with Outlet tap tank fittings surface-pump inlet filter) and to E (assumes 1 ¼” hosetail inlet on (assumes 1 ¼” hosetail outlet surface-pump) on surface-pump) SLX-40 Installation Guide SLX-40 Installation Guide... - Page 4 25m. Please see your distributor for a list of recommended surface pumps WARNING! EXCEEDING THE PRESSURE HEAD AND FLOW SPECIFICATIONS MAY DAMAGE THE SLX-40 AND VOID THE WARRANTY. HDPE (PE100) PN16 (SDR11) pipes, 40mm Tank or water butt (200L or more) including...
-
Page 5: Tools Needed For Installation
Woodscrews, anchor bolts or appropriate fasteners to secure the well-head to whatever platform structure is used to support the SLX-40 at the top of the well or borehole. (Please note that 3x40mm M8 bolts are supplied for use with a metal... -
Page 6: Installation Instructions
If the well is greater than 20cm (8”) in diameter, please ensure that it is completely point on (D) covered and safe, ensuring it is not possible for a person to fall into the well!! 1½” Hose HDPE Maximum riser-pipes Head HDPE down-pipe Submersible-pump SLX-40 Installation Guide SLX-40 Installation Guide... - Page 7 TIP: We recommend that the top hole, F, is installed as far as possible from A and E to avoid any silt being TIP: A tank level switch or overflow return to the well should be installed if the pump will operate unsupervised. carried with the outlet water. SLX-40 Installation Guide SLX-40 Installation Guide...
- Page 8 This will make it heavier to transport, but introduce less air for removal the next time it is used. TIP: Take care not to overtighten the hose clips. SLX-40 Installation Guide SLX-40 Installation Guide...
- Page 9 The maximum head of the SLX-40 is 25m (82 feet), therefore, the HPDE pipes should also not be cut longer than 25m (82 feet).
- Page 10 TIP: The cable tie ends should be located BETWEEN the pipes and NOT on the outside of the pipes where they could catch against the side of the well when installing or extracting the submersible-pump SLX-40 Installation Guide SLX-40 Installation Guide...
- Page 11 Remove any HDPE cuttings from inside the pipes. Submersible-pump TIP: Mark the down-pipe using a cable tie, pen or knife. Connect the other two pipes to the remaining two ports on the well-head (D) by repeating steps 13 and 14 above. SLX-40 Installation Guide SLX-40 Installation Guide...
- Page 12 If a camera is available, please take a photo that includes everything shown in the example image. HDPE down-pipe Wire tightly twisted around all HDPE joints HDPE down- pipe joined to correct port SLX-40 Installation Guide SLX-40 Installation Guide...
- Page 13 B, C and E) and check that the hoses and surface- pump fill with water. 1½” Hose TIP: If the tank is large, tip it to submerge A. Temporarily support the tank, e.g. with a block of wood. SLX-40 Installation Guide SLX-40 Installation Guide...
- Page 14 Check that any air remaining in the system has circulated and settled out in by temporarily part-opening C, shown in this image: the tank and the SLX-40 has a steady beat. This may take up to 5 minutes. as shown. This process will be more effective if C is raised.
- Page 15 The SLX-40 should now start lifting more water to the surface tank than is pumped down the down-pipe. Run the pump until the water level in the tank is above where the hoses connect to the tank when it is level. Please ensure the tank is covered with a lid or other cover.
- Page 16 Before the 5 year warranty can be activated a ‘Site Installation Report’ must be Please talk through the “User Guide” with the operator of the SLX-40. Confirm submitted to Impact Pumps. Please complete the ‘Site Installation Report’ by visiting that they know how to connect and run the pump including how to expel air.
- Page 17 Please return all 4 pages of this ‘Site Installation Report: Distributor’s Copy’ to your distributor who will photograph it and submit it via www.impactpumps.com/support. Please leave the following ‘Site Installation Report: New Pump Owner’s Copy’ with the new owner of the SLX-40. Certified Installer’s Phone Number*...
- Page 18 Please enter the manufacturer and model number of the surface-pump that is powering the Impact Pump SLX-40 HDPE down-pipe joined to correct ports Maximum head (i.e., the height from the deepest...
- Page 19 In addition to completing the online ‘Site Installation Report’ or the paper ‘Site Installation Report: Please confirm the new pump owner is fully satisfied with the SLX-40, the Distributor’s Copy’ , please also complete this ‘Site Installation Report: New Pump Owner’s Copy’ and installation and that the following statements are true:* leave it with the new owner of the SLX-40.
- Page 20 Please enter the manufacturer and model number of the surface-pump that is powering the Impact Pump SLX-40 HDPE down-pipe joined to correct ports Maximum head (i.e., the height from the deepest...
-
Page 21: Additional Notes
SLX-40 Site Installation Report: New Pump Owner’s Copy, Page 4 of 4 Please confirm the new pump owner is fully satisfied with the SLX-40, the installation and that the following statements are true:* The pump runs as it should, any air has been expelled and there are no leaks.
Need help?
Do you have a question about the SLX-40 and is the answer not in the manual?
Questions and answers