Advertisement
Available languages
Available languages
Quick Links
Advertisement

Related Manuals for SAMCHULLY BT Series

Summary of Contents for SAMCHULLY BT Series
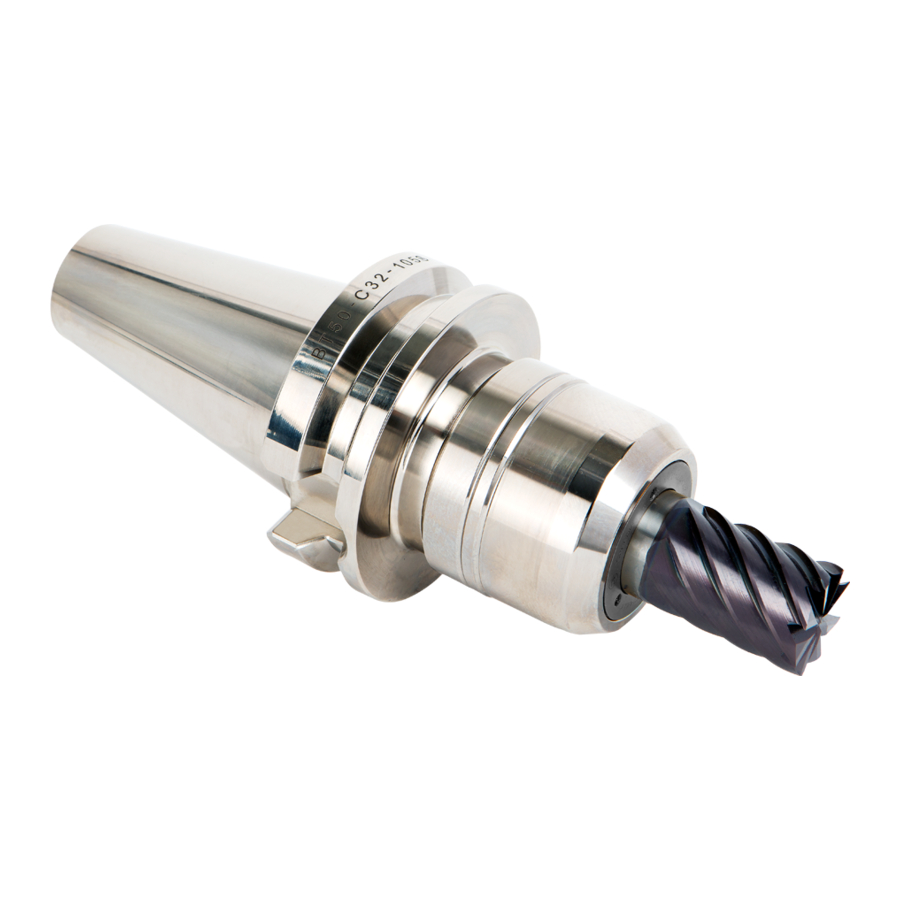
- Page 1 ER Collet Chuck BT, BTT Series 삼천리 ER 콜렛척 취급설명서 ER Collet Chuck Instruction Manual ER弹簧刀柄操作说明书...
- Page 2 Model Number BT, BTT ER Chuck...
- Page 3 목 차 콜렛 체결방법 체결 시 주의사항 주의사항 Instruction Manual...
- Page 4 Table of Contents Clamping the Collet Precautions on clamping Precautions...
- Page 5 目 录 筒夹夹持方法 夹持时的注意事项 注意事项 Instruction Manual...
- Page 6 콜렛 체결방법 ① 콜렛 삽입방법 콜렛의 원주에 있는 홈을 그림1과 같이 너트 뒷면의 마크 방향에 있는 리브에 끼운 후 안쪽으로 밀어 넣으십시오. ② 콜렛 제거방법 너트의 “ ”가 표시된 쪽에서 콜렛을 화살표 방향으로 누르십시오. 콜렛 홈 PUSH (삽입) Depress (제거) 리브...
- Page 7 체결 시 주의사항 ① 최적의 정확도를 유지하기 위해 다른 제조업체의 콜렛이나 너트를 사용하지 마십시오. ② 척에 조립하기 전에 반드시 콜렛을 먼저 너트에 끼우십시오. (그림 2.참조) ③ 최상의 결과를 얻으려면 가능한 공구를 콜렛 내경의 전체길이에 삽입하십시오. (콜렛 내경 길이보다 2/3 이하로 짧은 공구는 사용하지 마십시오. 그림 3.참조) Chucking 부가...
- Page 8 Chuck 출하시에는 Torque 설정이 되어있지 않기 때문에 Spanner 또는 Torque Wrench를 사용하여 Torque를 설정하여 주십시오. 체결 Torque가 너무 강하면 Collet 및 Chuck 본체에 손상이 생길 수 있으므로 유의하시기 바랍니다. Torque Wrench를 사용시에는, Torque Limiter에서 찰칵 소리가 나면 체결완료 상태이므로 즉시 체결을 멈추어 주십시오. Torque Limiter를...
- Page 9 ER 너트 체결 토크 Chucking diameter Model torque(Nm) Model torque(Nm) 1.0~5.0 ER08S-N 1.0~2.9 ER11-N ER11S-N 3.0~7.0 1.5~3.5 ER16-BN ER16S-N 4.0~4.5 5.0~10.0 1.5~6.5 ER20-BN ER20S-N 7.0~13.0 1.0~3.5 4.0~4.5 ER25-BN ER25S-N 5.0~7.5 8.0~17.0 2.0~2.5 3.0~7.5 ER32-BN 8.0~22.0 3.0~26.0 ER40-BN Instruction Manual...
- Page 10 주의사항 절삭 공구 장착시 ① 손상 혹은 균열이 있거나 런아웃이 과도한 척은 사용하지 마십시오. ② 척 및 절삭 공구 Shank에 부착된 이물질을 깨끗이 제거하십시오. ③ 여유면 마모가 0.4mm 이상 마모된 절삭 공구는 사용하지 마십시오. ④ 부상을 입지 않도록 천 또는 천과 유사한 물건을 사용해 절삭 공구를 잡아야합니다. ⑤...
- Page 12 품질보증서 아래와 같이 품질을 보증합니다. ER Collet Chuck 품명 규격 제품번호 품질보증기간 12개월 구입일 본 제품은 철저한 품질관리와 엄격한 검사과정을 거쳐서 만들어진 제품입니다. 제품에 이상이 발생되었을 때에는 대리점이나 소비자 상담실의 안내를 받으십시오. 부품 보유기간 5년 (사양은 예고없이 변경될 수 있습니다.)
- Page 13 무상서비스 안내 품질기간 이내에 정상적으로 사용한 상태에서 자연발생한 고장의 경우에는 이 보증서 기재 내용에 따라 무상으로 수리하여 드립니다. 유상서비스 안내 1. 품질보증기간이 경과한 경우 2. 품질보증기간 이내인 경우 - 사용상 부주의로 인한 고장의 경우 - 임의의 개조로 인한 고장의 경우 - 천재지변에...
- Page 14 Clamping the Collet ① Inserting the collet Place the groove on the circumference of the collet on the rib in the direction marked on the rear of the nut as shown in Fig. 1 and push the collet inward. ②...
- Page 15 Precautions on clamping ① To maintain optimal precision, do not use the collets or nuts of other manufacturers. ② Insert the collet into the nut before assembling the collet on the chuck. (See Fig. 2.) ③ To ensure optimal results, fully insert the tool into the collet such that as much of the diameter as possible. (To ensure optimal results, the cutting tool shank must be inserted at least 3/4 of the collet bore.
- Page 16 The chuck is delivered with the torque not set. Set the torque with spanner or torque wrench. Note that applying excessive torque may cause damage to the collet and chuck body. When fastening is completed, a click sound is heard from the torque limiter while using a torque wrench, In such case, immediately stop fastening.
- Page 17 ER Nuts Tightening torque Chucking diameter Model torque(Nm) Model torque(Nm) 1.0~5.0 ER08S-N 1.0~2.9 ER11-N ER11S-N 3.0~7.0 1.5~3.5 ER16-BN ER16S-N 4.0~4.5 5.0~10.0 1.5~6.5 ER20-BN ER20S-N 7.0~13.0 1.0~3.5 4.0~4.5 ER25-BN ER25S-N 5.0~7.5 8.0~17.0 2.0~2.5 3.0~7.5 ER32-BN 8.0~22.0 3.0~26.0 ER40-BN Instruction Manual...
- Page 18 ① Do not tighten the toolholder nut and collet assembly without a cutting tool. Collets under pressure without a cutting tool will deform or crack. ② For optimal performance, please use Samchully pull studs. Pull studs should be considered as consumable items that should be replaced every 2 years.
- Page 20 12 months Purchase date The product is manufactured with strict quality control. If any defects are discovered, do not continue to use the toolholder and contact Samchully Workholding. Part retention period: 5 years (Specifications are subject to change withour prior notice.)
- Page 21 - Failure due to negligent use of the product - Unauthorized modification of the product - Failure due to acts of force majeure. Customer Service Center Samchully Workholding 20472 Crescent Bay Dr. Suite #108 Lake Forest, Ca. 92630 Ph. (949) 727-3001...
- Page 22 筒夹夹持方法 ① 插入弹夹 将凹槽沿着在胸骨后部标志的方向放置在胸骨上的圆周上。 如图1所示的螺母,把螺母推向内侧。 ② 插入弹夹 按collet朝标有" "的螺帽旁箭头方向按。 Collet Groove PUSH Depress 螺纹 图1. 标志 Tooling System...
- Page 23 夹持时的注意事项 ① 为了维持最佳的准确度,请勿使用其他制造企业的筒夹或螺母。 ② 在安装刀柄前,请务必先将筒夹插入螺母中。(参考图2.) ③ 若想获得最佳效果,请尽量将刀具插入筒夹内径的总长中。 (请勿使用比筒夹内径长度短2/3以下的刀具。参考图3.) 卡盘零件的缩短会对刀具和夹板造成损害,并对夹板造成局部损害。(适当的卡盘长度=切削刀具x4-5倍或以上) ④ 在装配卡盘上的夹子之前,将夹子插入螺母。(参见图2) 图2. 그림 2 图3. 그림 3 Instruction Manual...
- Page 24 由于刀柄出厂时未设定扭矩,因此请使用扳手或扭矩扳手设定扭矩。 若夹持扭矩过强,筒夹和刀柄主体有可能受损,请注意。 使用扭矩扳手时,若扭矩限制器发出“咔哒”声,则连接完成,请立即停止夹持。请注意不要超过扭矩限制器。 Tooling System...
- Page 25 ER型夹紧螺母紧固扭矩 Chucking diameter Model torque(Nm) Model torque(Nm) 1.0~5.0 ER08S-N 1.0~2.9 ER11-N ER11S-N 3.0~7.0 1.5~3.5 ER16-BN ER16S-N 4.0~4.5 5.0~10.0 1.5~6.5 ER20-BN ER20S-N 7.0~13.0 1.0~3.5 4.0~4.5 ER25-BN ER25S-N 5.0~7.5 8.0~17.0 2.0~2.5 3.0~7.5 ER32-BN 8.0~22.0 3.0~26.0 ER40-BN Instruction Manual...
- Page 26 注意事项 安装切削刀具时 ① 请勿使用损坏或裂开或跳动超差的刀柄。 ② 请彻底去除附着在刀柄和切削刀具柄部上的异物 ③ 请勿使用侧面磨损超过0.4mm以上的切削刀具。 ④ 为了避免受伤,必须使用布或与布相似的物品握住切削刀具。 ⑤ 请使用刀具柄部精度为h7的产品。 ⑥ 请勿使用柄部上存在切口或削平柄的切削刀具。(参考右图) 操作中 ① 出现振动/震颤时,请停止使用。 ② 主轴旋转时,请勿碰触刀柄或切削刀具。 其他 ① 在未插入切削刀具的状态下请勿夹持螺母。 ② 三千里机械建议使用本公司的拉钉。拉钉为耗材,必须每隔2年更换一次,请勿使用有损伤痕迹或变形的拉钉。 Tooling System...
- Page 28 质量保证书 提供以下质量保证。 品名 ER Collet Chuck 规格 产品编号 保修期 12个月 购买日期 本产品是经过彻底的质量管理和严格的检查过程制造的产品。 如果发现产品异常,请咨询代理店或消费者咨询室。 配件持有期限5年(配置有可能不经通知直接变更。)...
- Page 29 无偿服务说明 保修期内,在正常使用的状态下,自然地发生故障时, 根据本保修单记载的内容提供无偿修理。 有偿服务说明 1. 超过保修期时 2. 在保修期内时 - 因使用上的不注意导致发生故障时 - 因任意改造导致 发生故障时 - 因自然灾害导致发生故障时...
- Page 32 삼천리 ER 콜렛척 취급설명서 ER Collet Chuck Instruction Manual ER弹簧刀柄操作说明书 www.samchully.com Samchully Machinery [405-820] 인천광역시 남동구 남동대로 99 TEL. +82-32-822-4811 FAX. +82-32-822-4377 [405-820] 99, Namdong-daero, Namdong-gu, Incheon, Korea K2021-C2-102 TEL. +82-32-899-8965 FAX. +82-32-721-7607...
Need help?
Do you have a question about the BT Series and is the answer not in the manual?
Questions and answers