Table of Contents
Advertisement
Quick Links
Installation Guide
Guía de instalación
© 2022 Ubicquia, Inc.
Lever Nut Connector (2X)
Conector para Empalmar el Cable (2X)
Heat Shrink Butt Connector
Conector Termoretráctil
Connector + 20 AWG Cable (40ft / 12m)
Conector + Cable de Grosor de 20 AWG
(40ft / 12m)
Mounting Bracket
Soporte de Instalacion
Captive Mounting Screw
Tornillo Cautivo
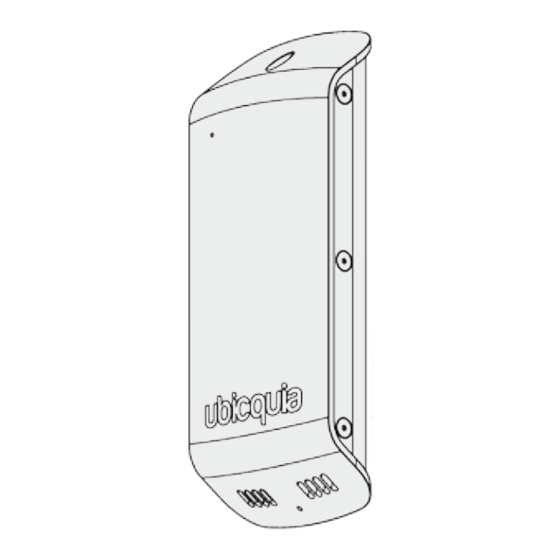
UbiSmart™ AQM+ Unit
Unidad UbiSmart™ AQM+
Required Materials
. Tamper Resistant T15 Driver
. Concrete screws (x2) or up to
1/2 inch bands (x2)
. Other tools required depending
on bracket installation method
Herramientas Necesarias
. Destornillador Torx T15
. Tornillos para concreto (x2) para
cintas de hasta ½"
. Se requieren otras herramientas
dependiendo del método de
instalación del soporte
*EN: NOTE: UbiSmart AQM+ device only functions
when paired with UbiCell
™
*ES: NOTA: UbiSmart AQM+ solamente funciona
cuando esta conectado con un UbiCell
or UbiHub
.
™
o UbiHub
.
™
™
1
Advertisement
Table of Contents

Related Manuals for ubicquia ubismart AQM+

Summary of Contents for ubicquia ubismart AQM+
- Page 1 *EN: NOTE: UbiSmart AQM+ device only functions when paired with UbiCell or UbiHub ™ ™ *ES: NOTA: UbiSmart AQM+ solamente funciona cuando esta conectado con un UbiCell o UbiHub ™ ™ © 2022 Ubicquia, Inc.
- Page 2 Distancia de árboles > 20m Distancia de calle > 50m EN: Concrete/Wood Pole. The EN: Metal Pole. The cable should EN: Ubicquia provides a 40 ft cable should be secured externally be run inside the pole. Drill hole at connection cable with connector.
- Page 3 NOTE: When tightening, ensure exceso al terminar. the bracket does not crush the NOTE: Do not over-torque the cable. screws. NOTA: Al apretar, asegúrese de NOTA: No apriete demasiado los que el soporte no aplaste el cable. tornillos. © 2022 Ubicquia, Inc.
- Page 4 UbiSmart AQM+ tarda sobre 45 minutos para que los valores del sensor se muestren en el UbiVu. EN: Rotate the device upwards into the locked position. ES: Gire el dispositivo hacia la posición de cerrado. © 2022 Ubicquia, Inc.
- Page 5 Changes or modifications not expressly approved by Ubicquia, Inc. could void the user’s authority to operate the equipment. NOTE: This equipment has been tested and found to comply with the limits for a Class B digital device, pursuant to part 15 of the FCC Rules.
Need help?
Do you have a question about the ubismart AQM+ and is the answer not in the manual?
Questions and answers