Table of Contents
Advertisement
Quick Links
Advertisement
Table of Contents

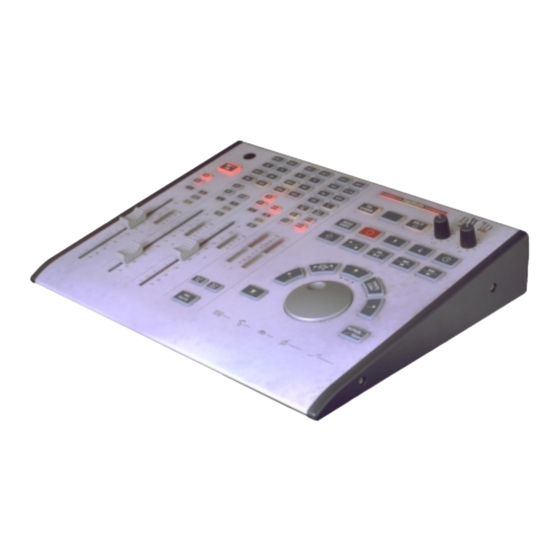
Summary of Contents for DAVID DigAS DigaStudio
- Page 1 DigaStudio...
-
Page 2: Table Of Contents
DigaStudio Installation Notes Page 2 of 15 Table of contents General Information.................... 3 Safety information........................3 Supplied components ........................ 3 Accessories ..........................3 Installation......................4 DigaStudio ..........................4 RS-422 adapter ......................... 4 PC software ..........................5 Beginning of Operation ..................7 DigaStudio .......................... -
Page 3: General Information
DigaStudio Installation Notes Page 3 of 15 1 General Information 1.1 Safety information Please read the enclosed safety information before turning on the system for the first time! No liability will be accepted for any damage of any kind caused by incorrect use. -
Page 4: Installation
DigaStudio Installation Notes Page 4 of 15 2 Installation 2.1 DigaStudio 1. Make sure that the power switch on the front of the DigaStudio Box is in the Off position 2. Plug the supplied power cable into the rear of the DigaStudio Box and then connect to a correctly grounded power socket. -
Page 5: Pc Software
SHOW. This brings up a larger window with the name DigaStudio In- terface Manager. In the future the latest updates can be downloaded from our mailbox. Information concerning updates is available in our ISDN mailbox and on our internet homepage http://www/david-gmbh.de. - Page 6 DigaStudio Installation Notes Page 6 of 15 4. Click on the COM port button. A window for RS-232 properties ap- pears. Enter the paramters as shown here. Make sure that you choose the correct COM port, that is, the one on the PC to which the interface cable is connected.
-
Page 7: Beginning Of Operation
Note: depending on when the software was delivered it is possible that some functions are not available (e.g. TimeStamps etc.). Updates will be available at a later date. Information about the latest software releases is available in our ISDN mailbox and on our internet homepage http://www/david-gmbh.de. -
Page 8: Configuration
DigaStudio Installation Notes Page 8 of 15 4 Configuration In this section a few important configuration steps are described which can only be performed via the PC software. A more extensive description will be contained in the DigaStudio User Manual, which will be available at a later date. -
Page 9: Channels 1
DigaStudio Installation Notes Page 9 of 15 By clicking on the relevant tab the page for those settings is displayed and the settings can then be modified. 4.1.1 Channels 1..4 These tabs allow a number of channel-specific settings to be performed: •... -
Page 10: Program Settings
DigaStudio Installation Notes Page 10 of 15 4.1.6 Program Settings This page is for generating and loading profiles as described in the following section. 4.2 Configuration via profiles Profiles are „snapshots„ of particular system settings. Any system state can be saved and reloaded at any time. -
Page 11: Downloading The Operating Software
DigaStudio Installation Notes Page 11 of 15 4.3 Downloading the operating software The operating software for DigaStudio consists of three parts: • Operating software for the DigaStudio Box • Operating software for the DigaStudio Desk • DSP software for the PUMA chip in the DigaStudio Box The operating software is resident in the respective devices and is automatically activated when the device is turned on. - Page 12 DigaStudio Installation Notes Page 12 of 15 2. Select the required module to be downloaded.
- Page 13 DigaStudio Installation Notes Page 13 of 15 3. Select the relevant HEX file. The selection buttons next to the file name fields call up a standard windows file-selection dialog in order to select the respective HEX file. In general the following file names are assigned to the respective download targets: •...
- Page 14 DigaStudio Installation Notes Page 14 of 15 To download new Desk software first the control software must be halted by clicking the STOP button, and after the download procedure is complete, re- started by means of the START button. 8. After completion of the download procedure the DigaStudio has to be turned off and on, after which the system is ready for 7.
- Page 15 Page 15 of 15 Landsberger Straße 87 80339 Munich Germany Fon: +49 - 89 - 540 139 - 0 Fax: +49 - 89 - 540 139 - 50 Document information Author: Andreas Hildebrand Revision date: 26.11.98 / 18:35 File: \\pluto\daten\david\produkt\digastudio\geräte\installationshinweise.doc...
Need help?
Do you have a question about the DigAS DigaStudio and is the answer not in the manual?
Questions and answers