Table of Contents
Advertisement
Quick Links
Installation, Operation & Maintenance Manual
DMX Series
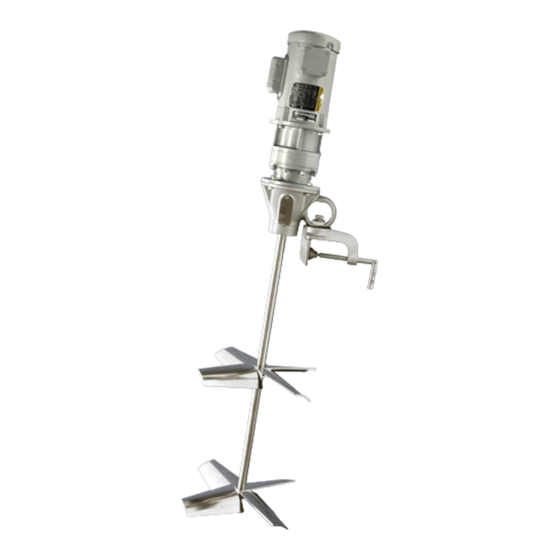
PORTABLE MIXER
Important Safety Instructions
This Installation and Operation Manual Includes
Important Warnings and Safety Information.
Be sure to keep this manual with equipment and
ensure all operators read the enclosed
information.
Table of Contents
Important Safety Warnings ........................................... 1
Receiving, Inspection & Storage ................................... 3
Operation Instructions ................................................... 4
Start-up Checklist.......................................................... 5
Assembly & Installation ................................................. 6
Clamp Mount ............................................................. 6
Plate Mount ............................................................... 8
Parts, Maintenance & Service .................................... 11
Clamp Mount ........................................................... 11
Plate Mount or Flange ............................................. 12
General Information Regarding Air Motors ............. 15
Troubleshooting Guide ............................................... 18
Terms & Conditions .................................................... 19
Warranty ..................................................................... 20
Ph. 604.244.3771 Fax 604.244.3772
info@dynamixinc.com
www.dynamixinc.com
R15-042020
DMX SERIES
Portable Mixer
Advertisement
Table of Contents

Summary of Contents for Dynamix DMX Series
-
Page 1: Table Of Contents
Installation, Operation & Maintenance Manual DMX Series PORTABLE MIXER Important Safety Instructions This Installation and Operation Manual Includes Important Warnings and Safety Information. Be sure to keep this manual with equipment and ensure all operators read the enclosed information. Table of Contents Important Safety Warnings ........... -
Page 2: Important Safety Warnings
1. This mixer is intended for professional use only. 2. The installation of this equipment does not normally require the services of factory personnel. If required, these services can be agreed upon before or after purchase. These services are available from Dynamix Agitators by contacting the Sales Department. - Page 3 15. Do not exceed the working air pressure of 100 psi for air motors 16. Check equipment daily. Repair and replace damaged parts immediately. 17. Do not uninstall or service this mixer until you have followed your “Control of Hazardous Energy Sources” procedure as per OSHA Guidelines and/or the Canadian Occupational Health and Safety Regulations.
-
Page 4: Receiving, Inspection & Storage
FOLLOW THESE INSTRUCTIONS COULD RESULT IN SERIOUS INJURY WARNING! Goods must be inspected with 30 days of receive date. It is assumed that goods are satisfactory if Dynamix is not notified within this period. Your mixer has been tested and checked for shaft straightness before shipping. Care must be taken while handling the shaft to ensure proper operation. -
Page 5: Operation Instructions
6. On start-up jog the mixer in order to ensure the mixer shaft and impeller is not obstructed from rotation. 7. Fluid level should be one diameter above the impeller for proper mixing unless approved by Dynamix Engineering 8. Avoid drawing fluid level down past last impeller. Impeller should not operate out of fluid unless specifically designed for this. -
Page 6: Start-Up Checklist
Start-up Checklist Please Review This Checklist Carefully Before Operating the Mixer Prior to, and during start-up, please check that the following things have been done: 1. Manual has been read and followed 2. Drive coupling is fully engaged ... -
Page 7: Assembly & Installation
Assembly & Installation Clamp Mount Installing the Mixer Shaft and Impellers 1. The mixer shaft has one end which is machined to fit the drive coupling. This is the motor end. Slide the impeller(s) onto the other end of the shaft; ensure the impeller is mounted according to the sticker and rotation indicated on the sticker. - Page 8 Mixer Positioning 1. Dynamix “Clamp Mount“ mixers are designed to be angled @ 10 to 15 ° (Fig. 2) to the vertical wall and @ 15 to 30° (Fig 3) from the tank center, as shown. The following illustrations are for reference only. If there are any questions regarding the proper positioning of your mixer, please contact your Dynamix representative.
-
Page 9: Plate Mount
Plate Mount Installing the Mixer Shaft 1. The mixer shaft has one end which is machined to fit the drive coupling. This is the motor end. Slide the impeller(s) onto the other end of the shaft; ensure the impeller is mounted according to the sticker and rotation indicated on the sticker. - Page 10 Mixer Mounting 1. The mounting structure must be stable and secure. If the mixer is not mounted to a stable platform, damage to the tank or mixer may occur, as well as harm to personnel. 2. The mixer is supplied with rubber vibration mounts, which absorb the vibrations of the shaft. This will help reduce the stresses in longer shafts.
- Page 11 If your mixer has been approved and designed for “Offset Mounting” you can use the following instructions. If it is not approved for offset mixing, then do not use this as it will damage the mixer. Contact Dynamix to confirm if needed.
-
Page 12: Parts, Maintenance & Service
This drawing is not exact. It is only a typical representation of the DMX Series models. When noted, please contact your Dynamix representative with your mixer serial number. Note; the DMX Series is a highly configurable mixer and few parts are standard. REF # PART NAME PART No. -
Page 13: Plate Mount Or Flange
This drawing is not exact. It is only a typical representation of the DMX Series models. When noted, please contact your Dynamix representative with your mixer serial number. Note; the DMX Series is a highly configurable mixer and few parts are standard. REF # PART NAME PART No. -
Page 14: General Information Regarding Electric Motors
General Information Regarding Electric Motors Overview For your protection, do not install, operate or attempt to perform maintenance procedures until you understand the Warning and Caution statements. A Warning statement indicates a possible unsafe condition that can cause harm to personnel. - Page 15 Safety Notice This equipment contains high voltage. Electrical shock can cause serious or fatal injury. Only qualified personnel should attempt installation, operation and maintenance of electrical equipment. Be sure that you are completely familiar with NEMA publication MG-2, safety standards for construction and guide for selection, installation and use of electric motors and the National Electrical Code and local codes and practices.
-
Page 16: General Information Regarding Air Motors
General Information Regarding Air Motors Air motors operate best with lubricated, dry, clean air at air pressures below 100psi. Air Lubricator: Lubricated air is typically available from the air system. If not, an automatic lubricator must be installed in the air- line ahead of the air motor. Use a pneumatic air lubricant e.g. ISO VG32 or detergent SAE #10 automotive oil. Lubricator should be adjusted to feed one drop of oil for every 50 to 75cfm. - Page 17 Air Motor Horsepower Rating & Air Consumption For Air Motors Rated at 1.5HP For Air Motors Rated at 4HP Note: Output rpm refers to motor output shaft only. For gear reduced drives refer to gear ratio on quotation. R15-042020...
- Page 18 Gear Driven Gear drivers for mixers are lubricated at the factory using the proper type and amount of lubricant for normal service, and are maintenance free. For additional information contact Dynamix Agitators. Mixer Shaft Bearings Mixer Shaft Bearings are pre-lubed and sealed and do not require re-lubrication.
-
Page 19: Troubleshooting Guide
Troubleshooting Guide Use This Chart to Diagnose Operation Issues Problem Possible Cause Possible Solution • • Loose connections Check and tighten connection • • Incorrect wiring Check wiring diagram and wire correctly Mixer Will • • Blown fuse Replace fuse •... -
Page 20: Terms & Conditions
Products for modification, repair or replacement must be authorized by Dynamix in writing prior to return of the Products by the Customer. Dynamix will not be responsible for any repairs performed by third parties unless the extent, or terms and costs of such repairs, are authorized by Dynamix, in writing in advance. -
Page 21: Warranty
Agreement. If any part of these Delivered Terms are found invalid, the remaining part will be effective. No waiver, alteration or modification of any of the provisions of these Delivered Terms will be binding on Dynamix, unless made in writing and signed by a duly authorized officer of Dynamix. - Page 22 Product in respect of which damages are unclaimed. 3. What Is Not Covered By Warranty: Damages and Claims for Which Dynamix Is Not Responsible The Seller's Warranty applies insofar as the unit is operated within the rating and service conditions for which it was specifically sold.
- Page 23 Details of claim Dynamix will notify the customer whether it will be necessary to return the Product or part or component to us. If so, we will send the customer an "AUTHORIZED RETURN NUMBER" that must be attached to the product or part or component before returning it.
-
Page 24: Dynamix Agitators Inc
Warranty Data Sheet To validate your warranty, please complete this form and return to: Dynamix Agitators Inc. #150-14480 River Road Richmond, BC, Canada V6V 1L4 Mixer Model Number Serial Number Purchase Order Number Date Received Tank Number or Location Agitator Start Up Data...
Need help?
Do you have a question about the DMX Series and is the answer not in the manual?
Questions and answers