Table of Contents
Advertisement
Quick Links
User Guide (UG)
CENTAURI-200
Revision: 3.0
Date: 02-06-2022
Volansys Technologies Private Limited
Block A 7th Floor, Safal Profitaire, Corporate Road,
Prahladnagar, Ahmedabad 380015, India
www.volansys.com
Phone: 91-79-4004-1994
Email:
info@volansys.com
Confidentiality Notice
Copyright © 2020Volansys – All rights reserved.
This document is authored by Volansys and is Volansys' intellectual property, including the copyrights in all countries in the world. This
document is provided under a license to use only with all other rights, including ownership rights, being retained by Volansys. This file may not
be distributed, copied, or reproduced in any manner, electronic or otherwise, without the express written consent of Volansys.
Advertisement
Table of Contents

Summary of Contents for ACL VOLANSYS CENTAURI-200
- Page 1 User Guide (UG) CENTAURI-200 Revision: 3.0 Date: 02-06-2022 Volansys Technologies Private Limited Block A 7th Floor, Safal Profitaire, Corporate Road, Prahladnagar, Ahmedabad 380015, India www.volansys.com Phone: 91-79-4004-1994 Email: info@volansys.com Confidentiality Notice Copyright © 2020Volansys – All rights reserved. This document is authored by Volansys and is Volansys’ intellectual property, including the copyrights in all countries in the world. This document is provided under a license to use only with all other rights, including ownership rights, being retained by Volansys.
-
Page 2: Table Of Contents
CENTAURI-200 User Guide TABLE OF CONTENTS 1 INTRODUCTION ..............................5 1.1 P ................................. 5 URPOSE 1.2 S ..................................5 COPE 1.2.1 P ..............................5 REREQUISITES 1.2.2 S ....................5 UPPORTED OFTWARE AND ARDWARE LATFORMS 1.3 A & A ............................ 5 CRONYMS BBREVIATIONS 1.4 R ................................ - Page 3 CENTAURI-200 User Guide 5.6 R ........................... 30 EMOVE EVICE LISTS OF TABLES ............................ 13 ABLE ATEWAY INDICATION ..........................14 ABLE ATEWAY WITCH FUNCTION LISTS OF FIGURES 1- 1 G .......................... 7 IGURE ATEWAY SETUP ARCHITECTURE 3- 1 M ......................... 10 IGURE OBILE PPLICATION...
- Page 4 CENTAURI-200 User Guide Revision History Date Version Details of change Author Reviewers Approvers 10-08-2019 Draft 0.1 Initial Draft KB, RT 29-08-2019 First Release RT, NP 12-12-2019 Added Zigbee device control in section 5. Updated IoTiFy link in Section 3 06-02-2020 Updated section 4.3 and updated the document for Zigbee support.
-
Page 5: Introduction
CENTAURI-200 User Guide NTRODUCTION This document will guide an end user in getting started with the CENTAURI-200. Purpose This document will address the following things: 1. Getting Started with CENTAURI-200 demonstration 2. System Overview 3. CENTAURI-200 Gateway Setup 4. End device setup and control Scope The scope of the guide is to describe the various functionalities to configure CENTAURI-200 using mobile application for the user. -
Page 6: References
CENTAURI-200 User Guide Extended Unique Identifier Over The Air References Reference Document Title Provided by Remarks Document Conventions This element signifies a useful information or tip or suggestion This element signifies a warning or proceed with caution This element signifies that the action should be avoid Volansys-Confidential Page 6 of 31 VT-ENG-TMP-UG | Rev 1.1 | 31-Jul-19... -
Page 7: System Overview
CENTAURI-200 User Guide YSTEM VERVIEW CENTAURI-200 Gateway is a central device to run the out of the box demonstration. In this setup, the user can control and monitor the Z-wave and ZigBee end devices with help of mobile application. To do the setup, the user needs to provide Internet connectivity to CENTAURI-200 Gateway. -
Page 8: Setup Prerequisites
CENTAURI-200 User Guide ETUP REREQUISITES 2.1 Hardware Requirements User needs following listed items to fulfill setup requirement CENTAURI-200 Gateway. o Z-wave controller Module o ZigBee Controller Module o Internet connectivity on Gateway via Ethernet or Wi-Fi. 2.2 Hardware Optional Requirements The following Z-Wave / ZigBee end devices are supported ... -
Page 9: Mobile Application Setup
CENTAURI-200 User Guide OBILE APPLICATION SETUP 3.1 Installation (Android Mobile Application) 1. The IoTify Android application is available on Google Play Store. 3.2 Installation (iOS Mobile Application) 1. The IoTify iOS application is available on the Apple Application store. Volansys-Confidential Page 9 of 31 VT-ENG-TMP-UG | Rev 1.1 | 31-Jul-19... -
Page 10: Initial Setup And User Registration
CENTAURI-200 User Guide 3.3 Initial setup and User registration Launch/open installed application in the mobile. User can see below screen Figure 3- 1 Mobile Application Launch Page If prompted for any permission, please allow. Follow user registration process for creating account. Enter verification code received on email to complete registration process. - Page 11 CENTAURI-200 User Guide Figure 3- 2 User registration for Gateway Login with the user credential created during sign-up. On successful authentication, user is redirected to the list of registered gateways. The user can see registered gateway if any or can see below screen without any gateways. Volansys-Confidential Page 11 of 31 VT-ENG-TMP-UG | Rev 1.1 | 31-Jul-19...
- Page 12 CENTAURI-200 User Guide Figure 3- 3 Home screen after successful login Volansys-Confidential Page 12 of 31 VT-ENG-TMP-UG | Rev 1.1 | 31-Jul-19...
-
Page 13: Gateway Setup
CENTAURI-200 User Guide ATEWAY SETUP 4.1 Gateway LED indication Indication Represents POWER LED Power is available No Power supply is connected LED1 Access Point mode is off SOLID RED Access Point mode is on. Blinking RED End Device Commissioning in progress (1 second off, 1 second on) LED2... -
Page 14: Gateway Initial Setup
CENTAURI-200 User Guide devices, rules and scenes) Table 2 Gateway Switch function 4.3 Gateway Initial setup Follow below steps for initial Gateway setup 4.3.1 Gateway Setup with Wi-Fi Plug in power cable in DC power input port of gateway available on back panel. Plug-out Ethernet cable if it is plugged in. -
Page 15: Gateway Commissioning [Registration]
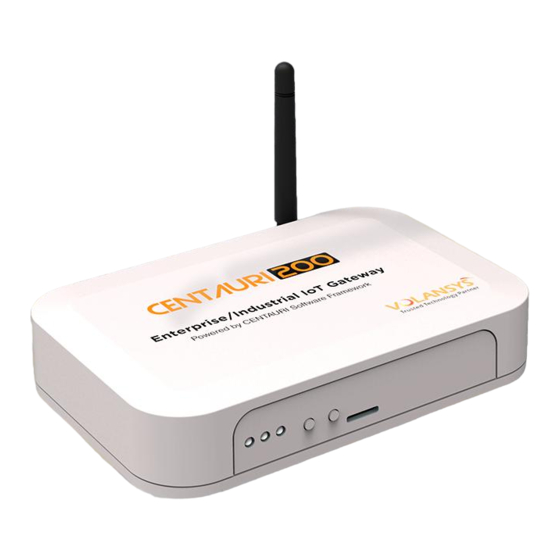
CENTAURI-200 User Guide Figure 4- 1 CENTAURI-200 Gateway 4.4 Gateway Commissioning [Registration] A user needs to register the gateway using the mobile application to use the gateway to control and monitor end devices. To register the gateway, follow below steps. 4.4.1 Gateway Registration Open the mobile application and log in using user id. -
Page 16: Figure 4- 2 I Otify - Addg
CENTAURI-200 User Guide Figure 4- 2 IoTify – Add Gateway Once user connects to access point of the GW, the user needs to enter the Wi-Fi password as centauri_XXXX (XXXX=Last 4 digit of Gateway MAC, e.g. “centauri_D1A5”). After the user comes back to this application, user will see below screen. -
Page 17: Figure 4- 3 Gatewayp
CENTAURI-200 User Guide that GW will use for getting an internet connectivity. (E.g. Home Wi-Fi router access point). User will be prompted to enter passphrase if that is configured on selected SSID) Figure 4- 3 Gateway Provisioning Volansys-Confidential Page 17 of 31 VT-ENG-TMP-UG | Rev 1.1 | 31-Jul-19... -
Page 18: Figure 4- 4 Gateway List
CENTAURI-200 User Guide After providing all correct input, the gateway will be commissioned, and it will be available on application as shown below. User can add multiple gateway to the application by following same process. Figure 4- 4 Gateway List Long press on Gateway and select Gateway information. -
Page 19: Factory Reset The Gateway
CENTAURI-200 User Guide Figure 4- 5 Gateway property change 4.4.2 Factory reset the gateway SW2 switch can be used (long press) to factory reset the gateway if needed. Refer Gateway Switch indication for more details Volansys-Confidential Page 19 of 31 VT-ENG-TMP-UG | Rev 1.1 | 31-Jul-19... -
Page 20: Figure 4- 6 Gateway W I -F
CENTAURI-200 User Guide Figure 4- 6 Gateway Wi-Fi reset button o User can see LED2 will turn green if Gateway has internet connectivity. o LED2 will be red if there is not internet connectivity Volansys-Confidential Page 20 of 31 VT-ENG-TMP-UG | Rev 1.1 | 31-Jul-19... -
Page 21: Change Gateway Network Interface For Ip Connectivity (Wi-Fi Or Ethernet)
CENTAURI-200 User Guide 4.5 Change Gateway Network Interface for IP connectivity (Wi-Fi or Ethernet) 4.5.1 Change from Wi-Fi to Ethernet Follow below steps to change Network interface from Wi-Fi to Ethernet Press SW2 switch more than 5sec to factory reset the Gateway. See if LED2 turns Red. Plug in Ethernet cable to Gateway board. -
Page 22: Remove Gateway
CENTAURI-200 User Guide 4.6 Remove Gateway To remove Gateway from registered gateway list, follow below steps. The gateway must be powered on and connected to the cloud. Confirm LED2 must be solid green. GW should be shown Green on mobile application as well. Open Mobile application and select the Gateway to be removed. -
Page 23: End Device Setup And Control
CENTAURI-200 User Guide ND DEVICE SETUP AND CONTROL 5.1 Z-Wave or Zigbee modules The gateway will have either of one module installed on MikroBus if it is configured for Z-Wave or Zigbee. Figure 5- 1 Mikrobus based Z-Wave 700 module Figure 5- 2 Mikrobus based Zigbee JN5179 module 5.2 Z-Wave/ ZigBee end Device commissioning 1. - Page 24 CENTAURI-200 User Guide Note: While commissioning end device, at a time only one Z-Wave device can be paired. Once the first Z-wave device is paired successfully, another device can be paired with CENTAURI-200. Volansys-Confidential Page 24 of 31 VT-ENG-TMP-UG | Rev 1.1 | 31-Jul-19...
- Page 25 CENTAURI-200 User Guide Figure 5- 5 Waiting for end-device pairing Figure 5- 3 End device listing screen Figure 5- 4 Commissioned Gateway with no end-device paired Volansys-Confidential Page 25 of 31 VT-ENG-TMP-UG | Rev 1.1 | 31-Jul-19...
-
Page 26: End Device Properties
CENTAURI-200 User Guide Figure 5- 6 Successful end-device listing 5.3 End Device Properties 1. You can rename the end device from device property screen by “Device information” from listed devices. Figure 5- 7 End device information Volansys-Confidential Page 26 of 31 VT-ENG-TMP-UG | Rev 1.1 | 31-Jul-19... -
Page 27: Z-Wave / Zigbee End Device Controlling And Monitoring
CENTAURI-200 User Guide 5.4 Z-Wave / ZigBee end Device controlling and monitoring. 5.4.1 Z-Wave / ZigBee bulb control 1. Select gateway in mobile application and select desired bulb to control the brightness. See below. Figure 5- 8 Zigbee / Z-wave bulb control from mobile application Volansys-Confidential Page 27 of 31 VT-ENG-TMP-UG | Rev 1.1 | 31-Jul-19... -
Page 28: Z-Wave / Zigbee Device Monitoring
CENTAURI-200 User Guide 5.4.2 Z-Wave / ZigBee device monitoring 1. Select gateway in mobile and select desired monitoring device. See below. Figure 5- 9 ZigBee / Z-wave door sensor monitoring from mobile application Volansys-Confidential Page 28 of 31 VT-ENG-TMP-UG | Rev 1.1 | 31-Jul-19... -
Page 29: Remove Z-Wave End Device
CENTAURI-200 User Guide Figure 5- 10 Z-wave Multi sensor monitoring from mobile application 5.5 Remove Z-Wave End Device 1. Select desired Gateway and choose “Remove Z-Wave device” from menu 2. Gateway will open end device remove window. Now follow instruction given in user manual of specific end device to unpair it from Gateway. -
Page 30: Figure 5- 11 Z
CENTAURI-200 User Guide Figure 5- 11 Z-wave remove end-device from mobile application 5.6 Remove ZigBee End Device 1. Long press on any added device from “Devices” screen to be removed. 2. IoTify will open end device remove window. Now follow instruction given in user manual of specific end device to unpair it from HomeBridge. -
Page 31: Figure 5- 12 Zigb
CENTAURI-200 User Guide Figure 5- 12 ZigBee remove end-device from mobile application Volansys-Confidential Page 31 of 31 VT-ENG-TMP-UG | Rev 1.1 | 31-Jul-19...
Need help?
Do you have a question about the VOLANSYS CENTAURI-200 and is the answer not in the manual?
Questions and answers