Table of Contents
Advertisement
Quick Links
Advertisement
Table of Contents

Subscribe to Our Youtube Channel
Summary of Contents for Screening Eagle Profometer PM8000 Pro
- Page 1 PM8000 Pro Rebar Diameter and Cover Meter User Manual...
- Page 2 Document Information Document Revision: Revision Date: Apr 12, 2023 Document State: Released Company: Proceq SA Ringstrasse 2 CH-8603 Schwerzenbach Switzerland Classification: Technical Manual Revision History Date Author, Comments Apr 12, 2023 HELG, PEGG - Initial document 17. April 2023 © Copyright 2023, PROCEQ SA...
-
Page 3: Table Of Contents
Content Introduction ........................6 Scope of this document ......................6 Product versions ........................6 Product applications ......................8 Scope of Delivery ......................9 Measurement Principle ....................10 Device Overview ......................11 Switching-on and getting started ..................11 Visual indicators ......................... 12 Keys ........................... 12 4.3.1 Spot measurement ....................... - Page 4 Legal Notice This document contains important information on the safety, use and maintenance of Proceq products. Read through this document carefully before the first use of the instrument. Observe the safety and warning notes in this documentation and on the product. This is a prerequisite for safe working and trouble-free operation.
- Page 5 Damages during carriage On receipt of the goods, check for any visible damages on the packaging. If it is undamaged you may sign the receipt of the goods. If you do suspect by visual inspection that damage has occurred, make a note of the visible damage on the delivery receipt and request the courier to countersign it.
-
Page 6: Introduction
Via low power Bluetooth the PM8000 sensor wirelessly connects to the iPad, which runs the pm app. Given mobile data connectivity (Wi-Fi or mobile network), the pm app automatically and safely stores all measurements on the Screening Eagle Workspace. 1.1 Scope of this document This document is the user manual for all products of the PM8000 Product family. - Page 7 Data Sharing URL exchange URL exchange Data Exporting HTML HTML JPG (Snapshot) JPG (Snapshot) Data Synchronization Screening Eagle Workspace, automatic Screening Eagle Workspace, automatic Screening Eagle Inspect Integration Screening Eagle Inspect Integration 17. April 2023 © Copyright 2023, PROCEQ SA...
-
Page 8: Product Applications
1.3 Product applications In general, two measurement types can be differentiated: Spot measurement (standalone) For brief quality control, rebar location or metal detection a spot measurement is performed. Spot measurements are done in standalone configuration and provide measurement values, such as concrete cover. For a sequence of spot measurements, the pm app can be used to collect elementary statistics and to attach additional information such as pictures, geolocation to the measurement series. -
Page 9: Scope Of Delivery
2 Scope of Delivery Please refer to the Quick start Guide provided in the standard delivery and available in download section of the product webpage: profometer-pm8000-QSG.pdf (screeningeagle.com) 17. April 2023 © Copyright 2023, PROCEQ SA... -
Page 10: Measurement Principle
3 Measurement Principle PM8000 uses electromagnetic pulse induction technology to detect rebars. Coils in the probe are periodically charged by current pulses and thus generate a magnetic field. On the surface of any electrically conductive material which is in the magnetic field eddy currents are induced. They produce a magnetic field in the opposite direction. -
Page 11: Device Overview
4 Device Overview 4.1 Switching-on and getting started Please refer to the Quick Start Guide (included in standard delivery) for first steps with your PM8000. The Quick Start Guide is also available in the download section of the product webpage : profometer-pm8000-QSG.pdf (screeningeagle.com) The main instructions for getting started are presented in Figure Figure 5... -
Page 12: Visual Indicators
4.2 Visual indicators The visual indicators show quickly and easily the proximity of a metallic object. The exact location where the sensor measures is indicated by the measurement center mark. The arrows right and left with LED indicate the rebar or metallic object proximity. Measurement Center (MC) Right Left Arrow... -
Page 13: Scan Measurement
4.3.2 Scan measurement When the sensor used connected with the pm App the key functions assignment is different. Figure 9: Key functions in connected operation For more information, please refer to the tutorial videos of pm app (Profometer app downloadable from iOS App store). 4.4 Measurement Screen for Spot measurement Figure 10: Overview Measurement Screen in stand-alone operation (*) Depending on the unit setting... -
Page 14: Tracking Indicator
4.5 Tracking Indicator It is possible to activate the tracking indicator allowing to visualize the rebar or metallic object. To activate the tracking indicator, the left side key must be short-pushed during the calibration as explained in Figure 11. The deactivation of the tracking indicator follows the same button press sequence. -
Page 15: Main Menu Items
4.6.1 Main Menu Items Several menu items are available for changing the settings, configurations and access to the device information. Figure 12: Menu item overview 4.6.2 Setting Reference Rebar Diameter With the correct rebar diameter setting, the precision of cover measurement and rebar diameter estimation increases significantly. -
Page 16: Set Operation Mode
4.6.3 Set Operation Mode In standalone operation, it is important to select the right mode before spot measurement. In this menu you can select on the three different modes: Locate: Rebar location, measurement reading, metal detection Spot Scan Auto: ... -
Page 17: Neighboring Rebar Correction
4.6.5 Neighboring rebar correction Cover and rebar diameter measurements are influenced by neighboring rebars. This can be compensated by using the Neighboring Rebar Correction (NRC). In this menu, you can activate the neighboring rebar correction by setting the known rebar spacing. -
Page 18: Audio
Figure 17: Menu - Measuring Range Setting 4.6.7 Audio The device can give an audible tone to assist in location or to give useful alarms. In this menu you can select/deselect the sound settings for the following alerts (Default: all off) : Rebar center detected ... -
Page 19: Memory
Given mobile data connectivity (Wifi or mobile network), the pm app automatically and safely stores all spot measurement series on the Screening Eagle Workspace by synchronizing with the iPad. 17. April 2023... - Page 20 Figure 21 : pm app – sensor connected to iPad Figure 22 : pm app – import spot data For more information on how to import spot measurement data into pm app software, please refer to the tutorial video named “Sensor Spot data” either in pm app or Youtube videos (https://youtube.com/playlist?list=PLxVorw5ptOuIZfVeUt60cYYWnNiMcagYu) 17.
-
Page 21: Device Info
4.6.10 Device Info The device info is useful in case of firmware update, warranty case or repair request. In this menu you can get all information about sensor serial number, firmware version and FCC ID. The device info is useful in case of firmware update, warranty case or repair request. Figure 23: Menu - Device Information When a firmware update is needed, a notification in pm app will be visible. -
Page 22: Pm8000 Measuring Range
4.7 PM8000 Measuring Range The pulse induction principle used by PM8000 has defined operating ranges and accuracies. The measuring range is dependent on the rebar diameter. The expected accuracy of the cover measurement is indicated in the graphic below. (Complies with BS1881 part 204, for a single rebar with sufficient spacing and known diameter). -
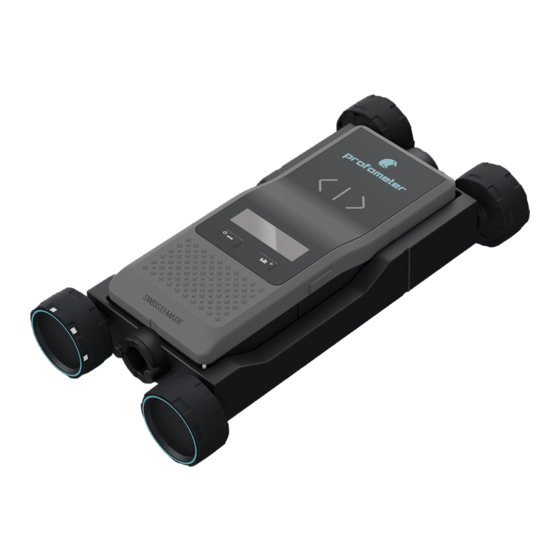
Page 23: Measuring With The Cart
When the rebar diameter is unknown, as explained in section 4.6.6, with rebar depth >80mm then the deep mode should be activated. In deep mode, 180mm is the maximum depth limit for detection. Nevertheless, if the rebar diameter is known, the Figure 25 provides more precision on the maximum depth possible of detection following the rebar diameter. -
Page 24: Factors Affecting The Measurement
Figure 27: Measuring range with cart 4.8 Factors Affecting the Measurement 4.8.1 Errors due to Neighboring Rebars All rebars within the sphere of influence 400mm / 16 inch diameter affect the reading. Any ferromagnetic material within the sphere may have an influence on the signal value (e.g. during a calibration). -
Page 25: Resolution
This effect can be reduced by the neighbouring rebar correction implemented in the PM8000 for spot measurement (see 4.6.5 and scan measurements in the pm app software). 4.8.2 Resolution There is a limit to the minimum spacing of rebars, which can be differentiated. This value is depending on the cover depth and rebar diameter. -
Page 26: Factors Affecting Diameter Determination
Figure 30: PM8000 Error of Cover with fixed 16mm rebar diameter setting 4.8.4 Factors Affecting Diameter Determination Rebar diameter estimation is a challenging task with several factors affecting the estimation. It is recommended to measure in several locations to find the best conditions where there is a clean mesh without the presence of overlapping rebars, metallic object or wires/wire connecting first and second rebar layers. -
Page 27: Orientation
Figure 31: Minimum space for rebar diameter measurement Closed welded reinforcement meshes or meshes with binding wires: This produces an additional signal which increases the displayed diameter value on PM8000 sensor or pm app software. Figure 32: Welded or wired rebars 4.8.5 Orientation The strongest signal results are obtained when the vertical axis is parallel to the rebar being measured and the measurement center is directly over the rebar. - Page 28 Midpoint line Figure 33: Sensor positioned at the midpoint line There are 3 methods to find the midpoint lines in both directions: Use PM8000 sensor in spot measurement (locate mode) for locating horizontal and vertical rebars. Then, manually draw the midpoint lines in both directions. The sensor can also locate midpoint lines as described in section 5.3.1.
-
Page 29: Operation And Handling
Carefully read this user manual. Watch all the tutorial videos provided in pm app software or see a demo by a qualified Screening Eagle representative. The test kit is a functional test only. It cannot be used for any quantitative test since the tolerance of the case is too high. -
Page 30: Measurement Process
A circular arrow rotates on the display for approximately 2.5 seconds while the calibration is carried out. Figure 35: Calibration procedure 5.3 Measurement process Generally, a measurement follows the procedure in Figure 36. Figure 36: Measurement process 5.3.1 Finding a Rebar, midpoint line or rebar orientation Place the PM8000 on the test surface and move it slowly in a chosen direction. - Page 31 There are three scenarios. Scenario A: Sweeping Perpendicular to the Rebars The Center Line is in parallel to the rebars This is the correct scenario to detect the rebars. Try it out on the rebar provided in the case, as explained in section 4.8.5. Approaching a Rebar Figure 37: Approaching a Rebar Tracking indicator moves in opposite direction to the PM8000.
- Page 32 Figure 38: Indication of a rebar Approaching a Midpoint Figure 39 : Approaching a midpoint 17. April 2023 © Copyright 2023, PROCEQ SA...
- Page 33 The tracking indicator moves in the same direction as the PM8000. The cover value keeps increasing until a maximum value. Continue sweeping until the tracking indicator is exactly at the midpoint Line. The midpoint is directly beneath the Measurement Center (MC). ...
- Page 34 Figure 41: Distinguishing between a Rebar and a Midpoint Scenario B: Sweeping Parallel to the Rebars The Center Line (9) is perpendicular to the rebars. Figure 42: Sweeping parallel Little or no movement of the tracking Indicator. In this case turn the PM8000 by 90° and continue sweeping as described under Scenario A.
-
Page 35: Map Out The Rebar Grid
Figure 43: Sweeping at an angle Now how to find the check the rebar orientation? Rotate the PM8000 sensor around the measurement center as described in Figure 44. When the PM8000 rotates toward the rebar orientation, the cover value will reduce until a minimum value corresponding to the real rebar cover and real orientation. -
Page 36: Measurement Files Visualization & Storage
Given mobile data connectivity (Wifi or mobile network), the pm app automatically and safely stores all measurements on the Screening Eagle Workspace by synchronizing with the iPad. Reporting is done from the Screening Eagle Workspace. -
Page 37: Line Scan Measurements
5.4.2 Line scan measurements Available only with Profometer PM8000 Pro license, the line scan view (cover & diameter values) & signal strength view are created with scan measurement with connected sensor. Figure 47: Line scan & signal strength view 5.4.3 Area scan measurements Available only with Profometer PM8000 Pro license, the area scan view (cover &... -
Page 38: Heat Maps
Figure 49: Advanced statistics view 5.4.5 Heat Maps Available only with Profometer PM8000 Pro license, heat maps can be created from area scan view. Augmented reality is possible by superimposing the heat map on the real structure. Figure 50: Heat map & Augmented reality 17. -
Page 39: Data Storage, Reading, Sharing & Reporting
5.4.6 Data storage, reading, sharing & reporting Screening Eagle Workspace is the online platform where all measurements are stored automatically as soon as there is data connectivity (Wifi or mobile network) allowing synchronization of the iPad. Reading, sharing & reporting (pdf printing of tab) is possible. The tabs provide all the cover &... -
Page 40: Application Hints
6 Application hints Understand the limits of the pulse induction principle especially when rebars are too deep into concrete or when rebars are too close each other. Make sure you apply the correct measuring range; Several graphs are provided in this user manual to help you refining the range setting. -
Page 41: Technical Specification
7 Technical Specification Measurement Principle Eddy current Cover Measurement Max. Depth Up to 185mm / 7.3 in Accuracy Depending on Depth +/- 1mm to 4 mm / 0.04in to 0.16 in Rebar Diameter Max. Depth Up to 63 mm / 2.5un Accuracy +/- rebar diameter Encoder accuracy... - Page 42 The English version of the content remains the official version. All translated content should bear an appropriate notice to this effect. For safety and liability information, please download at www.screeningeagle.com/safety-and-liability Subject to change. Copyright © 2023 by Proceq SA, Schwerzenbach. All rights reserved. 17.
- Page 43 Sao Paulo SP 05424-010 Brasil +41 43 355 38 00 T +55 11 3083 3889 UROPE ROCEQ IDDLE Screening Eagle UK Limited Sharjah Airport Bedford i-lab, International Free Zone Stannard Way Priory Business Park MK44 3RZ P.O.Box: 8365 Bedford London...
Need help?
Do you have a question about the Profometer PM8000 Pro and is the answer not in the manual?
Questions and answers