Table of Contents
Advertisement
Quick Links
Advertisement
Table of Contents

Related Manuals for Tobii Dynavox TD I Series

Summary of Contents for Tobii Dynavox TD I Series
- Page 1 TD I-Series User's Manual TD I–13 TD I–16...
- Page 2 The information contained in this document is proprietary to Tobii Dynavox. Any reproduction in part or whole without prior written authorization by Tobii Dynavox is prohibited.
-
Page 3: Table Of Contents
Table of Contents Introduction........................Explanation of Admonitions ....................Symbols and Markings......................Intended Use........................1.3.1 Intended User Profile ..................1.3.2 Additional Information ..................1.3.3 Portable Use ...................... 1.3.4 Mounted Use...................... Package Contents....................... Safety..........................Avoiding Hearing Damage ....................Temperature ........................Power Supply and Batteries....................Mounting .......................... - Page 4 5.1.1.3 Tobii Dynavox Configuration ............5.1.2 Password Information ..................Shutting Down the Device....................Using Eye Gaze ........................5.3.1 Positioning......................5.3.2 Tips for Outdoor Usage..................5.3.3 Track Box ......................5.3.4 Track Status ....................... 5.3.5 Eye Tracking Settings (Application) ..............5.3.5.1 The Calibration Tab.................
- Page 5 5.11.5.1.1 Enabling Edge Swipe ..........5.11.5.1.2 Disabling Edge Swipe ..........5.11.5.2 Lock Screen ..................5.11.5.2.1 Enabling Lock Screen ..........5.11.5.2.2 Disabling Lock Screen..........5.11.6 Product Key ....................... 5.11.7 System & Diagnostics ..................5.12 Reset the Device......................... Product Care ........................Temperature & Humidity ..................... 6.1.1 General Use - Operating Temperature ..............
- Page 6 Approved Accessories..................... Local Certification Partners.....................
-
Page 7: Introduction
Introduction Thank you for purchasing a TD I-Series device! To ensure the optimal performance of this product, please take the time to read this manual carefully. The TD I-Series device is available in two different sizes: the TD I–13 with a 13.3" screen and the TD I–16 with a 15.6" screen. - Page 8 Symbol or Markings Description Dispose of in accordance with your country's requirements for electronic waste. CE is the abbreviation of the European Communities and this mark tells customs officials in the European Union that the product complies with one or more of the EC Directives. The UKCA (UK Conformity Assessed) marking is a UK product marking that is used for goods being placed on the market in Great Britain (England, Wales and Scotland).
-
Page 9: Intended Use
Symbol or Markings Description Serial Number. Safety Class II equipment (reinforced insulation). This mark shows the pin out polarity on the AC/DC Power Adapter. Enclosure ingress protection code per IEC 60529. China Compulsory Certificate. The most recognized International Safety mark. This safety listing signifies that the product was tested to IEC60601–1. -
Page 10: Portable Use
It is recommended to keep the original packaging materials for the TD I-Series. If the device needs to be returned to Tobii Dynavox for warranty-related issues or repair, it is beneficial that the original packaging or equivalent is used for shipping. Most shipping carriers require at least 2 inches of packing material around the device. - Page 11 ● 1 TD Switcher software (pre-installed) ● 1 Tobii Dynavox Gaze Viewer software (pre-installed) ● 1 Tobii Dynavox Accessible Literacy Learning (ALL) software (pre-installed) (Not available for all markets) ● 1 Tobii Dynavox Hardware Settings software (pre-installed) ● 1 Boardmaker 7 Student Center software (pre-installed) ●...
-
Page 12: Safety
TD I-Series device, there are a few safety warnings to bear in mind: No modification of this equipment is allowed Repairs to a Tobii Dynavox device must only be performed by Tobii Dynavox or a Tobii Dynavox authorized and approved repair center. -
Page 13: Avoiding Hearing Damage
Do not disassemble or harm the battery. Follow the environmental laws and regulations which apply in your area when disposing of batteries. The battery may only be replaced by the user with a TDG G1 battery pack sold by Tobii Dynavox. There is a risk of explosion if the battery is replaced with an incorrect type. -
Page 14: Mounting
Mounting The TD I-Series should be mounted according to manufacturer instructions of approved mounts. Tobii Dynavox or its agents are not liable for damage or injuries to a person or its property due to a TD I-Series falling from a mounted configuration. -
Page 15: Electricity
2.13 Third Party Tobii Dynavox assumes no responsibility for any consequence resulting from use of the TD I-Series in a manner inconsistent with its intended use, including any use of the TD I-Series with third-party software and/or hardware that changes the intended use. -
Page 16: Overview Of The Td I-13 And Td
Overview of the TD I–13 and TD I–16 Key Features The TD I-Series has several built-in features. Some of these come standard and some can be ordered as additional features. Standard features: 2 × Camera, 1 × microphone, 2 × speakers, 1 × IR ECU (Environmental Control Unit), 1 × Bluetooth®... -
Page 17: Ports, Sensors And Device Buttons
3.2.2 Ports, Sensors and Device Buttons Illustration 1: Front Position Description Position Description Status LED Adaptive Button 1 — Triangle (Configurable) Track Status (Default for touch) See 5.11.1 Adaptive Buttons, page 38. Light Sensor Adaptive Button 2 — Square (Configurable) Calibrate Eye Tracker (Default for touch) See 5.11.1 Adaptive Buttons, page 38. - Page 18 Illustration 2: Back Position Description Position Description Camera 8 MP Auto Focus (AF) Mounting Plate Power Button Speakers Partner Window Programmable IR Remote/ECU (transmitter and receiver) 3 Overview of the TD I–13 and TD I–16 TD I-Series I-13/I-16 User's Manual v.1.0 - en-US...
-
Page 19: Preinstalled Software
Illustration 3: Bottom, Left, and Right Side Position Description Position Description Power Connector Switch Port 1 USB 3.0 connectors (2) Switch Port 2 Head phone jack 3.5 mm Battery Cover Never force a connector into a port. If the connector and port do not join with reasonable ease, they probably do not match. -
Page 20: Batteries In The Device
Changing the Battery The battery may only be replaced by the user with a TDG G1 battery pack sold by Tobii Dynavox. There is a risk of explosion if the battery is replaced with an incorrect type. - Page 21 Push the new battery into the battery compartment. Align the two battery icons, one is located on the battery and one on the device, for the battery to be in the correct position. Place the battery cover back in place. Tighten the five (5) screws with a Phillips screwdriver.
-
Page 22: Using The Device
Immediately after booting up the TD I-Series, you will be taken through the Windows out-of-box experience (OOBE). It will require you to acknowledge both Microsoft and Tobii Dynavox End User License Agreements. This is also where you set up language and time-zone preferences. You will also be able to connect to a WIFI network. Simply follow the instructions on screen to progress to the next step. -
Page 23: Tobii Dynavox Configuration
Tobii Dynavox Configuration Once completing the above steps, a Tobii Dynavox setup guide will launch. The setup guide will ask you for a QR-code that defines what Tobii Dynavox software is to be installed. The QR-code is supplied on paper with your device, and the setup guide will let you use the built-in rear camera to scan it. -
Page 24: Positioning
5.3.1 Positioning X cm / inches Illustration 4: Positioning The TD I-Series is designed to work optimally when it is parallel to the user’s eyes at a distance of about 65 cm (25.6 inches), see Illustration 4: Positioning, page 24. X cm / inches Illustration 5: Positioning when Users Leaning Sideways or Those Lying Down This means that for those users leaning sideways or those lying down, the TD I-Series also needs to be tilted in order to keep the user’s eyes parallel to the screen and at the optimal distance, see Illustration 5: Positioning when Users Leaning... -
Page 25: Track Status
Select one of the following ways to access the Track Status: – Select the Track Status button, position in Illustration 1: Front, page 17, on the device. – Open Track Status from within your Tobii Dynavox Communication software Position the device. 5 Using the Device TD I-Series I-13/I-16 User's Manual v.1.0 - en-US... -
Page 26: Eye Tracking Settings (Application)
Select the Close button when finished. 5.3.5 Eye Tracking Settings (Application) 5.3.5.1 The Calibration Tab Calibration profile: Will show the name of the profile that is active. Manage profiles: Select this button to change to an already existing profile. For more information, see 5.3.5.1.1 Manage Profiles, page 26. -
Page 27: 5.3.5.1.2 Create New Profile
5.3.5.1.2 Create New Profile Position the user so that the two dots, representing the user’s eyes, are in the center of the box shown on screen. Select the Customize button the customize the calibration. For more information, see 5.3.5.1.5.1 Customize, page 29. Select the Create new profile button. -
Page 28: 5.3.5.1.4 Test Calibration
Select the calibration points to improve. Select the Improve Point(s) button to start the calibration for the selected calibration points. Repeat step 1–3, if necessary. 5.3.5.1.4 Test Calibration On the Test Calibration page the calibration can be tested, using predefined targets on the screen to see if the user needs to recalibrate the eye tracker. -
Page 29: 5.3.5.1.5 Calibration
5.3.5.1.5 Calibration 5.3.5.1.5.1 Customize Select the Customize button in the Calibration area to customize the calibration process. Calibration points: Select if 1, 2, 5, or 9 calibration points should be used. Calibration Area: For more information, see 5.3.5.1.5.1.1 Calibration Area, page 29. Step-through: Toggle the Step-through On/Off check box to On to activate the function where you use the “S”... - Page 30 Customizing the calibration area can be useful if you have discovered that the user cannot access certain areas of the screen using Eye Gaze. By sizing the calibration area to exclude the areas that the user cannot access it can improve the overall calibration.
-
Page 31: The Activation Tab
5.3.5.2 The Activation Tab 5.3.5.2.1 Gaze Settings In the Activation Tab, all the settings for how the user shall interact with Eye Gaze is set. Select if the user shall use the Gaze or Gaze & Switch to execute the commands and how the interaction shall behave. Activation method: ●... -
Page 32: The Feedback Tab
Duration Between Clicks: The Duration Between Clicks can be set to 8 different levels, just look at the desired position to change the setting. Changing the Duration Between Clicks will adjust how long the "dead time" that Eye Gaze software waits before allowing further switch input. -
Page 33: The General Tab
Illustration 8: Available Colors Feedback size: The feedback size of the chosen feedback type can be set to three (3) different values. ● Small ● Medium ● Large Feedback opacity (%): Change the opacity for the feedback between 10 - 100%. 5.3.5.4 The General Tab 5.3.5.4.1 Wake-on-Gaze®... -
Page 34: 5.3.5.4.2 Off-Screen Menu
5.3.5.4.2 Off-Screen Menu The Off-Screen Menu is a shortcut menu for the following actions: ● Pause — Pausing the eye tracking. ● Sleep — Putting the into sleep mode. ● TD Control — Starting the TD Control software. This shortcut can be toggle On/Off, see 5.3.5.4.3 Show TD Control Shortcut, page 34. 5.3.5.4.2.1 Enabling Off-Screen Menu To enable the Off-Screen Menu for the device:... -
Page 35: Setup Windows Hello
Follow the instructions in 5.4.1 Setup Windows Hello, page 35, to configure Windows Hello. 5.4.1 Setup Windows Hello Open the Windows Start menu. Select your Account. Select Change Account Settings. Select Sign-in options. To proceed, set up a PIN code. Select the Add button under PIN and follow the next steps. Make a note of the PIN code and keep it in a safe place. -
Page 36: Using The Partner Window
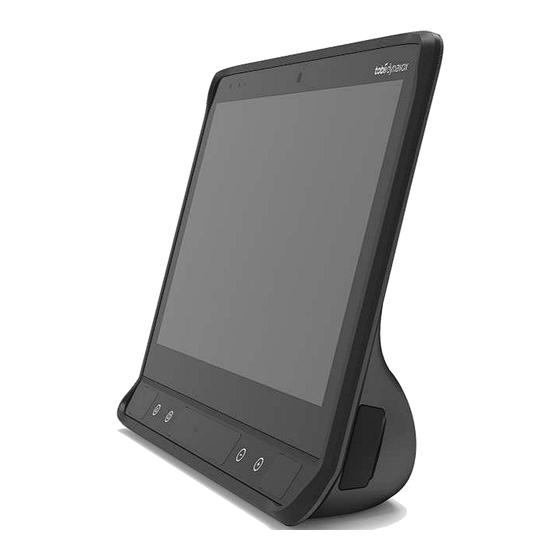
The Stand Adjustable Base may be used with the Tobii Dynavox logo facing forward, angling the device toward the user, or with the Tobii Dynavox logo toward the back side of the device, which will angle the screen away from the user. -
Page 37: Using The Cameras
5.11 Tobii Dynavox Hardware Settings With the Tobii Dynavox Hardware Settings it is possible to customize the some behavior of the TD I-Series. To access the Tobii Dynavox Hardware Settings follow this procedure: Select the Tobii Dynavox Hardware Settings app, , from the Desktop. -
Page 38: Adaptive Buttons
The touch behavior of the of the Adaptive buttons can be set and changed here. The Eye Gaze behaviors for the adaptive buttons are set in your Tobii Dynavox Communication software. See the User’s Manual for TD Snap in the section named “Page Set Settings - Adaptive Buttons”... -
Page 39: Disabling Volume Buttons
5.11.1.3.2 Disabling Volume Buttons To disable the Volume Buttons on the device: Open the Tobii Dynavox Hardware Settings app. Select Adaptive Buttons. Make sure the Volume Buttons is toggled Off to disable Volume Buttons. 5.11.2 Eye Tracker 5.11.2.1 Eye Tracking 5.11.2.1.1... -
Page 40: Sound
Do not enable jack detection if you are using Audible cues because Audible cue will not function properly with jack detection enabled. 5.11.3.1 Enabling Automatic Headphone Jack Detection To enable automatic headphone jack detection: Open the Tobii Dynavox Hardware Settings app. Select Sound. Set the Enable automatic headphone jack detection toggle to On. 5.11.3.2 Disabling automatic Headphone Jack Detection To disable automatic headphone jack detection: Open the Tobii Dynavox Hardware Settings app. -
Page 41: Enabling A Connected Switch
5.11.4.1 Enabling a Connected Switch To enable a connected Switch to power on the device: Open the Tobii Dynavox Hardware Settings app. Select Switches. For Switch 1 and/or Switch 2, set the Power on with Switch toggle to On. 5.11.4.2... -
Page 42: Disabling Edge Swipe
5.11.5.1.2 Disabling Edge Swipe To disable Edge swipe on the device: Open the Tobii Dynavox Hardware Settings app. Select Touch & Gesture. Make sure the Edge Swipe is toggled Off. 5.11.5.2 Lock Screen The Lock Screen is “disabled” by default. This option is important if a user would like to use “Kiosk Mode” on the device. -
Page 43: System & Diagnostics
TD I-Series Product Key(s) on the device are not valid for that feature. Some Tobii Dynavox software products may not appear in this list. To view the license status of a product, launch the software and look in the Settings>About section. - Page 44 Select one of these options: 5 Using the Device TD I-Series I-13/I-16 User's Manual v.1.0 - en-US...
- Page 45 The Configuration Manager app that runs at first login (prompting for the QR code) will restore any licensed Tobii Dynavox applications which are removed. ● Remove everything – Reinstalls Windows and removes all your personal files.
-
Page 46: Product Care
Product Care Temperature & Humidity 6.1.1 General Use - Operating Temperature The TD I-Series is best kept in dry conditions at room temperature. The recommended ranges for temperature and humidity for the device are as follows: ● Ambient temperature: 0°C to 35°C (32°F to 95°F) ●... -
Page 47: Transporting The Device
It is recommended to keep the original packaging materials for the TD I-Series. If the device needs to be returned to Tobii Dynavox for warranty-related issues or repair, it is beneficial that the original packaging or equivalent is used for shipping. Most shipping carriers require at least 2 inches of packing material around the device. -
Page 48: Support, Warranty, Training Resources And Trouble-Shooting
It is recommended to keep the original packaging materials for the TD I-Series. If the device needs to be returned to Tobii Dynavox for warranty-related issues or repair, it is beneficial that the original packaging or equivalent is used for shipping. Most shipping carriers require at least 2 inches of packing material around the device. -
Page 49: A4.2 How Do I Carry Out A Power Reset On The Td I-Series
A4.2 How do I carry out a Power Reset on the TD I-Series? Hold down the power button of the device for 10 seconds. Doing so will power off the device regardless of what it was doing. To turn it back on, momentarily press the power button and the device will start up and turn on. If the device does not start up correctly, please contact Customer Support. -
Page 50: Compliance Information
(2) this device must accept any interference received, including interference that may cause undesired operation. Modifications not expressly approved by Tobii Dynavox could void the user’s authority to operate the equipment under FCC rules. -
Page 51: B3 Industry Canada Statement
Industry Canada Statement Caution (i) The device for operation in the band 5150-5250 MHz is only for indoor use to reduce the potential for harmful interference to co-channel mobile satellite systems; (ii) The maximum antenna gain permitted for devices in the bands 5250-5350 MHz and 5470-5725 MHz shall be such that the equipment still complies with the e.i.r.p. -
Page 52: B5 Directives And Standards
Directives and Standards The TD I-Series complies with the following directives or standards: ● Medical Device Regulation (EU) 2017/745 ● Medical Device Directive 93/42/EEC ● Low voltage Directive 2014/35/EU ● Electromagnetic Compatibility (EMC) Directive 2014/30/EU ● Radio Equipment Directive (RED) 2014/53/EU ●... -
Page 53: Computer Device States Of Operation And Led Status
Appendix C Computer Device States of Operation and LED Status Table 1: Computer Device States of Operation Advanced Configuration Description and Power Interface (ACPI) State S0 (Working) Normal operating state - Windows session is running. Display will dim and turn off after a time of idle. S3 (Sleep) The device is sleeping. - Page 54 Description Criteria Comment Color Status Battery charge is under Blink three (3) times If the battery charge is under critical level the critical level the device will not start. Please charge the device for at least 10 minutes before trying to start the device.
-
Page 55: Technical Specifications
Typical Average Battery Run Time ~6.5 h Battery Charge Time Maximum 5.4 h (0-100%) Deskstand Integrated Mounting Systems Supported Tobii Dynavox QR adapter plate for Daessy and REHAdapt Power Supply 65 W AC adapter Appendix D Technical Specifications TD I-Series I-13/I-16 User's Manual v.1.0 - en-US... -
Page 56: D2 Device Power Adapter
Type/Model TD I–13 TD I–16 IP class IP54 Pass for device only, with I/O covers in place. Adaptor mode is excluded. IP22 In adapter mode. Indoor with continuous communication and with Eye Gaze if applicable. ~24 hours with a Power optimized scenario. Device Power Adapter Item Specification... - Page 57 Technical Specifications Tobii IS5L Module Freedom of Head Movement ˜20 × 20cm (7.9 × 7.9 inches) @ 50 cm from screen (Width x Height) ˜35 × 35 cm (13.8 × 13.8 inches) between 65 – 80 cm from screen Positioning Distance (from screen) 45 —...
-
Page 58: Maximum Allowed Temperature
Appendix E Maximum Allowed Temperature Table 5: Maximum Allowed Temperature Allowable maximum temperature for the TD I-Series metal external surfaces which Maximum Temperature °C/ are likely to be touched °F Temperature threshold: 55/131 External surfaces temperature allowed External surfaces temperature allowed in an area unlikely to be touched, see position 1 in 60/140 Illustration 9: Temperature Threshold Area, page 58 for the position of these areas. - Page 59 Battery Pack TDG G1 12006939 Stand Adjustable Base I-13/I-16 12006959 For information about the latest approved Tobii Dynavox Accessories, please visit the www.tobiidynavox.com website or contact your local Tobii Dynavox reseller. Appendix F Approved Accessories TD I-Series I-13/I-16 User's Manual v.1.0 - en-US...
- Page 60 Appendix G Local Certification Partners The listed companies are the partners for our local certifications in their countries. Contact Information: Link Assistive Pty Ltd SOLUCIONES EN TECNOLOGÍA ADAPTADA MEXICO 43 Adelaide Tce S.A DE C.V Pasadena SA, 5042 Av. Rio Mixcoac 164 Col. Acacias Del Valle Deleg Australia Benito Juarez.
- Page 61 Copyright © Tobii Dynavox AB (Publ). Not all products and services offered in each local market. Specifications are subject to change without prior notice. All trademarks are the property of their respective owners. Support for Your Tobii Dynavox Device Get Help Online See the product-specific Support page for your Tobii Dynavox device.
Need help?
Do you have a question about the TD I Series and is the answer not in the manual?
Questions and answers