Advertisement
Quick Links
control them without a monitor, keyboard or mouse!
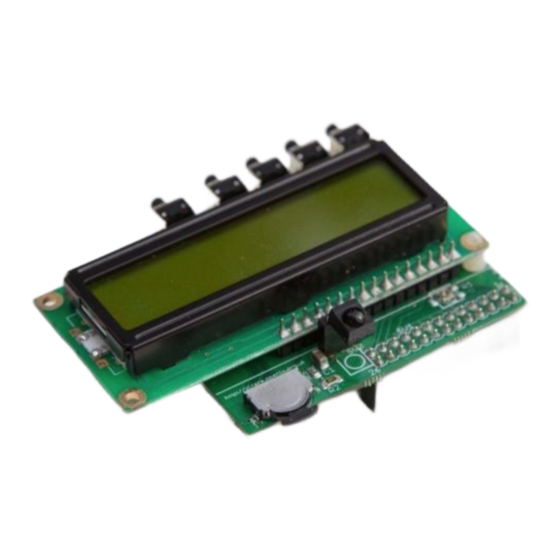
PiFace™ Control and Display 2
Get started with PiFace™ Control and Display in less than ten minutes!
For step by step help and ideas for projects visit: http://www.piface.org.uk/guides/
This guide applies to both the original PiFace™ Control and Display and
PiFace™ Control and Display 2.
PiFace™ Control and Display is a great way to use your Raspberry Pi® without the hassle
of cables and bulky peripherals. It's quick and simple to get started, with easy-to-use menu
builders and custom character creation.
The original PiFace™ Control and Display board fits the original Raspberry Pi® models A
and B. PiFace™ Control and Display 2 has been redesigned to fit the original models and
the Raspberry Pi® models A+, B+.
Product highlights
Typical applications:
● User interface for applications and projects
● Embed headless Raspberry Pi®
● Games
● Configuration menus
Features:
● 16 character by 2 line alphanumeric LCD display
For Raspberry Pi® - Getting started
Unleash your Raspberry Pi® projects from your desk and
Advertisement

Subscribe to Our Youtube Channel
Summary of Contents for PIFace Control and Display 2
- Page 1 The original PiFace™ Control and Display board fits the original Raspberry Pi® models A and B. PiFace™ Control and Display 2 has been redesigned to fit the original models and the Raspberry Pi® models A+, B+.
- Page 2 IR remote receiver. PiFace™ Control and Display is ideal for applications such as internet radio, streaming media, XBMC and many more. To use PiFace™ Control and Display, you will need to follow the simple steps contained in this guide. Fitting the board PiFace™...
- Page 3 Tour of hardware Top view Bottom view...
-
Page 4: Hardware Features
Hardware features LCD screen PiFace™ Control and Display has an onboard 16 by 2 character LCD screen for outputting messages, menus and custom characters. Each character is 5 pixels wide and 8 pixels high. The screen has an LED backlight that can be turned on and off from your code and will not affect the messages on the screen. - Page 5 Input buttons on PiFace™ Control and Display 2 Navigation rocker switch PiFace™ Control and Display has an onboard rocker switch and is ideal for menu control. The software treats the navigation switch as 3 separate inputs, 5, 6 and 7; one for each direction as show below.
- Page 6 SJ1 and SJ2 are solder jumpers that set the address of the board to enable multiple boards to be used together (using an appropriate connector e.g. PiFace™ Rack or PiFace™ Shim). The default is board address 0, as both jumpers are connected to GND via a small track.
- Page 7 Now reboot your Raspberry Pi® sudo reboot Enabling SPI port To use PiFace™ Control and Display you need to enable your Raspberry Pi®’s SPI port, do this by opening a terminal window and entering the following command: sudo raspi-config Use your keyboard’s arrow keys to select A dvanced Options to view the list of advanced configuration options.
- Page 8 PiFace™ Control and Display can be controlled easily using Python. First open a terminal window and start the Python interpreter by typing: python3 To use PiFace™ Control and Display from Python you must import the p ifacecad module: import pifacecad Before use, you must create a PiFace™ Control and Display object: cad = pifacecad.PiFaceCAD()
- Page 9 For details of more commands, visit: http://pifacecad.readthedocs.org/en/latest/example.html Setting up your IR remote with PiFace Control and Display You can use your TV (and other infrared) remotes to control your Raspberry Pi® using the IR receiver on PiFace™ Control and Display.
-
Page 10: Compliance Information
Your commands will appear in the console when you press buttons on your remote. Press Ctrl-c to exit this. Warnings ● PiFace™ Control and Display boards are not intended for use in critical systems. ● Do not expose to water, moisture or extremes of temperature (below -40°C or above 85°C). - Page 11 PiFace™ board should not be disposed of in household waste. Alternative arrangements may apply in other jurisdictions. ● PiFace™ Control and Display board is CE marked. It is a class B product. The EMC emission test was performed with a PiFace™ Control and Display on a Raspberry Pi®...
Need help?
Do you have a question about the Control and Display 2 and is the answer not in the manual?
Questions and answers