Table of Contents
Advertisement
Quick Links
Advertisement
Table of Contents

Summary of Contents for Biotech AB-40010
- Page 1 BIOTECH LIQUID FLOW METER User Manual AB-40010...
-
Page 2: Table Of Contents
CONTENT NOTICES WARRANTY IMPORTANT USER INFORMATION CE CERTIFYING RECYCLING WARNING! FEATURES 7.1. INTRODUCTION 7.2. CALIBRATION 7.3. A NEW TECHNICAL APPROACH 7.4. SELECTABLE INTEGRATION TIME 7.5. TIME FACTOR 7.6. NOTICE 7.7. SITE SELECTION 7.8. UNPACKING 7.9. PACKING LIST FLUID CONNECTIONS 8.1. LEFT SIDE 8.2. -
Page 3: Notices
All servicing will be handled by: Biotech AB Råövägen 300 439 92 Onsala Sweden Phone: +46 300 56 91 80 info@biotechfluidics.com Freight expenses for the safe transport of the product to Biotech AB and back, must be carried by the customer. -
Page 4: Important User Information
• Connected to other CE-marked Biotech AB instruments, or • Connected to other products recommended or described in this manual, and • Used in the same state as it was delivered from Biotech AB except for alterations described in this manual. -
Page 5: Recycling
By using the Liquid Flow Meter AB-40010 our tips/ warnings as well as our terms of delivery are accepted. 1. Only use in laboratory! The use for medical purposes, in the food- or beverage processing, plant breeding or something else is expressly required or permit- ted. -
Page 6: Features
FEATURES 7.1. INTRODUCTION The AB-40010 is specifically designed for continuous measurement of flow rate without interference in Fluidic systems. Compatible with all HPLC and GPC/SEC solvents, it is conveniently sized and powers itself from a USB connection. A modern PC based app allows continuous recording and storage of the measured flow rates. -
Page 7: A New Technical Approach
7.3. A NEW TECHNICAL APPROACH It may look like you have a stable flow…. Fig.1 But when you take a closer look… Fig. 2... -
Page 8: Selectable Integration Time
7.4. SELECTABLE INTEGRATION TIME - TIME FACTOR SETTINGS MADE VIA THE APP 78 msec (No Integration) • Real time measurement. Useful for tracking high frequency pulsation of the pump and detecting defective seal rings and/or check valves 300 msec • Equivalent to traditional volumetric flowmeters •... -
Page 9: Time Factor
7.5. TIME FACTOR — HOW YOU MEASURE DECIDES WHAT YOU GET Fig.3 9.8 sec integration time 310 m sec integration time Fig. 4 78 m sec integration time Fig.5... -
Page 10: Notice
7.6. NOTICE By using the Liquid Flow Meter AB-40010 our tips/ warnings as well as our terms of delivery are accepted. 1. Only use in laboratory! The use for medical purposes, in the food- or beverage processing, plant breeding or something else is expressly required or permit- ted. -
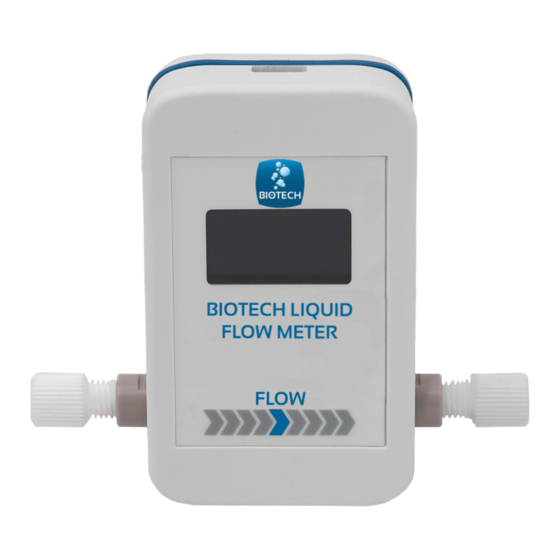
Page 11: Fluid Connections
FLUID CONNECTIONS First, remove the caps. Note! As the thru-hole of the flow meter is 1.8mm, be sure that tubing with OD 1/16” or smaller is not pushed into the flow meter cell. Nothing will be destroyed but the measurement will not work. 8.1. - Page 12 If everything is connected properly, the Flow Meter should look Figure 8 (descripted picture, color of Fittings may change). Fig. 8 Connection of the Flow Meter The Flat Bottom fittings may only be tightened finger tight!
-
Page 13: Operating
OPERATING 9.1. POWER-ON AND START The Flow Meter AB-40010 is easy to use with USB-powered plug. Connect the delivered USB cable to the flow meter and a computer. Upon powering up the instrument the display will shortly presents the Biotech AB logo. -
Page 14: Data Acquisition
9.3. DATA ACQUISITION 1. Start the app (see Chapter 10) or open a Terminal like HTERM and enter following settings: COM X -> find at device manager Port BaudRate 9600 Data Stop Parity None CTS Flow con- trol Newline at CR+LF 2. - Page 15 Press START to begin the data collection. Fig. 12 Data Collection Starting the data collection information about actual Minimum, Maximum and Average Flow Rate. By scrolling the mouse wheel, you can zoom in and out. Press STOP to discontinue the data collection. The data will be saved automatically (default, change in settings ->...
-
Page 16: Settings
11.2 SETTINGS In settings menu are the three registers: Device, Logfiles and About. Fig. 13 Settings DEVICE: Provides Information about the Serial Number, Firmware Version and Com port. Set the Integration Time in Milli Seconds (default 312 ms) Fig. 14 Integration time Settings... - Page 17 Set the solvent in use (default H2O) Fig. 15 Solvent Settings NOTE: All changes are stored in the device itself EDIT: Change the Solvent Calibration Factor (make sure to use the correct one) Fig. 16 Change THF Calibration Factor...
- Page 18 LOGFILES: Provides information about data storage location Fig. 17 Log File Path Save Log Files: Automatically save CSV logfile when measurement stops or at 100 000 data points (then a new sequence starts automatically). Change Log File Path: Change path for automatic log file storage. ABOUT: Provides information about the manufacturer.
-
Page 19: Export Graph
11.3 EXPORT GRAPH Save the measurement as a PNG file. Fig. 18 PNG Data 11.4 EXPORT DATA Export the measurement as CSV data. Measurements cannot be reloaded into the app. 12. TROUBLESHOOTING Error What to do The Flow Meter initial- Check the USB connection ization failed. -
Page 20: Contact
Phone: +1 612-703-5718 sales@biotechfluidics.com www.biotechfluidics.com © Copyright Biotech AB 2022 All rights reserved. No part of this publication may be reproduced, stored in a retrieval system or transmitted, in any form by any means, electronic, mechani- cal, magical, photocopying, recording, or otherwise as well as translated into any human, computer or alien language, without the prior written permission of the manufacturer.
Need help?
Do you have a question about the AB-40010 and is the answer not in the manual?
Questions and answers