Table of Contents
Advertisement
Quick Links
S1PBZ2G
IP66 Outdoor Power Box
Package Contents
Power Box 1pcs
Hex Screw M6x25 4pcs
Spring Washer 4pcs
Small Flat Washer 4pcs
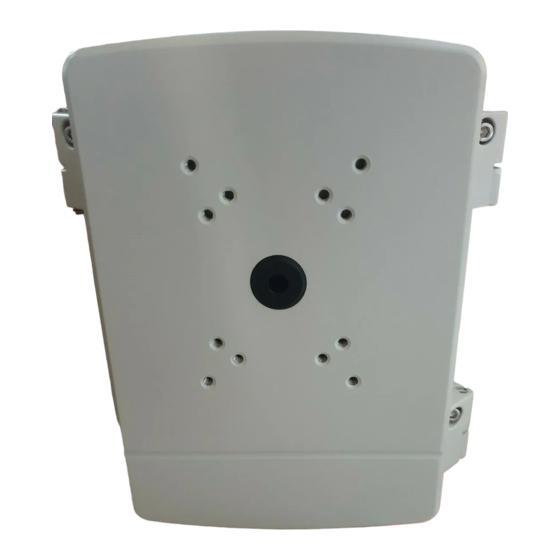
Power Box Overview
Dimensions (units: mm)
M20 P1.5 / G 1/2"
84.0
70.0
48.0
12-M6
248.0
Weight (power box only): 1.7Kg / 3.7lbs
www. irsecurity.com/pro
Rubber Plug 1pcs
Waterproof
Cap 3pcs
Mounting Bolt M8x70 4pcs
Allen Key 1pcs
Anchor 4pcs
Anchor Cap 4pcs
Large Flat Washer 4pcs
1
Mounting plate
2
Bottom cover
3
Top cover
4
Electrical safety cover
5
Rail
6
Loop buckle
7
Shaft
8
Conduit cap
9
M6 screw
10
Gasket
11
Gasket
12
Rubber plug
13
Waterproof lm
14
Retaining ring
160.0
84.0
Installation
Make sure to install the product in an area that can support the
weight of the power box plus cameras and accessories.
Make sure to seal the box and all cable entrances according to
the instructions in this document.
Check www. irsecurity.com/pro for the latest compatibility list.
1
Loosen M6 screws (x2) on the left side of the top panel and open the power
box. Loosen the M6 screws (x2) inside the power box and remove the
mounting plate.
M6 screws inside power box (x2)
2
Use the mounting plate to mark holes for the mounting bolts (x4) and any
cables you are running through the mounting surface. Use outer holes to
mount power box to wall.
NOTE: If installing power box on corner mount or pole mount, attach mounting
plate to the mount using the bolts supplied with the corner or pole mount. Skip
to step 5. Illustrations of complete installation shown below.
Drill holes for the mounting bolts (x4) and cables. Insert the anchors (x4)
3
and anchor caps (x4) into the holes as shown below. Run cables through
the mounting surface.
8- 10.0
S1PBZ2G_INSTALLATION_DIAGRAM_EN_R1
Bottom cover
Mounting plate
UP arrow on mounting plate should
be pointed up and away from the
mounting surface.
You must leave at least 30mm of
clearance from all sides of the
mounting plate to leave space to
install the power box.
Anchor and
anchor cap (x4)
Advertisement
Table of Contents

Subscribe to Our Youtube Channel
Summary of Contents for FLIR S1PBZ2G
- Page 1 Installation S1PBZ2G IP66 Outdoor Power Box Package Contents Make sure to install the product in an area that can support the weight of the power box plus cameras and accessories. Make sure to seal the box and all cable entrances according to the instructions in this document.
- Page 2 Run the required cabling for the camera through the rubber plug on the top Place the mounting plate over the holes. Insert the mounting bolts (x4) and cover of the power box. large at washers (x4) to secure the mounting plate to the mounting surface.
Need help?
Do you have a question about the S1PBZ2G and is the answer not in the manual?
Questions and answers